
6 Essential Core Exercises for Pregnant Women – Plus Which Ones to Steer Clear Of
Having a little bean on the way brings a flurry of questions: Can I eat bacon? What type of cheese is on the safe list? Should I even be thinking about ab workouts?
While it may feel counterintuitive to do core exercises when you’re pregnant, it’s actually very important to alleviate back pain, prepare yourself for labor, and speed up your postpartum recovery time.
“Your entire midsection is working so hard to support your growing baby,” says Kim Perry, CPT, a pre- and postnatal certified trainer based in Sarasota, Florida. “I recommend pregnant [people] integrate core work into their fitness routine and focus on the deep core muscles that will help improve your posture and mitigate some of those pesky pregnancy symptoms.”
For instance, the transverse abdominis is a major core muscle that wraps around your stomach and back. It acts like a corset by supporting your core and reducing stress on other various muscles in your abdominal region. It also helps to prevent diastasis recti, in which the left and right sides of your abdominal muscles can split during pregnancy, Perry adds.
Core stability exercises were more effective than usual care in relieving pain and boosting the quality of life for pregnant people with pain in their lower back and pelvic area in a January 2023 study published in the Journal of Manipulative and Physiological Therapeutics.
However, once you’re expecting, you might need to change the type of core exercises you do. It’s important to avoid certain types of core exercises, which include traditional go-to’s like crunches.
“Core exercises are incredibly important during pregnancy, but your focus should shift on how you approach your core work,” says Anna Kaiser, CPT, a pre- and postnatal certified trainer and CEO of Anna Kaiser Studios in New York City. “And depending on the person, you should avoid adding weight or intensity once you get pregnant. Continue working out at the same level you were before getting pregnant.”
Here are the six best core exercises for pregnancy, demonstrated by Perry—plus, three moves to avoid.
Safe core exercises for pregnancy 1. Offset squat
“This move is an anti-tilt challenge for the core,” Perry says.
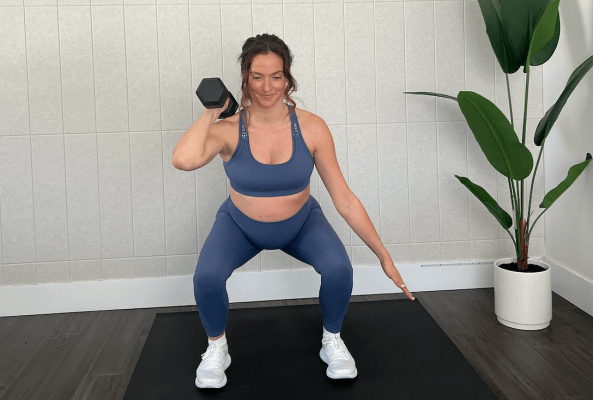 Photo: Kim Perry
- Stand tall with your feet hip-width apart, arms by your sides. Hold a dumbbell in your right hand (palm facing in toward your body).
- Lift the dumbbell up so that the head of the dumbbell rests on your right shoulder, palm facing in.
- Engage your core by drawing your belly button in, as if you’re giving the baby a hug.
- Bend your knees and push your hips back to lower toward the floor. Pretend as though you were going to sit on a chair.
- Lower down as far as comfortable, or until your thighs are parallel with the floor.
- Pause for a moment at the bottom of your squat. Resist the tilt from the extra weight on your shoulder.
- Press through your heels to return to standing.
- Complete 12 to 15 reps on each side.
2. Belly breathing
Also known as diaphragmatic breathing, this is a foundational move for core engagement during and after pregnancy. It may seem “simple” for a core workout, but it actually plays a very important role.
“The movement of your pelvic floor mimics the movement of your diaphragm,” Kaiser says. “If you are breathing into your chest and using your secondary breathing muscles, your neck and chest muscles will get tighter and your pelvic floor will not condition itself as it would if you were focused on deep belly, diaphragmatic breathing.”
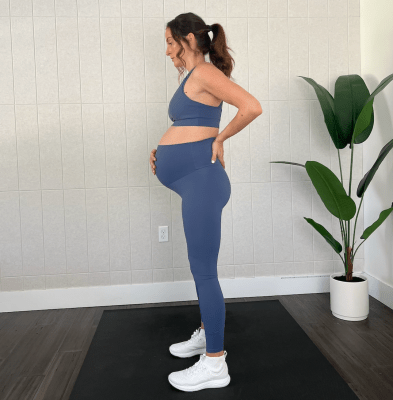 Photo: Kim Perry
- Stand tall with your feet hip-width apart.
- Place your right hand on your belly and your left hand on your hip or lower back.
- Take a deep breath in, filling your belly with air.
- As you exhale, think about first lifting your pelvic floor, then wrap your abdominals like you are gently tightening a corset from hip to hip.
- Complete 5 to 10 reps.
3. Bird dog
The bird dog “requires a lot of focus and stability,” Perry says. “If you notice yourself wobbling, you can bring your toes to the mat for more support.”
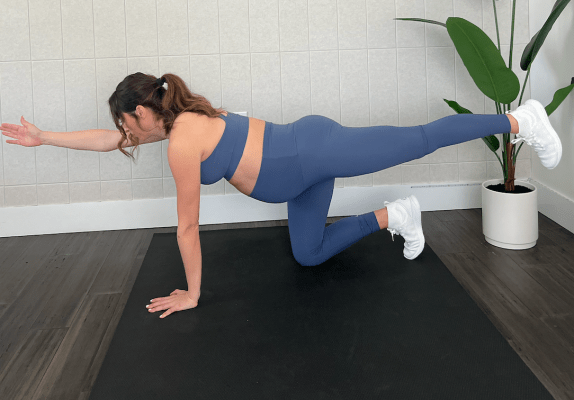 Photo: Kim Perry
- Start in a tabletop position on your hands and knees. Your hands should be directly in line with your shoulders and your knees should be directly in line with your hips.
- Inhale, then exhale to engage your core as you lift your right arm straight out in front of you.
- At the same time, reach your left leg straight behind you, fully extending your knee.
- Pause for a moment, then return to starting position.
- Repeat on opposite side, lifting your left arm up and your right leg back.
- Complete 12 to 15 reps on each side.
4. Side plank abduction
“I love this move for the core, hips, and booty,” Perry says.
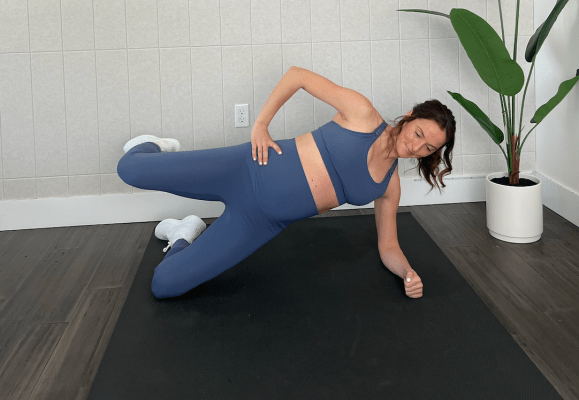 Photo: Kim Perry
- Lie on your left side.
- Prop yourself up on your left forearm with your elbow in line with your shoulder.
- Bend your knees and keep them stacked on top of each other.
- Inhale and relax.
- On the exhale, engage your core and lift your hips up into a plank, raising your top knee.
- Squeeze your glute. Hold for one count and slowly lower down to starting position.
- Complete 12 to 15 reps on each side.
5. Bear hold  Photo: Kim Perry
- Start in a tabletop position on your hands and knees. Your hands should be directly in line with your shoulders and your knees should be directly in line with your hips.
- Inhale, then exhale and engage your core as you press your palms down and lift your knees off the mat.
- Hover your knees below your hips for 3 to 5 seconds, then slowly lower back down.
- Complete 10 to 12 reps.
Tip: Focus on keeping the hips level the entire time by placing a block on your hips (or simply imagine one there).
6. Offset march
“This is another anti-tilt exercise that focuses on balance and stability,” Perry says.
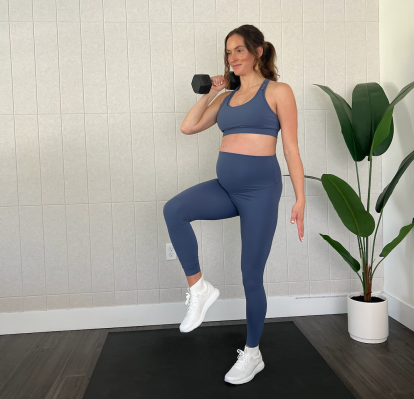 Photo: Kim Perry
- Stand tall with your feet hip-width apart, arms by your sides. Hold a dumbbell in your right hand (palm facing in toward your body).
- Lift the dumbbell up so that the head of the dumbbell rests on your right shoulder, palm facing in.
- Engage your core and shift your weight to your left leg.
- Raise your right knee as if you were marching.
- Slowly lower your right leg and repeat on the other side.
- Complete 12 to 15 reps on each side.
Core exercises to avoid during pregnancy 1. Standard crunch
While they may be a traditional ab workout, crunches are an exercise to avoid when you’re expecting.
“Moves like crunches put pressure on the linea alba, the connective tissue that holds your abs together,” Perry says. “This area is already under stress from supporting a baby and extra stress can increase the chance of tearing the tissue and developing diastasis recti.”
2. Plank
As your pregnancy progresses, you’ll also want to phase out planks, which can put too much pressure on your core.
“If you have been incorporating planks and bodyweight exercises into your programs since before pregnancy, you should stop planking once you get to 22 to 25 weeks of pregnancy,” Kaiser says.
3. Bicycle crunch
“Avoid any quick twisting movements in your torso and extended exercises lying on your back, like bicycles and leg switches,” Kaiser says.
Twisting your torso can crowd the baby’s space, per UNC Health. And spending too much time on your back (including when you sleep) when you’re over 20 weeks pregnant can constrict blood flow to you and the baby, according to the Cleveland Clinic.
Is the Yosuda Exercise Bike (2024) the Ultimate Budget-Friendly Option for Fitness Enthusiasts?
As the maker of some of the best exercise bikes for those on a budget, Yosuda is on a mission to make home fitness equipment accessible to more people. We selected four Yosuda exercise bikes to bring you a taste of what it’s like to pound the pedals on these affordable machines. The BarBend team of certified personal trainers, CrossFit coaches, and gym owners has spent years using over 20 exercise bikes, so when we hop in the saddle, we know what to look for.
We took the Yosuda YB001R Magnetic Exercise Bike for multiple spins and rated this model on a scale from 1 (yikes) to 5 (hooray) across 13 categories, like durability, adjustability, and portability. Whether you need a quiet ride, are short on floor space, or just want to reap the health benefits of indoor cycling — like lower blood pressure and increased aerobic capacity — take a more in-depth look to see if one of these options matches your budget, your space, and your fitness goals. (1)
About Our Expert:
This article has been reviewed by Amanda Capritto, CPT, CF-L1, CES, CSNC a certified personal trainer, certified nutrition coach, and CrossFit Level-1 Trainer. She reviewed the research we cite to help ensure we’re providing helpful, accurate descriptions and recommendations.
Why Should I Buy a Yosuda Exercise Bike?
If you’re tight on space in your home or in your wallet — or both — one of Yosuda’s exercise bikes might be the cardio machine you’ve been looking for. The company is known for packing high quality features — think heavy-duty steel frames and flywheels — into compact footprints, but the brand also boasts a variety of different bike forms. While the average exercise bike can land anywhere from $600 to over $2,000, these four Yosuda bikes all come in between $139.99 and $499.99.
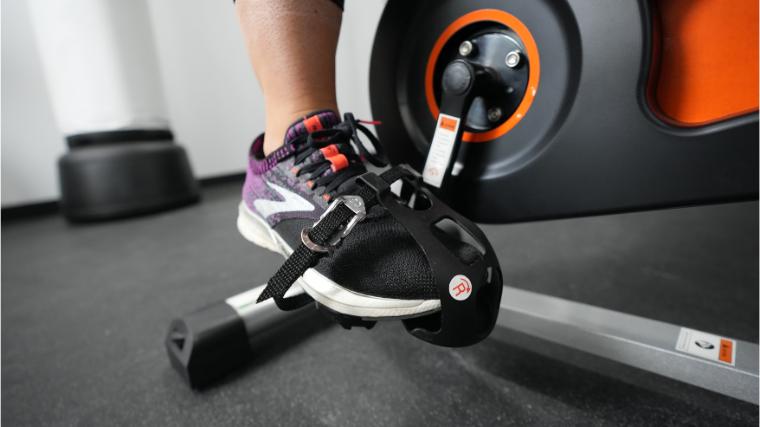
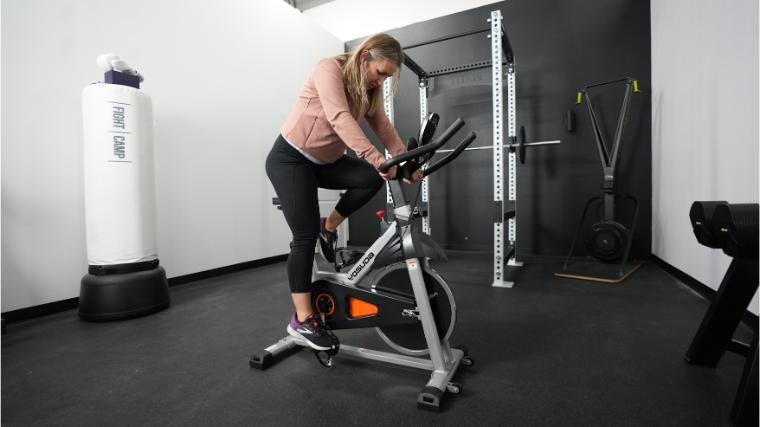 Our tester riding the Yosuda YB001R.
Even beyond their bikes, Yosuda has made an impression in the home fitness world with quality, affordable equipment like rowing machines and treadmills. For all their products, they offer a 30-Day Money Back Guarantee, Hassle-Free returns, fast shipping from local warehouses, and financing options.
We chose four of our favorite bikes from Yosuda and laid out all their details, along with our experience in the saddle, to help you find the model you need to hit your fitness goals. Your choice will come down to three main factors — how much space you can spare, how much cash you can spend, and how many housemates you’re trying not to disturb.
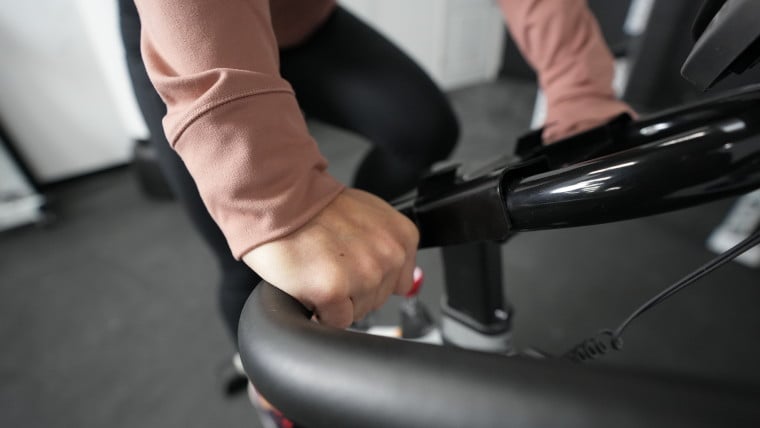 Close look at the handlebars while our BarBend Tester rides the Yosuda YB001R.
The quiet magnetic resistance onboard the YB001R or Pro models will be ideal for those with sleeping babies, cats, or roommates. The friction resistance of the YB001 and YB007A, meanwhile, is a bit noisier, but can save you a few bucks. Among all four options, you’ll see little difference in the floor space they occupy — 6.11 to 6.71 square feet — and a big difference in weight capacity — 270 to 350 pounds.
Over many rides on the YB001R Magnetic Exercise Bike, our team — including our tallest member at 6 foot 3 inches — has become familiar with the build, technology, and overall feel of these similar, but distinct exercise bikes from Yosuda. Check out what the BarBend team of weirdos who love cardio had to say about these four Yosuda exercise bikes.
Main Takeaways
- Yosuda YB001R Magnetic Exercise Bike: With a 35-pound flywheel and magnetic resistance system, if you’re looking for a compact, quiet bike and don’t need a huge weight capacity, this model is for you.
- Yosuda YB001 Indoor Stationary Cycling Bike: At just $233, this is the most affordable option of the four and with a 69-pound overall weight, most users can tilt and roll it from room to room.
- Yosuda Pro Magnetic Exercise Bike: As the most high-end option of the four, it has a weight capacity of 350 pounds, while its extendable tablet holder allows you to stream a workout or show while you ride.
- Yosuda YB007A Indoor Stationary Cycling Bike: As the big brother of the YB001, this model has the largest footprint — 6.71 square feet — but is the most adjustable.
Yosuda YB001R Magnetic Exercise Bike
Yosuda YB001R Exercise Bike

Yosuda YB001R Exercise Bike
Smooth and quiet cycling with a 35 lb flywheel and attached transport wheels so you can cruise where you want to. Simple LCD screen with a lip for an iPad, tablet, or phone.
Shop Yosuda
- Price: $279
- Dimensions: 45” H x 40” L x 22” W
- Weight: 68lbs
- Resistance: Magnetic
- Weight Capacity: 270lbs
- Flywheel Weight: 35lbs
Pros
- With a footprint of just 6.11 square feet and built-in transport wheels, its compact design is ideal for athletes limited on space.
- The 35-pound flywheel uses magnetic resistance to create a quiet ride for users up to 270 pounds.
- Compared to the average price range for upright exercise bikes — $600 to $2,000 — its $279 price point offers tremendous value.
Cons
- The magnetic resistance levels are not listed, so you’ll need to adjust the intensity based on feel.
- During testing, we noted some durability concerns, like small tears in the seat cushion after just a few rides.
When we first got our Yosuda YB001R Magnetic Resistance Exercise Bike, our tester had a one word reaction, “Whew.” After pulling it out of the box, all we had to do was attach the wheels and monitor and it was ready to ride. Delivery and set up was one of three categories, along with its footprint and portability, to earn at least a rating of 4 out of 5 from our tester, a certified personal trainer and nutrition coach.
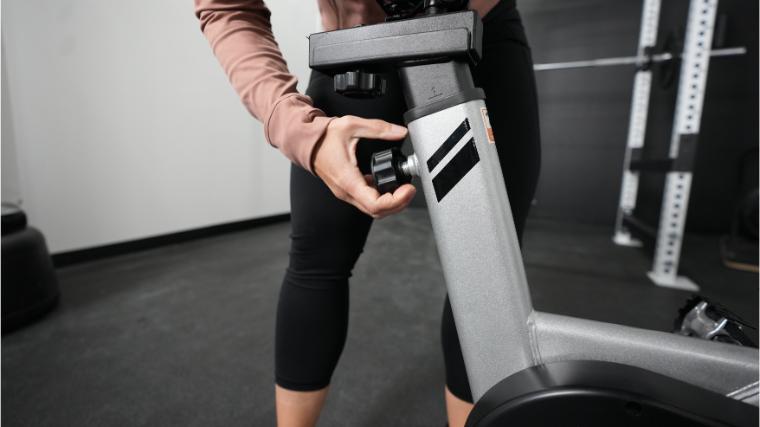 Our tester adjusting the seat stack on the Yosuda YB001R.
Anyone worried about disturbing the neighbors should appreciate the heavy-duty 35-pound flywheel that uses magnetic resistance to generate a quiet ride. “I was surprised at just how quiet it was,” our tester said. At 6 foot 3 inches, they pointed out how easy it was to adjust the seat and handlebars to find a comfortable fit, scoring its adjustability and ergonomics a 3.5 out of 5.
While it lacks Bluetooth connectivity or a screen — the tech capabilities on the YB001R earned a 2 out of 5 — this bike features an LCD display that shows your speed, distance and odometer. You can also slide your own device in the tablet holder to stream your own virtual workouts or shows.
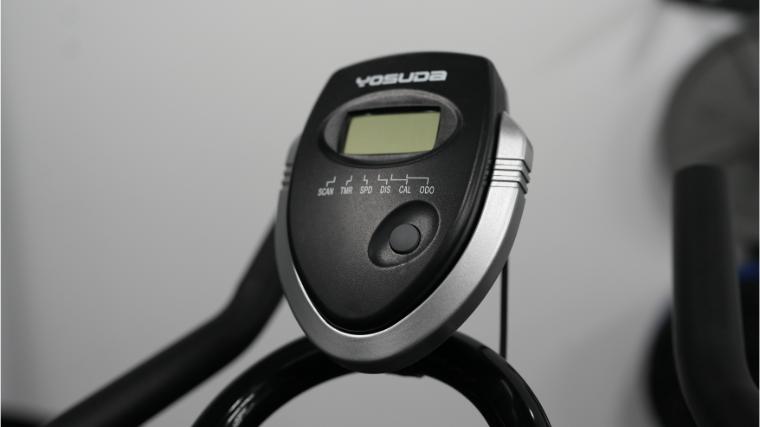 The LCD screen onboard the Yosuda YB001R.
We did notice a few durability concerns, most notably on the seat. “After two of three rides, I could already see some small tears on the seat — not a good sign,” said our tester. Although, for $279, our tester still rated its value 3.5 out of 5. “It may not be someone’s forever bike, but for a quick fix or beginner, this is a great price.”
Yosuda YB001 Indoor Stationary Cycling Bike
Yosuda YB001 Indoor Stationary Cycling Bike

Yosuda YB001 Indoor Stationary Cycling Bike
At just $233, the Yosuda YB001 Indoor Stationary Cycling Bike is the most affordable upright bike from Yosuda and with a 69-pound overall weight, most users can tilt and roll it from room to room.
Shop Yosuda
- Price: $233
- Dimensions: 45” H x 40” L x 22” W
- Weight: 68lbs
- Resistance: Friction
- Weight Capacity: 270lbs
- Flywheel Weight: 35lbs
Pros
- At just $233, it is the most affordable upright bike from Yosuda.
- Its built-in transport wheels and 68-pound overall weight can make it easy for most users to move.
- With a tablet holder beneath the LCD monitor, you can stream workouts or entertainment, while keeping an eye on your metrics.
Cons
- It may best for hard floors, as it can be a bit wobbly on carpet.
- Multiple customers reported that the seat was uncomfortable and needed to be switched out.
The Yosuda YB001 is the most affordable of the four bikes in our review, but with a footprint of 6.11 square feet and 35-pound flywheel, we think anyone looking who is short on space and looking for a challenging ride may have found their match. Our tester — a certified personal trainer and nutrition coach — rated the identical footprint of the YB001R a 4 out of 5. “I thought it was so easy to move. It felt super compact compared to other bikes I’ve tried,” they said.
Given its 68-pound overall weight and dual transport wheels, most people might be able to even tilt and roll it from room to room by themselves. After checking in on customer reviews, however, you may want the room that it ends up in to have a hard floor as opposed to carpet. Several users noted it was more wobbly on a soft surface like carpet.
While the YB001 won’t be mistaken for one of the best exercise bikes with screens, the tablet holder lets you stream workouts or catch up on Love is Blind — how could you, Jeramey?! — while getting your heart rate up. The seat height and handlebars are adjustable to help you find your fit, while the seat can also be switched out if you need a bit more padding.
As the less-expensive version of the YB007A, this model has a lower weight capacity (270 pounds), but occupies nearly one square foot less floor space, as well as less space in your budget. At $233, it’s the least expensive among these four by $46, while still allowing you to track your metrics and reap some of the benefits of cardio, like lower blood pressure. (benefits of cardio) At roughly $370 less than the bottom of the average range for upright bikes — $600 to $2,000 — it brings a lot of value.
Yosuda Pro Magnetic Exercise Bike
Yosuda Pro Magnetic Exercise Bike

Yosuda Pro Magnetic Exercise Bike
The Yosuda Pro Magnetic Exercise Bike has a weight capacity of 350 pounds, while its extendable tablet holder allows you to stream a workout or show while you ride.
Shop Yosuda
- Price: $399
- Dimensions: 42 H x 41 L x 22 W
- Weight: 86lbs
- Resistance: Magnetic
- Weight Capacity: 350lbs
- Flywheel Weight: 40lbs
Pros
- Using magnetic resistance, the 40-pound flywheel helps create a quiet ride.
- Its 350-pound weight capacity is the highest among all Yosuda exercise bikes.
- The tablet holder can pivot and extend 11 inches.
Cons
- At 86 pounds, it may be a bit too heavy for some to move on their own.
- The LCD monitor is not backlit, which can make the stats difficult to read in low lighting.
Among these four, the Yosuda Pro Magnetic has the highest weight capacity (350 pounds), while using a 40-pound flywheel to create a quieter ride than models with a friction resistance system. Anyone concerned about disturbing neighbors, or sleeping babies may want to give this model a closer look.
The LCD monitor can keep track of your metrics, like speed and distance, but the extendable tablet holder allows you to slide in your own device to stream whatever you like. As that digital monitor is not backlit, it could be a bit difficult to see in low lighting. If you prefer to track your stats or go a virtual ride on one the best fitness apps like Peloton or iFIT, though, you can pivot and stretch the iPad holder up to 11 inches to find the best placement for your intense workout.
Compared to the YB001R model that we tried out, the 18-pound weight difference may preclude some people from moving it on their own, even with the built-in transport wheels. The Pro Magnetic model is the most expensive option among the four in our review by $100, but anyone needing a higher weight capacity and quiet ride, might find that price difference to be worth it.
Yosuda YB007A Indoor Stationary Cycling Bike
Yosuda YB007A Indoor Stationary Cycling Bike

Yosuda YB007A Indoor Stationary Cycling Bike
As the big brother of the YB001, the Yosuda YB007A Indoor Stationary Cycling Bike has the largest footprint — 6.71 square feet — of the Yosuda upright bikes, but is the most adjustable.
Shop Yosuda
- Price: $299
- Dimensions: 45.3 H x 44.5 L x 21.7 W
- Weight: 86lbs
- Resistance: Friction
- Weight Capacity: 330lbs
- Flywheel Weight: 40lbs
Pros
- Its 330-pound weight capacity is 60 pounds more than the similar YB001 model.
- While it uses friction instead of magnetic resistance, it comes in at $100 less than the Pro Magnetic.
- The seat can be adjusted up, down, forward and back, while the handlebars adjust up and down.
Cons
- Its friction resistance system may be a bit noisier than a magnetic system.
- With a footprint of 6.71 square feet, the YB007A takes up the most room of these four bikes.
Compared to the other model in our review with friction resistance (the YB001), the YB007A’s weight capacity is 60 pounds higher, making it more accessible for more users. With a heavier flywheel, and belt-drive system, you can also expect a smooth ride as you build momentum and adjust the resistance.
Speaking of adjustments, the four-way adjustable seat and vertically-adjustable handlebars may also allow more athletes to find a comfortable position on this bike. No matter what position the seat is in, the resistance adjustment knob on the frame will be within reach, just above the water bottle holder. Instead of defined levels, you’ll need to get a feel for how much to turn it to hit your desired resistance.
[Related: Best Exercise Bikes Under $500]
The friction resistance system on the YB007A may be a bit noisier than the magnetic systems on the YB001R and Pro Magnetic models. But unless you are concerned about annoying your neighbors or waking up your cat, popping in your AirPods and streaming a workout or show from your own device is always an option.
With the tablet bracket, popping in your own device to stream a virtual ride, Nelflix, or YouTube TV can help you focus on your sweat, or distract you from it. The LCD monitor is also conveniently placed above the bracket so you can keep an eye on your speed, distance, or calories burned.
What to Consider Before Buying a Yosuda Exercise Bike
While these four Yosuda exercise bikes are similar, there are a few key differences like the amount of floor space they require, the kind of resistance system they use, and, of course, how much they cost. Check out a few things to consider before deciding which one is for you.
Available Space
Two of these bikes — the YB001R and YB001— take up virtually the same amount of floor space: 6.11 square feet. If you can visualize these bikes in your living room, this is about half the size of the average loveseat. (2)
[Related: The 9 Best Portable Exercise Bikes]
Anyone super tight on space may want to decide between these two, but if you can spare just a bit more real estate, the Pro Magnetic (6.26 square feet and the YB007A (6.71 square feet) feature higher weight capacities and heavier flywheels. If the space you have available is your deciding factor, grab your measuring tape and consult the dimensions we included for each bike.
Price
As with any large purchase, establishing your budget should probably be the first step in your search for a Yosuda exercise bike. These options range from $233 to $399, but all of them are below even the low end of the average range among many upright bikes out there — $600 to $2,000. These bikes are some of the best budget home gym equipment that we have tested, so if you are looking for an affordable exercise bike, one of these four could be your match made in exercise bike heaven.
Type of Resistance
Two of these Yosuda exercise bikes use a friction resistance system, while two use a magnetic system. Friction systems use a brake pad to create — you guessed it — friction between it and the flywheel, so as the resistance level increases (and more friction is created) it’s harder to pedal.

Unlocking the Secrets: How NFL Athletes Enhance Power and Speed through the Force-Velocity Relationship
While many NFL athletes lift at their heaviest during the off-season, due to the fact that they don’t have a packed schedule of football games to maintain, experts like Natalie Kollars, a strength and conditioning coach and founder of Fortis, know that proper strength and conditioning also requires explosiveness and speed. To that end, many athletes also focus on moderate loads, and for good reason.
“Focus on moderate load to maximize power and rate of force development,” explains Kollars in a recent Instagram post in which she worked with Seattle Seahawks running back Deejay Dallas.” This performance specialist, with an MSc in Exercise Physiology and Strength & Conditioning aims to “drive intent” among her football playing clients, rather than simply overload them with barbells. It’s all about the force-velocity relationship.
View this post on InstagramA post shared by Natalie Kollars (@nataliekollars)
The Force-Velocity Relationship
The relationship between the amount of force that a muscle can produce is intrinsically linked to the speed of the muscle contraction. So, as the load increases, the speed of movement will decrease. Training with moderate loads makes sense because football requires athletes to exhibit explosive power in various movements such as sprinting, jumping, and changing direction rapidly. Training with moderate loads can closely mimic the demands of these movements, making the training more specific to the requirements of sports such as football. The definition of a “moderate load” is individual to each player’s strength level, but it will typically be a weight that can be performed 8 – 12 times while maintaining good form.
“The force velocity curve is a tool I refer to when programming for my athletes,” Kollars says. Creating the desired adaptation is all about prescribing the correct stimulus. If the goal is to increase an athletes power capabilities, we need to prescribe a load that falls in the middle of the curve.”
Moderate loads allow athletes to move the weight with a moderate speed, striking a balance between force and velocity. This is ideal for power development, as power is the product of force and velocity. Training with moderate loads enables athletes to generate force while still moving the weight at a relatively high speed, promoting power production. Moderate load training also engages both the fast-twitch and slow-twitch muscle fibers. Fast-twitch fibers are crucial for explosive movements, and by targeting them with moderate loads, athletes can enhance their neuromuscular adaptations, something that is necessary for making gains with explosive power and speed.
Compared to training with heavy loads, which is also thought to improve speed and power, moderate load training puts less stress on the joints and connective tissues. This reduced stress lowers the risk of injuries, allowing highly paid athletes like NFL players to consistently engage in training without compromising their overall health and performance, meaning that when the season begins, a player should be ready to go.
Exclusive Interview: Haley Adams Shares Her Journey Back to Joy in CrossFit After a Year Hiatus
(Editor’s Note: This is the second part of our interview with Haley Adams. You can read part one here.)
For Haley Adams, returning to CrossFit after a year-long hiatus required a change in mindset. It required her to view the sport — and herself — from a different angle. It also required her to learn to have fun again.
“When I took my break [in 2023], initially, I thought I was done,” Adams tells the Morning Chalk Up. “I didn’t think I was going to go back; I never wanted to do that again, and I didn’t ever want to feel like that again. I was going to Planet Fitness with my mom, walking on the treadmill, and doing a bunch of random bodybuilding exercises. That was all I did for fitness.”
- “I was having a great time going and walking and listening to my headphones, and I did not want to set foot inside a CrossFit gym or touch a barbell.”
Things soon changed as she learned to embrace her training again.
- “Honestly, now training is like therapy — I enjoy it so much,” she says joyfully.
View this post on InstagramA post shared by Haley Adams (@haleyadamssss)
[Related: Meet Dylan Gibbs: The First U.S. Male Collegiate Functional Fitness National Champion]
“Having [coaches Hayley and Josh Murillo] here is wonderful; they make it so fun every day. It’s nice just to have people to rely on and know that they care about you and make the call to shut it down if necessary,” Adams says.
“We just have so much fun. And I mean, of course, you have bad days, but it’s nice to have them around when there are bad days. It is a night and day difference for me.”
Communication and trust have played the most significant part in Adams’ evolution. It all started with the simple idea of breaking fitness down into its simple parts to build it — and her — back up.
- Her coach, Josh Murillo, describes it: “I think that’s kind of where we started — let’s go to the gym and have as much fun as we can possibly have. And then go from there.”
- Adams elaborates: “I think I’m very protective of my head right now just because I know what triggers me and gets me into that headspace. So, making sure we eliminate all those external factors or things that would send me back into that kind of headspace is the biggest thing, at least for me. Because I just don’t ever want to feel like that again.”
Communication is a two-way street between the athlete and the coaches. “[It’s] our job to get her right up next to her threshold and try to push those limits to do the sport, right?” Josh asks.
“I think that’s what she relies on us for. But at the same time, we need to be conscious and listening. One day, we might have to bump something, or sometimes she’ll come in and say, ‘I’m fired up — let’s go!’”
This was something that Adams had been missing in her training.
“I’ve never really had that before,” she shares. “Before, even if I felt tired or worn out, it was too bad. I would say to myself, you suck, keep going, train all day. Now I have reassurance from them saying it’s ok to shut it down and step back.”
- “Having [Josh and Hayley] and trusting them to help me make smart decisions has been a massive game changer.”
The 2024 Comeback
As of this article’s publication, the The 2024 CrossFit Open is just days away. So what happens next for Adams? What is the big picture and her goal moving forward?
It’s simple: “I’m just going to take it year by year — I’m not going to have a 10-year plan. I just want to stay healthy. Stay happy. Stay fit,” Adams says.
- “I want to go out there and truly enjoy and do my best and know that I’ve worked super hard this year. I think the main thing is just to really enjoy it and be proud of myself and make other people around me proud.”
Adams is not the only young CrossFit athlete to step away. Earlier, in February 2024, Mal O’Brien posted on her social media that she would sit out the 2024 season while currently taking care of her wellness and finding balance in Hawaii. The two athletes are friends, and Adams could not be more proud.
View this post on InstagramA post shared by Haley Adams (@haleyadamssss)
[Related: Breaking Down the Most Common CrossFit Open Movement Combinations]
“I literally cannot be happier for her,” Adams beamed about O’Brien. “She deserves to feel peace and be happy and whatever that looks like for her like. I’m very happy for her — she deserves it.”
Adams hopes that her personal growth will help others, especially other young women.
“I think it gives people the clarity and the vision that it’s okay to take a step back and don’t put so much pressure on yourself. Just have fun and also be a kid,” Adams says. “I grew up way too fast and put way too much pressure on myself. I think it’s a lesson for adults not to push these kids until they break because it’s starting to become a trend.”
- She continues: “We push them to death until they’re 15, and then they burn out. They are lost and sad and experiencing all the same things I did, but a lot of people just don’t talk about it and deal with it. So I think it gives people peace to see that they can take a break and still be good. It doesn’t mean it is over.”
But just because Haley has taken the pressure off herself, don’t think for one moment she has become a pushover.
- “I don’t think she’s ever signing up for anything she isn’t trying to win,” Murillo says.
Adams says there’s one big difference spectators will see when she takes the competition floor.
“The most recognizable change will probably be my face,” Adams laughs. “I actually enjoy what I’m doing now. I would get the comment that I looked miserable when I was competing, and I was. Now I’m looking like I’m enjoying it because I am. I just love being out there and doing it for myself.”
We cannot wait to see you smile out there, Haley.
Featured image: @crispydudes / Instagram
The post Interview: Haley Adams on Finding the Joy In CrossFit Again After Her Year Away appeared first on BarBend.

2024 Bowflex Treadmill 22 Review: Achieve Your Fitness Goals with This Powerful Machine
Much like Columbus, who discovered America while searching for India and said, “Close enough,” your hunt for the best treadmill may leave you feeling lost, confused, and ready to settle. But despair not, those with a few extra bucks to spend may find their destination in the Bowflex Treadmill 22, a high-end splurge that can support those with serious goals looking to tackle sprints and hills.
This treadmill’s HD touchscreen allows you to follow along with trainers, explore the world via scenic routes, track your workout stats, and even access streaming services to view movies and TV shows. With a top speed of 12 miles per hour, 20 percent incline, and -5 percent decline capabilities, you can also up the ante with hill sprints. The $2,499 price tag is a hefty one, but the Treadmill 22 is a hefty machine that can support the cardio goals of fitness fanatics — and entertain them along the way — across daily workouts.
Bowflex Treadmill 22

Bowflex Treadmill 22
The Bowflex Treadmill 22 features 12 miles per hour max speed, a serious -5 to 20 percent incline, and a generous 60-inch running deck. The 22-inch HD touchscreen provides access to the JRNY app where you can take workout classes or stream content from streaming providers like Hulu, Amazon, or Netflix.
Shop Bowflex
About Our Expert:
This article has been reviewed by Amanda Capritto, CPT, CF-L1, CES, CSNC a certified personal trainer, certified nutrition coach, and CrossFit Level-1 Trainer. She reviewed the research we cite to help ensure we’re providing helpful, accurate descriptions and recommendations.
Main Takeaways
- You’ll have access to train hard with 12 miles per hour max speed and -5 to 20 percent incline capabilities.
- The 22-inch touchscreen is integrated with the JRNY app — an additional $19.99 a month — giving users access to workout programming.
- JRNY also lets users stream entertainment from apps like Netflix, Hulu, or Prime Video.
- The steel frame supports users up to 400 pounds, but weighs a whopping 336 pounds, making it difficult to move around.
Bowflex Treadmill 22 Highlights
- Price: $2,799
- Max Speed: 12mph
- Max Incline: -5%-20%
- Dimensions: 70″ H x 85″ L x 39.6″ W
- Weight: 336lbs
- Weight Capacity: 400lbs
- Warranty: 15-year frame, 5-years mechanical parts, one-year electronics, touchscreen, and labor
If you’re looking to invest in a home treadmill to take your training to the next level, the Bowflex Treadmill 22 is a worthwhile consideration. This machine is a tank, with a 400-pound user weight capacity that makes it suitable for cardio fiends of many shapes and sizes. The 12 miles per hour max speed and a -5 to 20 percent incline can supplement your cardio with heart-pounding hill sprints.
Certified personal trainer and our expert reviewer Amanda Capritto assessed qualities to look for in the best treadmills for tall runners. “For running and especially sprinting, you’ll want a deck… 60 inches long. As for width, 20 to 22 inches is ideal in order to accommodate arm motion while running and potential side-to-side movement that can occur when sprinting.” The Bowflex Treadmill 22’s spacious 22-inch by 60-inch tread deck provides enough length for tall runners and enough width to comfortably power through your sprints.
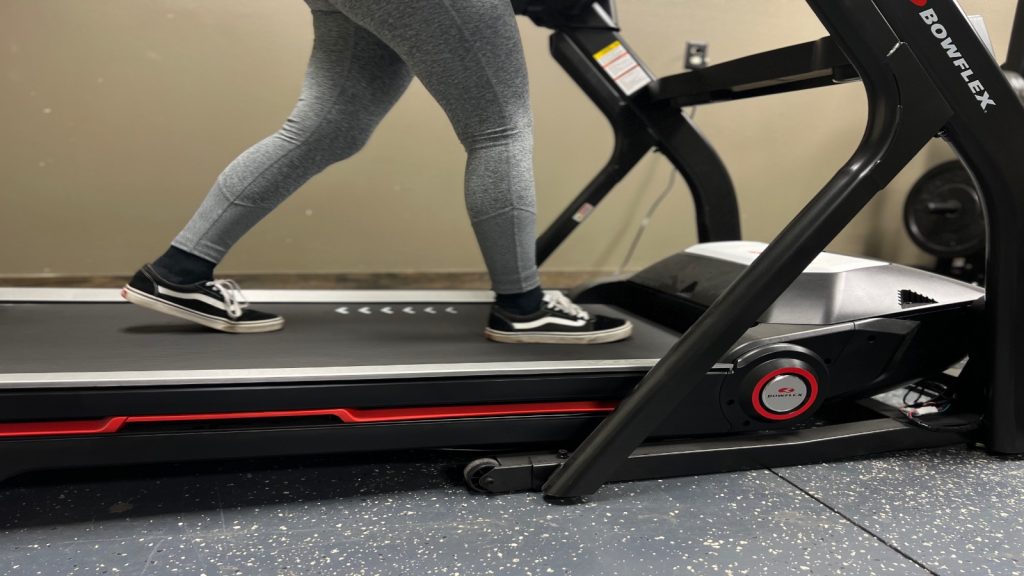 Our BarBend Tester walks on a Bowflex Treadmill.
While many high-end treadmills provide touchscreens with access to apps like iFIT or Peloton, the Treadmill 22 is integrated with JRNY, a fitness app that pairs workout programming with access to apps like Netflix, Hulu, Max, Disney+, and Amazon Prime Video. The only catch is that you’ll have to keep up with your JRNY subscription in order to stream on the treadmill’s 22-inch display.
Our biggest qualm with this treadmill is its 336-pound weight and 85-inch by 40-inch footprint. That’s a heavy machine that’s nearly 10 inches longer and 5 inches wider than many of the high-end treadmills we’ve tested. While there are folding capabilities, we prefer to get our workout on the treadmill rather than from trying to maneuver this goliath of a machine around.
Pros
- JRNY integration allows users to access workout programming and entertainment apps like Netflix via the 22-inch touchscreen.
- The max speed of 12 miles per hour and -5 to 20 percent incline offer a substantial amount of training versatility.
- The treadmill’s steel frame can support users up to 400 pounds — roughly 50 to 100 pounds more than most treadmills.
Cons
- Bowflex won’t tell consumers what motor sizes they use for their treadmills.
- At 336 pounds, this treadmill is nearly 40 pounds heavier than other high-end treadmills with screens we’ve tested.
- Despite its folding mechanism, the 85-inch by 40-inch footprint may make this treadmill unsuitable for apartments or small homes.
Training With the Bowflex Treadmill 22
While we haven’t gotten our hands on the Bowflex Treadmill 22 yet, we have tried and tested over 40 of the most popular treadmills and took note of how this machine stacked up against the competition. We’ve also rigorously tested the Bowflex Treadmill 10, which provides similar training capabilities, mechanical parts, folding mechanics, and belt deck design. The primary difference is the 22-inch screen on the Treadmill 22 compared to the 10-inch screen on the Treadmill 10.
JRNY Interactive Programming
At $11.99 a month or $99 for a full-year subscription, JRNY is one of the most affordable training apps for treadmill running. With a subscription, users get access to scenic routes, in-studio classes with personal trainers, and adaptive workouts that adjust your workout based on your ability. Whether you’re looking for how to run a faster mile or just want something to help you start a new routine, the JRNY provides. However, “JRNY doesn’t have as many offerings as iFIT does,” noted our tester who gave this dynamic programming a 3 out of 5.
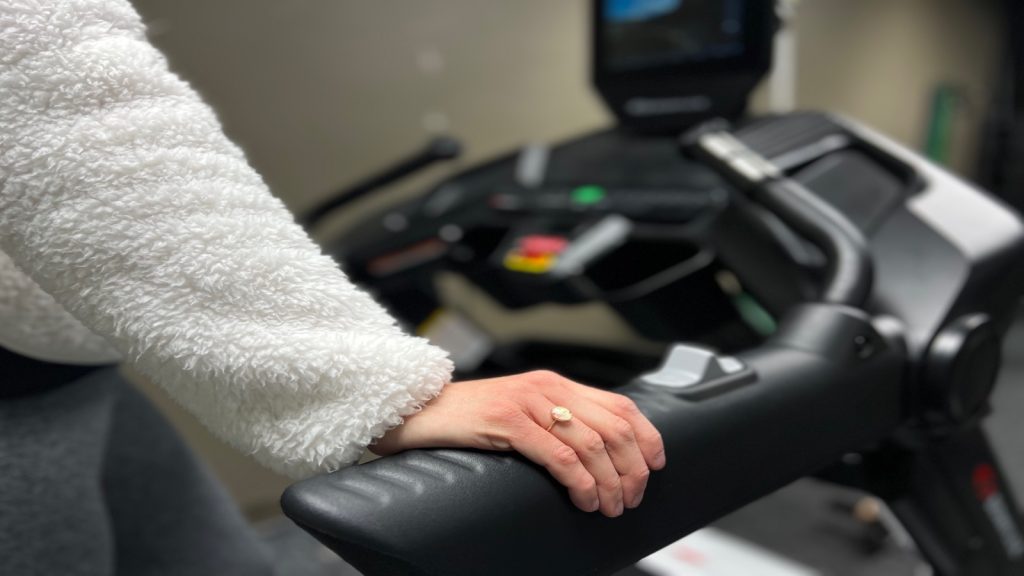 Our Tester’s hand resting on the handle of a Bowflex Treadmill
You’ll also be granted access to some of your own subscription services, like Hulu, Prime Video, or Netflix so you can stream your favorite shows or movies from the 22-inch screen.
If you like to cry while you run, may I suggest the first season of Michael Chriton’s “ER” (the same Chriton who brought us, “Jurassic Park”)? Perhaps the serotonin you get from exercise will help to balance out how grim and upsetting (in a good way!) that season is.
Speed and Incline Control
The 20-percent incline, -5 percent decline, and max speed of 12 miles per hour allow users of any fitness level the ability to climb, walk, sprint, or jog at the intensity that’s right for them. The incline range, in particular, is impressive, as it’s the largest range we’ve seen on any folding treadmill.
This range of training capabilities is great for those looking to mimic outdoor terrain or incorporate hill sprints. Walking at an incline activates different muscles than on flat ground and can also reduce knee pain. (1) Our expert reviewer and certified personal trainer Amanda Capritto notes, “If you plan to use your treadmill to train for outdoor events such as a marathon or a hike, incline is essential.”
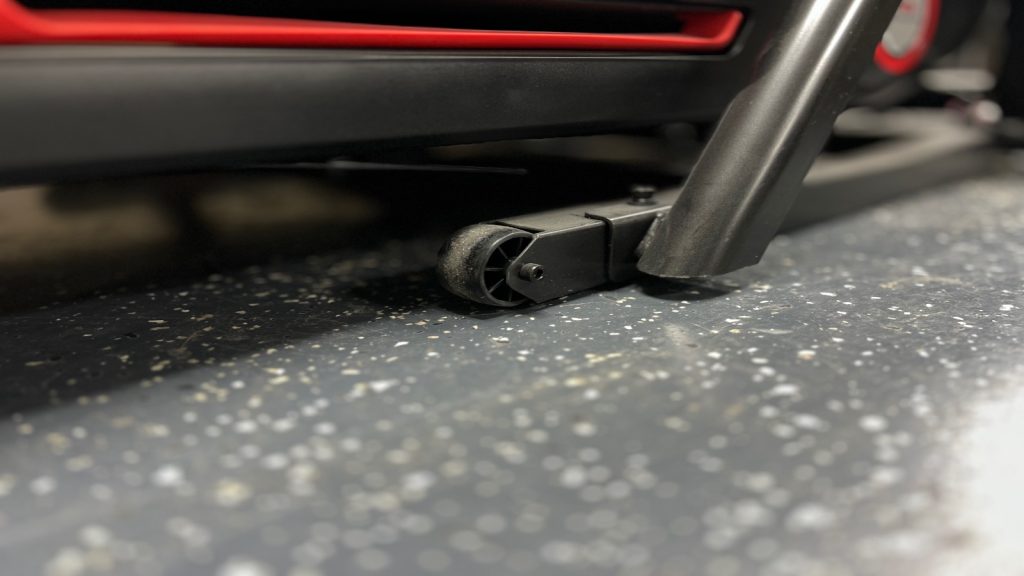 A close up view of the wheel on the base of a Bowflex Treadmill
A max speed of 12 miles per hour allows users to pick up their workout to a 5-minute mile pace, providing ample resistance for HIIT workouts or sprint trials. Speed and incline adjustments can be made in three different locations: there are quick-adjust buttons on the bottom of the console, and speed and incline buttons located on the arms and beside the heart rate monitor hand grips. The customizations on the Treadmill 10 scored a 4 out of 5 for a smaller incline range.
Rumor has it that the Treadmill 22 has a 4.0 HP motor. If the rumors are true, this is less robust than the 3.0 CHP motors we like to see for more serious runners. I even called customer service to verify the motor size and was told Bowflex doesn’t share this information. Certified personal trainer and our expert reviewer Amanda Capritto noted, “Ideally, a running treadmill will have a powerful motor with at least 3.0 CHP.”
Belt Deck
The 22 by 60-inch deck is spacious enough to accommodate taller runners or those with long strides. “This treadmill deck is really comfortable to use. Because of how wide and long it is, I had a ton of space to move freely and never felt like I was close to falling off,” said our tester when trying out the identical Treadmill 10 running surface. Both models also utilize Bowflex’s ComfortTech deck cushioning, which works to absorb shocks to help reduce joint pain. We scored the Treadmill 10’s adjustability and ergonomics a 4.5 out of 5.
Conveniences
This treadmill has tons of storage space, with water bottle holders and a media shelf. Bluetooth connectivity makes tracking your workout with apps like Zwift or Strava simple. And we also like that it has a built-in fan with multiple power levels.
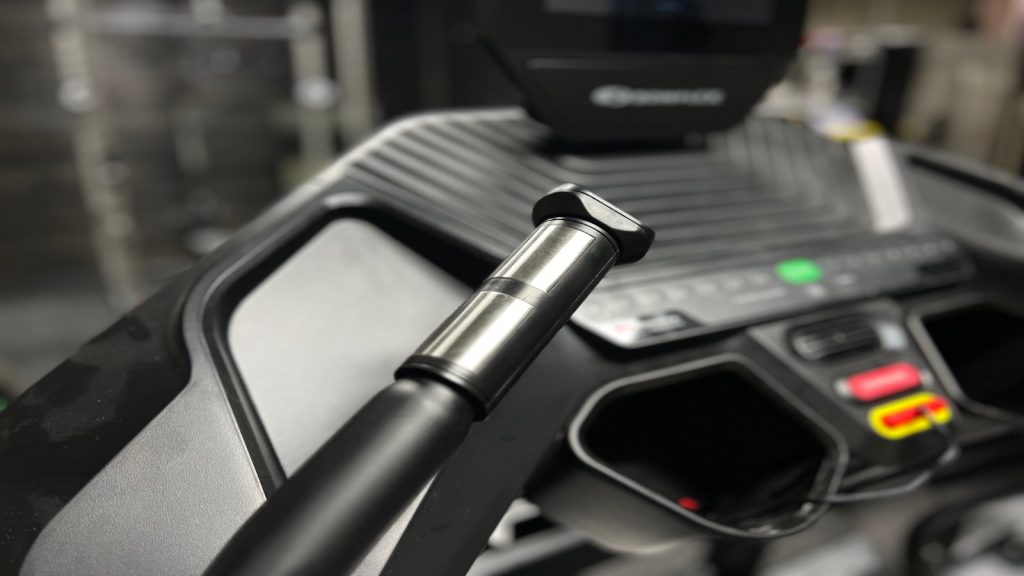 Close up view of the heart beat handle on a Bowflex Treadmill
Plus, you can keep track of how hard you’re training with the heart rate sensors on the handrails, which can help you maintain a fat-burning heart rate zone. Of course, you could also utilize the included Bluetooth armband heart rate monitor.
What to Consider Before Buying the Bowflex Treadmill 22
There are many factors to consider before pulling the trigger and bringing a treadmill into your home. When scanning models, you’ll want to have a budget range in mind, the amount of floor space you can dedicate to a machine, and the type of training you’d like to use your treadmill for.
Price
The Bowflex Treadmill 22 costs $2,799, which lands between the $2,000 to $3,000 average range for a high-end treadmill. It certainly earns its price point with its max speed of 12 miles per hour, 20-percent incline, -5-percent decline, 22-inch HD touchscreen with JRNY integration, and 400-pound weight capacity, but before emptying your wallet it’s worth asking if this level of versatility and stability aligns with your needs.
If you’re not one to engage with dynamic programming, you could save a few bucks by opting for a more utilitarian machine that eschews a screen entirely. The same goes for this treadmill’s impressive incline and decline range — if you’re more interested in endurance than hill training, you can certainly find a more budget-friendly model with a more modest range. But if you’re in the market for a top-of-the-line model that can support your training goals (and entertain you at the same time), then we think this model is absolutely worth the price.
[Related: The 8 Best High-End Treadmills]
Footprint and Portability
Only you can know how much floor space you have available for a treadmill, but we can provide you with detailed dimensions so that you can take some measurements to help envision how a treadmill will fit in your home.
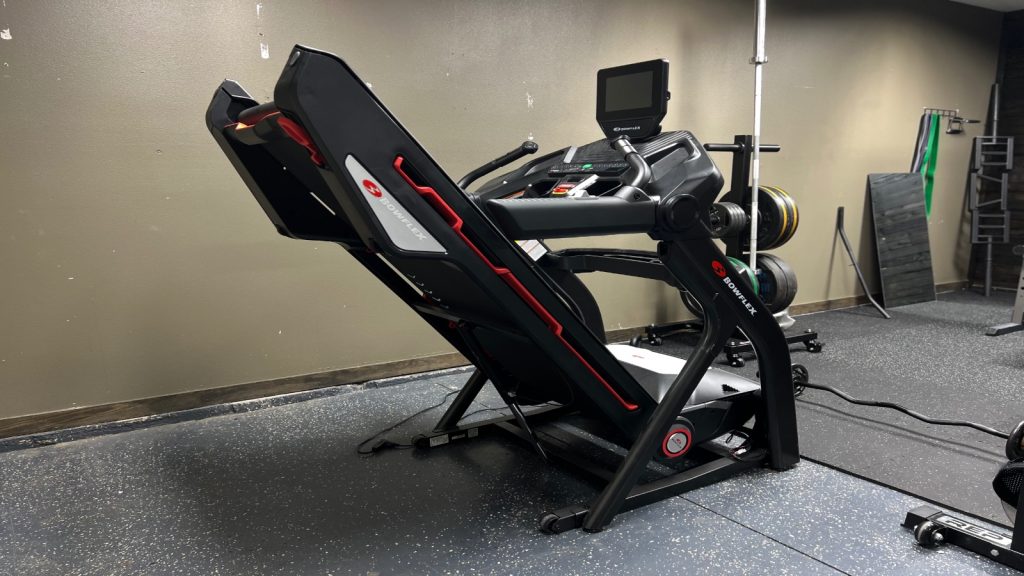 A view of a folded up Bowflex Treadmill..
The Bowflex Treadmill 22 takes up 85 by 40 inches of floor space. When folded, you’ll save 40.5 inches, as the 85-inch length folds up to 44.5 inches. Folded or unfolded, the 70-inch height remains the same. Folding and unfolding this treadmill is easy with the SoftDrop folding system, which uses hydraulics to assist in lifting and lowering the belt deck.
[Related: The 8 Best Folding Treadmills of 2024 (Expert Tested)]
Training Modality
With impressive speed and incline capabilities, this machine was built for hikers training for their grand adventure, athletes looking to train for endurance races, or those looking for some hill work or sprint intervals to increase their speed.
If you’re a cardio fiend, then the Treadmill 22 delivers. If you’re more in the market for a jogging treadmill, then this machine may be overkill. Before scooping it up, ask yourself: Will you be cranking up that incline to 20 percent? Will you be sprinting at 12 miles per hour? Consider your own fitness goals, then assess whether the Treadmill 22 aligns with them or if a less expensive machine can still check your boxes.
Bowflex Treadmill 22 Vs The Competition
The chart below highlights some comparisons between the Bowflex Treadmill 22 and its competition.
When comparing the Bowflex Treadmill 22’s specs to similar products, the price paid for a screen size of 22 inches is nearly $200 cheaper than the NordicTrack 2450 or the Peloton Tread. Additionally, the warranty for both the Bowflex 22 and the 10 are more substantial than Peloton or NordicTrack’s.
You’ll also have access to more affordable programming with the JRNY app ($11.99 a month), which costs nearly $30 less than Peloton’s All-Access ($44 a month) or NordicTrack’s iFIT membership ($39 a month). Of course, there’s a reason Peloton and NordicTrack are so well-renowned in the dynamic programming space — their virtual classes are among the best we’ve taken — so if you’re looking for immersion in your fitness classes, those apps are worth the cost.
The dimensions are where the Bowflex Treadmill 22 doesn’t impress. At 85 inches long, it’s nearly 17 inches longer than the Peloton and 6.5 inches longer than the NordicTrack. As for width, it’s also about 4 to 7 inches wider than the competition. While you may save some cash if you opt for the Bowflex Treadmill 22 over the Peloton Tread or NordicTrack 2450, you’ll be losing out on more space-saving designs.
Places to Buy the Bowflex Treadmill 22
The Bowflex Treadmill 22 can be purchased directly through the Bowflex website.
Warranty
Your purchase comes with a 15-year frame and motor warranty, 5 years for mechanical parts, one year for electronics and HD touchscreens, and 2 years for labor. Shipping is free, although they will not ship to P.O. boxes or international destinations.
Company Information
Bowflex started over 30 years ago with at-home gym equipment. Over the years, they’ve expanded to become one of the most popular fitness manufacturers, with treadmills, ellipticals, spin bikes, home gyms, and a variety of innovative free weights.
If you need to speak to someone in customer support, you can reach them at 1-800-618-8853. In my experience, I was able to speak with a living, breathing, real-life-not-a-robot customer support agent within 2 minutes of calling.
In Conclusion
The Bowflex Treadmill 22 is stable, sturdy, and built to withstand a beating. Featuring a max speed of 12 miles per hour, a -5 to 20 percent incline, and a generous 22-inch by 60-inch running deck, the treadmill provides the space and versatility for high-intensity training and longer endurance runs.
The 22-inch touchscreen display allows you to access content to keep you entertained from apps like Netflix, Max, and Hulu. However, access is limited to those who subscribe to JRNY, which provides training programs at a reasonable $11.99 monthly subscription. All in all, If you’re looking to invest in a treadmill to support serious training, and floor space isn’t an issue, the Bowflex Treadmill 22 is a worthwhile consideration.
FAQs
How much does the Bowflex Treadmill 22 cost?
The Bowflex 22 costs $2,799. However, you’ll also want to consider a JRNY membership to have access to streaming workout programming and your favorite shows. This subscription is one of the most affordable options we’ve seen at $11.99 a month or $99 for an annual membership.
How much horsepower does the Bowflex 22 have?
Bowflex hasn’t released this information, but rumor has it that this treadmill has a 4.0 HP motor. However, the solid 15-year motor warranty should put your mind at ease about any problems down the line.
Does Bowflex make a good treadmill?
Bowflex has been in the business for the last 30 years, so they know treadmills and they know what consumers are looking for. Bowflex makes some of the most sturdy and durable treadmills on the market. While their footprints are often large and cumbersome, they’ll prove to be sturdy machines that can last as long as you can.
References
- Haggerty, M., Dickin, D. C., Popp, J., & Wang, H. (2014). The influence of incline walking on joint mechanics. Gait & posture, 39(4), 1017–1021. https://doi.org/10.1016/j.gaitpost.2013.12.027
The post Bowflex Treadmill 22 Review (2024): A Big Machine to Support Big Goals appeared first on BarBend.

Meal Timing 101: Understanding the Basics and Importance for Health and Fitness Enthusiasts
The human body operates efficiently when it consistently receives energy from carbohydrates, fats, and proteins through the diet. That’s why regular meals and evenly spaced snacks throughout the day are essential to provide the body with the necessary nutrients for optimal functioning. This sustained energy intake enables you to engage in various daily tasks actively. However, the demands of daily life present challenges in following fixed mealtimes, and there are days when you might even skip a meal.
While a strict meal and snack schedule is not necessary, maintaining a consistent eating pattern throughout the day can offer benefits. Ideally, people rely on hunger cues and the body’s signals to determine when to eat. However, if eating patterns have been irregular or if one has become accustomed to skipping meals, hunger cues may not be reliable initially.
Beyond merely consuming food, the timing of your meals profoundly influences various aspects of your well-being. This article will explore the timing of the three main meals of the day, breakfast, lunch, and dinner, emphasising the potential advantages of following consistent meal timings.
The Benefits of Regular Meal Timings
People are leading increasingly hectic lives, resulting in disorganised daily schedules and giving rise to various lifestyle-related ailments. Irregular meal timings and an increase in the consumption of unhealthy, processed foods adversely impact digestion and disrupt the body’s metabolism cycle. It, in turn, contributes to issues like obesity and heart problems. Therefore, adopting consistent and balanced meal patterns is not only necessary but also beneficial for several reasons, including:
Manage Blood Sugar Levels
For people with diabetes, maintaining stable blood sugar levels is a primary goal. Establishing a daily routine for meals and insulin intake significantly reduces the likelihood of blood sugar fluctuations. However, prolonged gaps between meals can lead to noticeable dips in blood sugar levels.
Skipping meals and lacking meal structure can disrupt the balance between food intake and medication, leading to poorly controlled blood glucose levels. Eating at regular intervals ensures that carbohydrates are distributed evenly throughout the day, contributing to better blood glucose control.
The timing of meals for people with diabetes should be personalised, taking into account factors such as age, gender, living situation, work hours, medication, and more. HealthifyMe acknowledges this need and provides access to certified nutritionists who offer tailored recommendations based on a thorough assessment of individual health goals and nutritional requirements.
Maintain Circadian Rhythms
Consistent meal schedules go beyond managing blood sugar fluctuations. The right nutrients, a proper sleep cycle, and disciplined meal timings all contribute to the body’s cyclic rhythm. Aligning your eating patterns with your circadian rhythms, the body’s internal clock regulating wakefulness and sleep, has automatic health benefits. For example, a study shows that scheduled meals synchronise peripheral circadian rhythms, which could benefit people with circadian rhythm disorders.
Allows Ideal Gap Between Meals
Typically, the body takes 3-4 hours to digest a meal properly. Therefore, you need to consume meals every 3 to 4 hours to optimise digestion. It can also prevent overeating, reducing the risk of bloating or indigestion. Additionally, combining scheduled eating with meal planning supports a balanced diet and ensures optimal metabolism throughout the day. Scheduling your meals and snacks, coupled with adopting a healthy diet, can optimise your digestive health and prevent the onset of cardiovascular disease, type 2 diabetes, and obesity.
The Best Time to Eat Your Meals
Planning meals with the right balance of nutrients can contribute to good health, provided you consume those meals at the appropriate times. Some people have breakfast at 8 am, while others regularly have their first meal well into the noon. The question arises: which time is right? As it turns out, the right mealtime schedule is not a one-size-fits-all approach.
Different people have varying approaches to eating, and the meal plan that suits you may not be suitable for another (and vice versa). Moreover, genetics also play a role in how the body regulates circadian rhythms, which interact with mealtimes. Therefore, discovering the best mealtimes for you may require some trial and error.
Since there is no universally optimal mealtime schedule, consider the following approach to see if it works for you.
Breakfast
It’s advisable to consume breakfast within 1-2 hours of waking up in the morning. This action breaks your overnight fast and supplies your body with the necessary fuel to kickstart the day. When you start a day filled with activities like work meetings or morning workouts without providing fuel, your body operates in a fasting state. It can lead to increased feelings of tiredness or reduced energy. Furthermore, the body may compensate by triggering heightened cravings later in the day. Therefore, it’s crucial to aim for some form of nourishment, even if it’s a small portion, in the morning.
Lunch
After the initial morning meal, people often feel the need to eat again every 4-5 hours. For example, if you ate breakfast at 8 am, eat lunch between 12 pm and 1 pm. The hunger cues at lunchtime depend on what you had for breakfast and how balanced it was.
Lunchtime also requires a substantial energy boost to maintain an active metabolism for the following hours of the day. Therefore, it’s advisable to focus on lean proteins like chicken and fish or plant-based options such as lentils and chickpeas, combined with complex carbs, healthy fats from avocados or olive oil, and fibre-rich vegetables and whole grains.
Delaying lunch, especially when busy or occupied with other tasks, can be tempting. However, waiting until late afternoon may lead to overeating or choosing less healthy options. Suppose you had breakfast at 8 am; you might experience intense hunger by the time you sit down for a late afternoon lunch. In such a state, if a plate of fries or chips is placed in front of you, you may be tempted to consume the entire plate.
Dinner
A good rule of thumb is to avoid going more than three to four hours without eating. Suppose you have lunch around noon. In that case, it’s advisable to have a snack around 4 pm and dinner between 6 and 7 pm.
Some people find an earlier dinnertime beneficial. For instance, if you are prone to acid reflux or heartburn after eating, an earlier dinnertime may be better. Additionally, people with type 2 diabetes may benefit from an earlier dinnertime, as later dinners can contribute to blood glucose complications. Moreover, experts recommend waiting three to four hours after having dinner before going to sleep.
Snacks
One of the common reasons for overeating at dinner is not eating enough earlier in the day. Maintain a consistent schedule for dinner, ensuring there is no more than a four to five-hour gap between lunch and dinner. For some individuals, incorporating a snack between lunch and dinner might be necessary.
The optimal times for snacking are 10-11 am, 3-4 pm, and 8:30-9 pm. Consider having a snack whenever you go more than four hours between meals or after engaging in intense exercise.
The choice of your snack is also crucial, as not all snacks are equal. Opt for snacks that are rich in fibre and protein, as this combination will keep you feeling satisfied for a longer duration. It’s also essential to practise mindful eating, even during snacking.
How to Time Meals for Pre- and Post-Workout Nutrition
The optimal times to eat before and after a workout vary based on the type of exercise you intend to engage in. High-intensity workouts or intense cardio sessions may require more precise meal timing, whereas activities like walking or yoga offer greater flexibility.
In terms of pre-workout meals, consuming food an hour or two before exercising helps provide fuel for your muscles. It’s crucial to allow enough time for your meal to begin digesting before starting any high-intensity activities.
As for post-workout meals, eating within 2 hours of completing a session can aid in replenishing energy and electrolytes and repairing any muscle protein damage incurred during exercise. In other words, you should experiment and determine the time frame that works best for your body.
HealthifyMe Suggestion
Here are some tips to help you plan meals and stick to meal timings. Create a Meal Schedule: Set specific times for breakfast, lunch, dinner, and any snacks in between. Consistency helps regulate your body’s hunger cues. Plan Ahead: Take time to plan your meals for the week, including snacks. This reduces the likelihood of spontaneous, unhealthy choices. Balance Your Plate: Aim for a balanced meal with a mix of carbohydrates, protein, healthy fats, and vegetables. This helps keep you satisfied and provides essential nutrients. Meal Prep: Spend some time prepping ingredients or meals in advance to save time during busy weekdays. Be Flexible: While it’s good to have a plan, be flexible and forgiving if things don’t always go as planned. Adapt and adjust as needed.
The Final Word
Beyond the basic act of consuming food, the timing of meals significantly influences overall well-being. Amidst today’s fast-paced lifestyles, irregular meal patterns and unhealthy food choices contribute to various lifestyle-related issues. Thus, adopting consistent and balanced meal patterns becomes crucial for managing blood sugar levels, maintaining circadian rhythms, and allowing an ideal gap between meals.
Combining scheduled eating with meal planning ensures a stable energy source and optimal metabolism throughout the day. However, the best time to eat varies among individuals, and there’s no one-size-fits-all approach. By considering factors like personal preferences, genetics, health, and lifestyle, you can create a mealtime schedule that promotes overall health and well-being.
Disclaimer: The purpose of this article is just to disperse knowledge and raise awareness. It does not intend to replace medical advice from professionals. For further information, please contact our certified nutritionists Here.
Research Sources
Meal Timing, Meal Frequency and Metabolic Syndrome
When to Eat: The Importance of Eating Patterns in Health and Disease
Meal Timing Regulates the Human Circadian System
Timing of Breakfast, Lunch, and Dinner. Effects on Obesity and Metabolic Risk
Frequently Asked Questions (FAQs)
Q: How important are meal timings for overall health, and do they impact weight management?
A: Consuming meals at regular intervals plays a vital role in regulating metabolic rate, preventing energy fluctuations, and maintaining a steady metabolism. Timely meals also contribute to stabilising blood sugar levels, avoiding spikes and crashes. It’s essential to acknowledge that while meal timings can impact weight management, lifestyle factors such as exercise and diet choices play a significant role.
Q: Is there an ideal time to eat breakfast, and how does it influence daily energy levels?
A: A balanced breakfast with a mix of carbs, protein, and healthy fats provides a steady energy release, helping sustain energy levels until the next meal. However, the ideal time to eat breakfast can vary based on personal preferences, lifestyle, health conditions, and daily routine. Some people prefer to eat shortly after waking up, while others may opt to skip breakfast. The key is to listen to your body’s signals and choose a breakfast time that aligns with your needs.
Q: Are there specific recommendations for the timing of lunch and dinner for optimal digestion?
A: Individual preferences and schedules vary, so the ideal time is subjective. While there is no one-size-fits-all approach, a general guideline is to have lunch approximately 4-5 hours after breakfast. Ideally, have dinner 3-4 hours before going to sleep.
Q: Can late-night eating affect weight gain, and should there be a cut-off time for meals?
A: Late-night eating can affect weight gain. However, it mainly depends on factors such as total daily caloric intake, meal composition, and overall lifestyle. Plus, the impact of late-night eating on metabolism varies among individuals. There is no universal “cut-off time” for meals. Still, it is better to avoid large, heavy meals late at night.
Q: How does the timing of meals relate to workout routines and fitness goals?
A: Strategically timed meals, especially pre- and post-exercise nutrition, help to optimise performance. People with higher physical activity levels, like athletes, may need more frequent meals to fuel their energy expenditure.
Q: Are there benefits to spacing meals evenly throughout the day, or is intermittent fasting effective?
A: Both evenly-spaced meals and intermittent fasting can be effective. The choice between them depends on individual preferences, lifestyle, and health goals. Intermittent fasting or time-restricted eating patterns often align better with weight management objectives. However, regular meals may support better blood sugar control, especially for people with diabetes or insulin sensitivity.
Q: Do meal timings vary based on individual factors, such as age, activity level, or health conditions?
A: Yes, meal timings can vary based on individual factors such as age, activity level, and health conditions. Children and adolescents require more frequent meals and snacks to support their growth and energy needs. On the other hand, older adults may benefit from evenly spaced meals. Diabetic people may need to follow specific meal timings to manage blood sugar levels. Lifestyle preferences can also influence meal timings.
Q: Can skipping meals or irregular eating patterns have adverse effects on metabolism?
A: Skipping meals can cause fluctuations in blood sugar levels, resulting in fatigue, irritability, and difficulty concentrating. In the long run, this practice may contribute to the onset of insulin resistance. Additionally, prolonged periods without food can lead to the breakdown of lean muscle mass, mainly if protein intake is insufficient.
Q: How does meal timing affect blood sugar levels, especially for individuals with diabetes?
A: Consistent meal timing prevents significant fluctuations in blood glucose. Spacing meals evenly helps prevent hypoglycemia (low blood sugar) episodes. Avoiding prolonged periods without food helps also prevent extreme drops or spikes in blood glucose levels.
Q: Are there specific guidelines for snacking between meals, and how does it impact nutrition?
A: Mindful snacking between meals can be part of a balanced diet. Fruits, vegetables, nuts, seeds, yoghurt, and whole-grain products are good options. They help maintain energy levels and keep you feeling satisfied. However, be mindful of portion sizes to avoid excessive calorie intake.
NordicTrack EXP 10i Treadmill Review: The Ultimate Guide for Fitness Enthusiasts (2024)
NordicTrack has consistently made some of the best treadmills on the market, so of course we got our hands on the EXP 10i, one of the most compact treadmills NordicTrack offers. Updated from the EXP 7i, this treadmill provides a 2.75 CHP motor which powers up to 12 percent incline and 10 miles per hour max speed. We’ve tried and tested over 40 of the most popular treadmills and took note of how this machine stacked up against the competition for this NordicTrack EXP 10i review.
Our team here at BarBend is filled with certified personal trainers, former D1 athletes, and marathon racers who rated the treadmills they tested on a scale of 1 (not great) to 5 (we love it) across categories such as adjustability, workout experience, portability, and more. With iFIT streaming capabilities and a compact footprint, runners and walkers looking for interactive programming won’t have to compromise on floor space. Coming in at a mid-level price of $1,599, we think the EXP 10i would be a great treadmill for beginners or joggers just getting back into a routine after some time away.
NordicTrack EXP 10i

NordicTrack EXP 10i
The NordicTrack EXP 1oi is ideal for walking, sprinting, and everything in between. This one is durable and sturdy for high-intensity training but can also go up to a 12% incline for those who like to climb.
Shop NordicTrack
About Our Expert:
This article has been reviewed by Amanda Capritto, CPT, CF-L1, CES, CSNC a certified personal trainer, certified nutrition coach, and CrossFit Level-1 Trainer. She reviewed the research we cite to help ensure we’re providing helpful, accurate descriptions and recommendations.
Main Takeaways
- With a 12-percent incline and a max speed of 10 miles per hour, you are covered for walking, hiking, jogging, or running.
- Integration with the iFIT fitness app gives you access to thousands of live and on-demand classes on its 10-inch HD touchscreen.
- The 55-inch running deck may be too short for taller runners or those with longer gaits.
NordicTrack EXP 10i Treadmill Highlights
- Price: $1,599
- Max Speed: 10mph
- Max Incline: 0%-12%
- Dimensions: 59.7″ H x 70.8″ L x 34.9″ W
- Weight: 230lbs
- Roller Size: 1.9”
- Weight Capacity: 300lbs
- Warranty: 10-year frame, 2-years parts, 1-year labor
High-end treadmills with tech gadgets and gizmos often come with footprints not suitable for apartment dwellers or those lacking a spare room. NordicTrack took this to heart, developing their EXP series with compact profiles and folding capabilities. Our team appreciated the workout experience, footprint, and incline capabilities of this $1,599 treadmill, which is a more compact version of NordicTrack treadmills like the NordicTrack Commercial 1750 ($2,299) and NordicTrack Commercial 1250 ($1,599).
 Our BarBend tester Jake Herod testing out the EXP 7i, which has a nearly identical build.
The 2.75 CHP motor can power your training intensity up to a 12-percent incline and a top speed of 10 miles per hour. When assessing the best treadmills for running for BarBend, certified personal trainer Amanda Capritto noted that this motor size can support high-intensity workouts. “[Look for] a 2.75 to 4.0 CHP for running and sprinting, and a 2.5 CHP or higher for jogging,” she said.
If you’re looking for dynamic programming that immerses you in scenic locales with hands-free adjustments to speed and incline, the NordicTrack EXP 10i’s iFIT integration provides. We’re huge iFIT fans here at Barbend, and the 10-inch HD touchscreen gives you access to travel the world with your trainer as they lead you through a workout.
iFIT programming is often seen with higher-end treadmills which come with larger footprints and higher costs. However, the EXP 10i is NordicTrack’s most compact treadmill at just over 17 square feet.
With a 70-inch length, the EXP 10i is about 10 inches shorter than the NordicTrack 1750 and 8.5 inches shorter than the NordicTrack 1250. However, this compact profile comes at a cost. “For running, and especially sprinting, you’ll want a deck of 20 inches wide by 60 inches long,’ says Capritto. The 55-inch running deck falls short, making this treadmill a tough recommendation for taller runners or those with longer strides. For those of average height, however, 55 inches should be able to support your gait.
Pros
- iFIT integrated programming gives users access to thousands of scenic on-demand classes for walking, running, hiking, and more.
- The 12-percent incline and max speed of 10 miles per hour provide plenty of variety and challenge for walkers and runners alike.
- EasyLift offers hydraulic-assisted lifting and lowering when you want to open or fold up your treadmill.
Cons
- iFIT has a $39 monthly membership fee after a one-month free trial.
- The 55-inch running deck may be too short for taller runners or those with longer strides.
- The powerful 2.75 CHP motor isn’t terribly quiet, according to our tester, and adjusting the incline made even more noise.
Training With the NordicTrack EXP 10i Treadmill
The 12-percent incline and max speed of 10 miles per hour allow users to jog, run, walk, and hike at a variety of intensities. A workout fan, Bluetooth connectivity, and water bottle holders also provide users with the amenities they need to focus on their pace. Plus, with iFIT-integrated training, you can access cardio, strength, and mobility classes on the 10-inch HD screen.
 Heavy duty wheels on the NordicTrack EXP series treadmills.
However, more advanced runners may take issue with the 55-inch running deck, the 2.75 CHP motor, and the 1.9-inch rollers, which are 0.35 inches smaller than the 2.25 to 2.5-inch rollers we recommend for running treadmills.
[Related: The 8 Best High-End Treadmills]
iFIT Programming
One of our favorite aspects of this treadmill is its compatibility with iFIT programming. The $39 per month iFIT subscription gives you access to more than 17,000 fitness classes that pair trainer-led instruction with scenic and immersive backdrops. You’ll also be able to create your own routes with the treadmill’s Google Maps integration.
Kate Meier, Barbend editorial member and certified personal trainer, loved the SmartAdjust feature offered by iFIT. Instead of noodling around on the center console, the EXP 10i can automatically adjust your speed and incline based on the demands of your class or scenic ride.
Meier noted, “I was taking a class where the trainer went uphill, and my treadmill’s auto-adjust feature upped the incline and slowed my speed so I felt like I was there, climbing the hill with them.” Dynamic programming scored a 5 out of 5.
 Jake Harod jogging on a NordicTrack EXP series treadmill.
It’s worth noting this treadmill has no pre-loaded programming, so without iFIT, you’ll only be able to use the treadmill in manual mode. However, there is a media holder where you can prop up a phone and tablet to catch up on your true crime docs while you work out.
Incline Capabilities
The 12-percent incline on the NordicTrack EXP 10i holds its own against some of the best incline treadmills, which tend to reach pitches between 12 to 15 percent.
“People training for outdoor events with hills and natural inclines can benefit from incline treadmills, as can anyone who wants to build stamina and muscular endurance in the legs,” notes certified personal trainer Amanda Capritto.
We did, however, find the motor to be touch noisy during runs. “I was surprised at how loud it was when I would change incline or speed,” said our tester, a certified personal trainer. “Also, the motor took longer to make those adjustments than what I’ve experienced with other, higher-end treadmills from NordicTrack.” Regardless, workout experience scored a 4 out of 5 with our tester.
Console
Moving on a treadmill isn’t always conducive to navigating complicated display consoles, but the EXP 10i provides an intuitive design. Speed and incline settings can be toggled with just one touch, or you can opt to make micro-adjustments in the form of half increments to create the exact training intensity you want. We also appreciated the flat surface of the console, which made wiping down our sweaty paw prints that much easier.
The 10-inch HD touchscreen — 3 inches larger than the touchscreen display on the EXP 7i — provides typical training metrics like calories burned, elapsed time, speed, and distance. You’ll also be able to tilt the screen should you need to adjust for a more ergonomic eye-line to watch iFIT’s programming both when on the machine or when taking strength or yoga classes like off to the side. Tech capabilities scored a 4.5 out of 5.
 The touchscreen on a NordicTrack EXP series treadmill.
Although this treadmill doesn’t come with heart rate sensors, it is compatible with external heart rate monitors like the SmartBeat, which utilizes ActivePulse technology that can control your speed and incline to maintain an optimal heart-rate zone. SmartBeat is worn around your upper arm and syncs your data with iFIT. NordicTrack sells this device for $99.
Belt Deck
The EXP 10i brings an impressively compact package to consumers, but with that smaller footprint comes a smaller running surface. The 20-inch by 55-inch running deck will likely be fine for the average runner, but taller athletes and those with longer strides will want to try out a 55-inch deck at their local gym before setting one up in their home.
Our tester didn’t have an issue with the deck length. In fact, they had a very cozy experience. “The Runners Flex cushioning provided noticeable shock absorption, which provides a bit of comfort and can help reduce the impact on your joints,” they noted. Other NordicTrack treadmills with Runners Flex technology have even made it on our list of the best cushioned treadmills.
What to Consider Before Buying the NordicTrack EXP 10i Treadmill
There are dozens of factors to consider when shopping for a treadmill. As you peruse the internet, keep in mind your budget, what sort of training modality you’ll use your treadmill for, and the amount of floor space you have available.
Price
The NordicTrack EXP 10i comes out to $1,599. This is a relatively affordable price point for a treadmill with a 12-percent incline, a max speed of 10 miles per hour, and a 10-inch HD touchscreen capable of streaming iFIT classes. Plus, it’s one of the cheapest NordicTrack treadmills on the market by about $700 to $2,900. However, you’ll also want to factor in the monthly $39 subscription fee for iFIT membership.
You’ll get to try out iFIT free of charge for one month, and after that, you’ll have the option to cancel or subscribe for $39 a month, $396 a year, $699 for two years, or $899 for three years. Paying for longer memberships saves you some cash compared to paying a monthly fee — saving you $72 for a year subscription, $237 for a two-year subscription, and $505 for a three-year subscription.
Footprint and Foldability
The EXP 10i measures 70.8 inches long by 34.9 inches wide by 59.7 inches tall. That’s about 17 square feet, which is roughly 5 square feet smaller than the average high-end treadmill. This is a folding treadmill — a neat feature you don’t often see on treadmills with screens — and it shrinks from 70.8 inches to 39 inches when folded.
[Related: The 8 Best Folding Treadmills of 2024 (Expert Tested)]
 Jake is shown using the assisted lowering ability in these NordicTrack EXP series treadmills.
With those dimensions in hand, certified personal trainer Amanda Capritto recommends you measure — nay, “triple-measure” — your home gym to ensure you’ll have plenty of space for it among your dumbbells and resistance bands.
Fitness Goals
Are you looking for a machine to support runs and HIIT workouts? Or do you want a treadmill that can help you stay active with some brisk walks and jogs? The EXP 10i can support both, but advanced runners may be disappointed by the treadmill’s max speed of 10 miles per hour, which comes out to about a 6-minute mile pace. Serious sprinters may want a treadmill that can reach speeds of 12 miles per hour.
NordicTrack EXP 10i Treadmill Vs. The Competition
There are countless options on the market, so we drew up a comparison chart to help you get a sense of how the EXP 10i stacks up to the competition.
When comparing the NordicTrack EXP 10i’s specs to similar products, we find that the main draw is the footprint. The machine is both shorter (or comparable) in height, length, and width than the Horizon 7.4 AT, ProForm Pro 2000, Sole F63, and NordicTrack Commercial 1250. On average, users will save 7 inches in length, one inch in width, and 6 inches in height when opting for the EXP 10i over the competition.
The EXP 10i’s 10-inch touch screen is average for iFIT-compatible machines at this price point, but larger and more advanced than the LCD screens that come with the Horizon 7.0 AT and the Sole F63.
Where the EXP 10i gets left in the dust is with its 10-miles-per-hour max speed — every other treadmill can reach speeds of 12 miles per hour. However, 10 miles per hour provides access to a 6-minute-mile pace, so we think the average consumer will find that suitable for their training.
Places to Buy the NordicTrack EXP 10i
You can buy the NordicTrack EXP 10i directly from the NordicTrack website, as well as online retailers like Dick’s Sporting Goods, Lowe’s, Target, Bed Bath & Beyond, and Walmart.
Warranty
NordicTrack provides a 10-year warranty on the frame and motor, a 2-year warranty on parts, and a 1-year labor warranty. You can also purchase a 3-year extended warranty for about $180, extending the parts warranty to 5 years and the labor warranty to 4 years. For $260, there’s a Maintenance Plan that includes a 10-year frame warranty, 3 years parts, and 3 years labor.
Company Information
NordicTrack was founded in 1975 in Chaska Minnesota by Edward and Florence Pauls after Edward invented the NordicTrack ski machine in their garage. Over the last 49 years, NordicTrack has become a leader in the fitness equipment space, producing some of the best ellipticals, exercise bikes, rowing machines, and more. Should you need to reach customer support, you can call 1-888-308-9616.
Final Words
The NordicTrack EXP 10i provides a connected entry-level machine for the cardio enthusiast’s home gym, with a noteworthy 12-percent incline, 2.75 CHP motor, compact footprint, and iFIT streaming capabilities. The 55-inch deck and max speed of 10 miles per hour, while below the standard we like to see on running treadmills, were still sufficient enough to help our testers work up a sweat.
 Jake is shown lifting a NordicTrack EXP series treadmill.
If you’re new to running or trying to get back into treadmill workouts after some time away, we think the NordicTrack EXP 10i is right for you. Its sturdy build and cushioned belt should offer a bit of comfort, while its access to iFIT workouts can help provide motivation and structure. As one of NordicTrack’s most compact treadmills, it’ll also be a better fit for apartment dwellers or those in small spaces. However, if you’re a serious runner who’s looking for larger incline and speed capabilities, you may want to look elsewhere.
FAQs
What does the NordicTrack EXP 10i cost?
This treadmill will cost $1,599. But we recommend going into this purchase with the desire to use iFIT training, since much of the treadmill’s tech functionality is tied to this subscription. The iFIT subscription will cost you a monthly fee of $39 after a free trial during your first month of use.
Can you use NordicTrack EXP 10i without iFIT?
NordicTrack makes some of the best treadmills with iFIT connectivity. You don’t have to have an iFIT membership to use this machine, though the fitness app’s library of classes and AutoAdjust capabilities unlock much of the EXP 10i’s potential. Without iFIT, you’ll be able to run in manual mode, but you won’t have access to any programming, as it has no preset workouts.
Is NordicTrack EXP 10i good for beginners?
Yes! The NordicTrack EXP 10i is an excellent option for beginners. With a max speed of 10 miles per hour and a 12-percent incline,..

Highly Anticipated CrossFit Open Workout 24.2 Showdown: Justin Medeiros Takes on Colten Mertens
The 2024 CrossFit Open is fast approaching. While the details for each of the three workouts that comprise the Open won’t be announced until their respective live announcements on the CrossFit Games YouTube channel, the elite athletes that will tackle the Open workouts first are raising the anticipation.
Workout 24.1 will feature Jeffrey Adler, Brent Fikowski, Alex Gazan, and Alexis Raptis on Feb. 29, 2024. One week later, on March 7, 2024, workout 24.2 will feature the head-to-head clash of two-time Fittest Man on Earth® Justin Medeiros and four-time CrossFit Games athlete Colten Mertens.
View this post on InstagramA post shared by CrossFit Games (@crossfitgames)
[Related: TYR Sport and CrossFit Games Athlete Dani Speegle Release Limited Edition CXT-1 Trainer]
Justin Medeiros
Medeiros made his CrossFit Games debut in 2020 and has had a remarkable career thus far. His four Games appearances comprise three podium finishes, including back-to-back wins in 2021 and 2022.
Medeiros’ career-best Open finish worldwide was third place in 2022. His average Open rank since 2019 is 51.5 — a mark of consistency. After a 13th-place finish at the 2023 CrossFit Games — the lowest rank of his Games career — Medeiros is expected to return with a renewed fire in 2024.
Colten Mertens
Mertens made his CrossFit Games debut in 2018, ranking 19th overall. He has competed at the Games every year since 2021, ranking 31st in 2021, 32nd in 2022, and a career-best 18th in 2023.
Mertens has competed in the Open every year since 2017 and has steadily improved his worldwide rank each year. From 2017 to 2023, he progressed his worldwide Open rank year-over-year from 5,923rd to 434th to 403rd to 108th to 18th to fourth to third. If Mertens can continue this progression, he should be a favorite to return to the Games in 2024 and challenge for a top 10 rank.
More CrossFit Content
- Haley Adams Will Compete in the 2024 CrossFit Season
- “I’m So Excited” — Inside the 2024 Adaptive CrossFit Season With WheelWOD’s Kevin Ogar
- YouTuber Will Tennyson Learns the Clean & Jerk the Hard Way From CrossFit Games Champion Mat Fraser
Feature image: @crossfitgames on Instagram
The post CrossFit Open Workout 24.2 Will Feature Justin Medeiros Vs. Colten Mertens appeared first on BarBend.

Fitness Enthusiast Delaney Wallace Shatters IPF Raw Total World Record, Lifting an Astounding 842.5 Kilograms at the 2024 Sheffield Championships
The International Powerlifting Federation (IPF) raw total world record in the 83-kilogram class has fallen. On Feb. 10, 2024, Delaney Wallace was one of 12 male athletes who competed at the 2024 Sheffield Powerlifting Championships in Sheffield, UK.
Competing against athletes of various weight classes, Wallace’s goal was to score as high a percentage of his weight class’s world record to top the Sheffield leaderboard. Ultimately, three male athletes shattered their weight class’s IPF raw world record, one of which was Wallace, who exceeded Russel Orhii‘s previous world record by 1.5 kilograms.
Below is Wallace‘s full eight-for-nine performance that comprised his new IPF total world record of 842.5 kilograms:
2024 Sheffield Powerlifting Championships Results — Delaney Wallace, 83KG
Wallace weighed in officially at 82.7 kilograms. The weights below are in kilograms:
-
Squat
- 282.5
- 297.5
- 305
-
Bench Press
- 192.5
- 202.5
- 207.5
-
Deadlift
- 310
- 330
- 335
- Total — 842.5 kilograms — IPF Raw World Record
[Related: Taylor Atwood’s “World Champion Mindset” When Lifting Heavy In Training]
View this post on InstagramA post shared by Delaney Wallace (@dlaneywallace)
[Related: Wascar Carpio (59KG) Raw Deadlifts 273 Kilograms in Prep for 2024 Powerlifting America Raw Nationals]
The men’s 83-kilogram class is among the most stacked in professional powerlifting. Wallace’s new IPF total world record is a monumental feat, as Orhii has been a dominant force in the division on the IPF stage for years. Wallace scored a £5,000 award for eclipsing the IPF world record.
Wallace also won £7,500 for his overall bronze medal finish. Despite breaking the IPF total world record in the 83-kilogram class, Wallace broke it by a smaller percentage than Gustav Hedlund and Jonathan Cayco, both 93-kilogram lifters, who broke their class’s IPF total world record.
2024 Sheffield Championships Results Women
- Agata Sitko (69KG) — 600 Kilograms, 109.3%
- Prescillia Bavoil (69KG) — 585 Kilograms, 106.6%
- Carola Garra (69KG) — 582.5 Kilograms, 106.1%
- Evie Corrigan (52KG) — 481 Kilograms, 103.2%
- Brittany Schlater (+84KG) — 710 Kilograms, 102.4%
- Sonita Kyen Muluh (+84KG) — 708 Kilograms, 102.1%
- Karlina Tongotea (76KG) — 610.5 Kilograms, 101.8%
- Jade Jacob (57KG) — 519.5 Kilograms, 101.4%
- Natalie Richards (57KG) — 516.5 Kilograms, 100.8%
- Tiffany Chapon (47KG) — 431.5 Kilograms, 100.7%
- Amanda Lawrence (84KG) — 647 Kilograms, 100.3%
- Noemie Allabert (52KG) — 447.5 Kilograms, 97.3%
Men
- Gustav Hedlund (93KG) — 895 Kilograms, 100.8%
- Jonathan Cayco (93KG) — 890.5 Kilograms, 100.6%
- Delaney Wallace (83KG) — 842.5 Kilograms, 100.2%
- Gavin Adin (93KG) — 887 Kilograms, 99.9%
- Panagiotis Tarinidis (66KG) — 702.5 Kilograms, 98.9%
- Timothy Monigatti (74KG) — 789.5 Kilograms, 98.7%
- Carlos Petterson-Grifith (93KG) — 875 Kilograms, 98.5%
- Anatolii Novopismennyi (105KG) — 925.5 Kilograms, 98.5%
- Carl Johansson (74KG) — 785.5 Kilograms, 98.2%
- Kyota Ushiyama (66KG) — 690 Kilograms, 97.1%
- Jesus Olivares (+120KG) —1,152.5 Kilograms, 96.6%
- Tony Cliffe (120KG) — 925 Kilograms, 94.5%
Looking outside the IPF, the all-time world record total in the 83-kilogram class is significantly heavier. Per Open Powerlifting, the current all-time raw total world record belongs to Jawon Garrison, who achieved 915.5 kilograms at the 2023 WRPF The American Pro 2.
More Powerlifting News
- How to Train Powerlifting Once Per Week (And Make it Count)
- 2024 Paris Paralympic Games Medals Revealed
- Zahir Khudayarov Squats 460KG for a Double in Wraps
Featured image: @dlaneywallace on Instagram
The post Delaney Wallace (83KG) Sets IPF Raw Total World Record of 842.5 Kilograms at 2024 Sheffield Championships appeared first on BarBend.
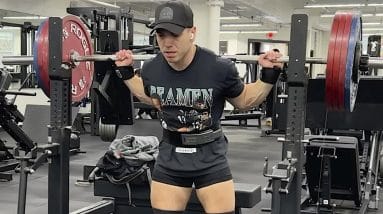
Unleashing Taylor Atwood’s Unbreakable Mindset: Mastering Heavyweights during Training
Taylor Atwood has dominated the 74-kilogram class in the International Powerlifting Federation (IPF) for years. A three-time world champion, Atwood set the squat and total world records at the 2019 IPF Classic World Championships (CWC).
At the 2021 United States Powerlifting (USAPL) Raw Nationals, Atwood posted a historic performance that included a 303-kilogram (668-pound) squat and a 340.5-kilogram deadlift for an 838.5-kilogram (1,849-pound) total to top the IPF rankings with 123.42 GL points*.
Since then, Atwood has been hard at work in the gym, focused on regaining his position atop the pack with a “World Champion mindset.” On Jan. 31, 2024, Atwood took to his YouTube channel to share what constitutes a “World Champion mindset,” and chatted with world-champion French team members about their mindsets before a heavy lift:
https://www.youtube.com/watch?v=ZUAgha2fWHk&ab_channel=TaylorAtwoodVideo can’t be loaded because JavaScript is disabled: Implementing a World Champion Mindset to Lift Heavy Weights | Heavy Squats and Deadlifts (https://www.youtube.com/watch?v=ZUAgha2fWHk&ab_channel=TaylorAtwood)
*The GL point formula is an attempt to compare the achievements of lifters of different body weights.
Atwood talked first to 66-kilogram world champion, Panagiotis Tarinidis amidst a group training session with members of Team France. Tarinidis expressed the feeling of being surrounded by greatness when training amongst such an accomplished team. That spurred him on to be part of that greatness and manifest his potential.
Two-time world champion Lya Bavoil was in the midst of a monster squat session of eight sets of two repetitions at 190 kilograms (419 pounds). Her motivation rises to meet the harder challenges:
The more I am challenged physically, the easier it is mentally.
Counterintuitively, Bavoil said that often, each set seems easier than the last as she fine-tunes her mental approach.
The third world champion that Atwood chatted to was Tiffany Chapon. Chapon, still a Junior, has been Open world champion three times and holds the Open world records in the 47-kilogram class in the squat, bench press, and total. Chapon shared that she visualizes the lift, knowing she is capable of it.
View this post on InstagramA post shared by Taylor Atwood (@t_atwood)
Bavoil, Tarinidis, and Chapon will all compete at the 2024 Sheffield Powerlifting Championships in the UK. Tune into SBD Apparel’s YouTube channel on Feb. 10, 2024, to see how their varying mindsets help them in competition.
Atwood is preparing for Powerlifting America (PA) Raw Nationals in Reno, NV, on March 15, 2024. There, he will face off against Austin Perkins for the first time since 2021. Atwood was victorious in that encounter but Perkins has performed extraordinary strength feats in training since.
Featured image: @t_atwood on Instagram
The post Taylor Atwood’s “World Champion Mindset” When Lifting Heavy In Training appeared first on BarBend.
Tom Haviland Has the Potential to Become the World’s Strongest Man, According to Fitness Expert Mitchell Hooper
Australian social media sensation Tom Haviland stands at a colossal 6’8″ and is working toward a body weight of 400 pounds while maintaining a visible six-pack. Unlike his contemporaries, Haviland avoids the limelight, training at his home gym and outdoors without putting his face on camera.
Haviland’s training videos received the attention of podcaster Joe Rogan, who argued that Haviland might be the strongest man in the world. Haviland has trained with the 12-time Australia’s Strongest Man champion Derek Boyer but has never competed in a pro strongman contest.
On Jan. 30, 2024, the reigning World’s Strongest Man (WSM) champion Mitchell Hooper published a video on his YouTube channel wherein he compared Haviland’s best lifts to his own to determine if Haviland could outperform him if Haviland competed at the 2024 WSM contest, scheduled for May 1-5, 2024 in Myrtle Beach, SC. Check it out below:
https://www.youtube.com/watch?v=jj1BbcmUNfg&ab_channel=MitchellHooperVideo can’t be loaded because JavaScript is disabled: Could Tom Haviland Win World’s Strongest Man? (https://www.youtube.com/watch?v=jj1BbcmUNfg&ab_channel=MitchellHooper)
“Haviland is not just a great deadlifter and bench presser; I’ve seen him do everything,” Hooper said. “I can’t pick out one thing he can’t do really well.”
7 Lifts Comparing Haviland vs. Hooper
Below is how Haviland and Hooper stack up across seven lifts:
1. Yoke Walk
In one of Haviland’s Instagram posts, he carried a 1,200-pound homemade yoke on his shoulders. Hooper has lifted up to 1,350 pounds on the yoke, surpassing Haviland’s best.
Hooper highlighted that Haviland’s equipment was not as stable, implying that Haviland could likely achieve higher numbers with a better kit. However, Hooper concluded that he would likely outperform Haviland in a yoke event in a strongman contest.
2. Bicep Curls
Haviland has a 235-pound barbell biceps curl personal best. Hooper admitted he cannot curl anywhere close to Havliand’s PR, conceding this lift to tie the comparison one to one.
3. Zercher Carry
Haviland performed a 626-pound Zercher carry for two sets of 30 seconds of continuous walking.
“This is basically Conan’s wheel. For context, the WSM weight of the Conan’s Wheel is 440 pounds (200 kilograms),” said Hooper. “I’ve gone up to 500 pounds on the Zercher [carry], and this is another 100 pounds and some off pounds on top of that.”
View this post on InstagramA post shared by Mitchell Hooper (@mitchellhooper)
Hooper called it a “big 50/50” chance on whether he could match Haviland’s personal best on the Zercher carry. Hooper assessed lift three as a draw.
4. Stone to Shoulder
Haviland has lifted a 275-pound stone-to-shoulder, walked five steps, performed a set of squats, moved it to the other shoulder, and repeated for another set.
“I find it hard just to stabilize while standing [with a stone on the shoulder], never mind squatting,” Hooper said. “But at 120 to 125 kilograms, I think it would be manageable for me.”
Hooper ended this comparison in a draw as well. Predicted record after four lifts: 1-1-2.
5. Deadlift
Haviland pulled a 926-pound deadlift without a suit or a specialized deadlift bar. Hooper hoisted a 981-pound deadlift at the 2023 Arnold Strongman Classic, which Hooper won, suggesting a close comparison but leaning towards a draw due to the conditions of Haviland’s lift. Predicted record after five lifts: 1-1-3.
6. Squats
Haviland performed a 692-pound squat for multiple reps. Hooper’s best squat is about 810-815 pounds for a double in knee sleeves, making this another close comparison that Hooper suggests yet another draw. Predicted record after five lifts: 1-1-4.
7. Clean to Zercher Catch and Squat
Haviland has successfully completed a Zercher catch and squat with weights up to 485 pounds. Hooper accepted he could not clean 485 pounds, indicating Haviland would outperform him in this lift.
 Image via @tom_haviland on Instagram
“Haviland has got head-to-toe strengths,” Hooper said. “I can’t pick out a thing where I go like, ‘he’s not even close.’” Hooper’s predicted record against Haviland after seven events: 1-2-4.
Hooper concluded that if Haviland were to fully commit to training for the World’s Strongest Man competition, Haviland would not only Haviland contend for the Finals, but potentially win the coveted title.
Hooper’s next strongman contest will be the 2024 Arnold Strongman Classic, slated for March 1-2 in Columbus, OH, where he will defend his title against former ASC and WSM champs Martins Licis and Hafthor Björnsson. Two-time WSM winner Tom Stoltman and 2020 WSM Oleksii Novikov are the other top contenders in the lineup.
Featured image: @tom_haviland on Instagram
The post Mitchell Hooper Thinks Tom Haviland Can Win the World’s Strongest Man appeared first on BarBend.
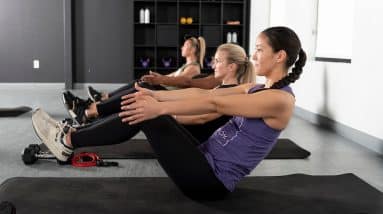

Cydney Gillon Reveals Expert Contest Prep Tips for Natural Bodybuilders
Seven-time reigning Figure Olympia champion Cydney Gillon knows how to tune a physique to compete at the top of the sport. While most bodybuilders who compete on the Olympia stage are enhanced, contest prep can be similar for natural athletes.
On Jan 23, 2024, Gillon shared seven contest prep tips for natural bodybuilders on her YouTube channel based on her nearly two decades of experience in the sport. Learn them below:
https://www.youtube.com/watch?v=nllG6YP4YRk&ab_channel=CydneyGillonVideo can’t be loaded because JavaScript is disabled: 7x Mrs. Olympia, Cydney Gillon, shares tips for bodybuilding competitors who want to prep naturally (https://www.youtube.com/watch?v=nllG6YP4YRk&ab_channel=CydneyGillon)
[Related: Nick Walker Will Enter the 2024 New York Pro Bodybuilding Show]
Natural vs. Enhanced Bodybuilding Coaching
“If you bring it, you bring it, and that’s the person who will win,” said Gillon early in the video. Determination is critical for success in competitive bodybuilding for both natural and enhanced athletes. Gillon affirms that selecting the right coach to help achieve one’s physique goals is a top priority. For example, coaches who know how to build muscle naturally to the target body composition will benefit natural bodybuilders.
Per Gillon, one size doesn’t fit all. Patience is required for effective physique gains. Recognizing weaknesses and being objective about them can help maintain a healthy mentality for the years required to achieve bodybuilding success. Gillon’s running training lasted for four years to establish a base of conditioning and power to support her bodybuilding training before entering competitions.
Gillon acknowledged genetics’ role in bodybuilding as it pertains to muscular development — another nod toward why proper coaching and strategic programming are necessary to offset any genetic shortcomings an athlete might have.
 Image via @vytamin_c on Instagram
[Related: Rubiel “Neckzilla” Mosquera Is Out of the 2024 Arnold Classic]
Supplementation, Sleep, & Stress
Gillon said many factors play equally valuable roles in contest prep. In addition to training, proper supplements for recovery, getting enough sleep, reducing stress, and balancing gut health are all critical for performing at 100 percent.
Creatine is Gillon’s number one supplement for recovery, followed closely by hydration and glutamine to support her running and cardio volume. Gillon consumes amino acids early in the off-season and tapers them off a few weeks before a show to refine her aesthetics. For physiological and mental stress, Gillion relies on herbal supplements like ashwagandha, Rhodiola Rosea, and adaptogens.
Gillon built the requisite muscle in the correct proportions for Figure competitions using amino acids and creatine in combination with correct coaching, recovery, and supplementation.
Contest Prep Length
Some athletes achieve better results from a long-term prep of a year or longer; others see results six months or fewer. Depending on how one feels mentally during a diet or with ramped-up cardio, adding or shaving prep months between shows can impact metabolism and body composition.
Cutting & Bulking Tips
Gillon implored athletes to avoid crash diets when cutting before competition. She believes that crash diets create too challenging of an environment for the body to maintain the muscle roundedness that looks good on stage.
 Image via @vytamin_c on Instagram
Additionally, excess cardio can flatten certain body parts, like the glutes. Therefore, she recommends keeping cardio brisk, not blistering, especially when cutting calories. The type of cardio can also impact the body. Steady-state cardio might not create enough energy expenditure, while HIIT might be too exhausting. Gillon urged not to exert the body into a catabolic state (when the body breaks down its muscle; opposite of anabolic).
Losing body fat at a prep’s end is the goal. Supplementation and the proper cardio/diet (read: calories in vs. out) are the most significant contributing factors. For Gillon, BCAAs and EAAs worked best during a cut.
Post-show, Gillon recommends reverse dieting — gradually increasing caloric intake to boost metabolism. Adjusting gradually can help correct hormone imbalances created by aggressive dieting and cutting.
Gillan’s closing IP was to be goal-focused rather than gratification-focused.
More Bodybuilding Content
- These Are the 10 Best Dumbbell Exercises for Bodybuilding
- How to (Properly) Combine Powerlifting and Bodybuilding Training
- The Ultimate Guide to Building Your Own Bodybuilding Workout Plan
Featured image: @vytamin_c on Instagram
The post Cydney Gillon’s Contest Prep Tips for Natural Bodybuilders appeared first on BarBend.