
7 Effective Stretches to Relieve Knee Pain: Expert-Backed Techniques for Fitness Enthusiasts
Knee Pain Stretches
Knee pain can be a debilitating issue that affects people of all ages and lifestyles. Whether it’s caused by an injury, overuse, or underlying medical conditions, finding relief is essential for maintaining an active and healthy life. While consulting a healthcare professional is crucial for proper diagnosis and treatment, incorporating targeted stretches into your routine can significantly alleviate knee pain and improve mobility. In this blog, we’ll explore a range of knee pain stretches that can help you regain comfort and flexibility.
How Stretching Can Help With Knee Pain
Stretching can be an effective and beneficial approach to managing knee pain. While it might not directly address all the underlying causes of knee pain, it can significantly alleviate discomfort, improve flexibility, and promote overall joint health. Here’s how stretching can help with knee pain:
- Improved Flexibility: Tight muscles around the knee joint can contribute to pain and discomfort. Certain knee exercises and stretches can help lengthen and relax these muscles to reduce tension and enhance flexibility. When your muscles are more flexible, they’re less likely to pull on your knee joint and cause discomfort.
- Better Range of Motion: Knee pain can sometimes lead to reduced range of motion in the joint. Gentle stretching helps to gradually increase the joint’s mobility by releasing tightness in the muscles and connective tissues around it.
- Better Blood Circulation: Stretching also increases blood flow to the muscles and tissues around the knee.
- Reduced Muscle Imbalance: Muscular imbalances around the knee can contribute to improper joint alignment and pain. Stretching both the muscles that are overly tight and those that are weak can help restore balance, which can lead to better knee alignment and reduced discomfort.
- Injury Prevention: Regular stretching can help prevent injuries that may exacerbate knee pain. When muscles and tendons are more flexible and less tense, they are less likely to tear or strain during physical activities, reducing the risk of further knee complications.
 6 Knee Pain Stretches
The following stretches can provide relief from chronic knee pain and promote better joint health:
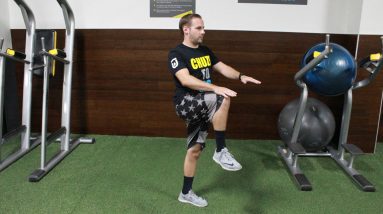
Quadriceps Stretch
The quadriceps muscles play a vital role in knee stability and movement. When they’re tight or imbalanced, they can contribute to knee pain. The quadriceps stretch is an excellent way to alleviate tension in these muscles.
How to do it:
- Stand near a wall or hold onto a stable surface for balance.
- Grab your ankle and gently pull it towards your glutes. Make sure to keep your knees close together.
- Hold the stretch for 20-30 seconds, feeling a gentle pull in the front of your thigh.
- Release and switch to the opposite leg.
- Repeat the stretch 2-3 times on each leg.
Hamstring Stretch
Tight hamstrings can also contribute to knee discomfort. Stretching these muscles can help relieve pressure on the knees and improve overall leg flexibility.
How to do it:
- Sit on the floor with one leg extended straight and the other leg bent so the sole of your foot rests against the inner thigh of your extended leg.
- Reach forward toward your toes, keeping your back straight.
- Hold the stretch for 20-30 seconds while feeling the gentle pull along the back of your thigh.
- Switch to the other leg and repeat the stretch.
- Perform the stretch 2-3 times on each leg.
Calf Stretch
Tight calf muscles can affect how the knee joint functions. Stretching the calf muscles can help reduce tension and promote better alignment in the knee.
How to do it:
- Stand facing a wall and place your hands on the wall at shoulder height.
- Step one foot back and keep it straight while bending the front knee.
- Lean into the wall while keeping your back heel on the ground.
- You should feel a gentle stretch in your calf. Hold for 20-30 seconds.
- Switch to the other leg and repeat the stretch.
- Perform the stretch 2-3 times on each leg.
IT Band Stretch
The iliotibial (IT) band is a thick band of tissue that runs along the outside of the thigh. When tight, it can pull on the knee joint and cause discomfort. Stretching the IT band can help relieve this tension.
How to do it:
- Stand upright with your feet close together.
- Cross your right leg over your left and reach your right arm over your head.
- Gently lean to the left side until you feel a stretch along the right side of your body.
- Hold the stretch for 20-30 seconds.
- Switch to the other side by crossing your left leg over your right and reaching your left arm over your head.
- Perform the stretch 2-3 times on each side.
Quad and Hip Flexor Stretch
Tight hip flexors can contribute to knee pain by altering the mechanics of the knee joint. This stretching exercise targets both the quadriceps and hip flexors.
How to do it:
- Kneel on the floor with one knee on a cushion or soft surface.
- Step the other leg forward, keeping the knee directly above the ankle.
- Gently push your hips forward while keeping your back straight.
- You should feel a stretch in the front of your hip and thigh. Hold for 20-30 seconds.
- Switch to the opposite leg and repeat the stretch.
- Perform the stretch 2-3 times on each leg.
Child’s Pose Stretch
The Child’s Pose is a relaxing stretch that can help alleviate knee pain by gently releasing tension in the lower back, hips, and knees.
How to do it:
- Start on your hands and knees in a tabletop position.
- Sit back onto your heels, keeping your arms extended in front of you.
- Lower your forehead to the floor and relax.
- Feel the stretch in your lower back, hips, and thighs.
- Hold the stretch for 30-60 seconds.
A Healthier You with Chuze Fitness
At Chuze, we understand the importance of proper stretching for overall health and well-being, whether you’re trying to relieve joint pain or prevent injury. Chuze Fitness is more than just a gym – it’s a supportive community. With state-of-the-art facilities, experienced trainers, and a wide range of fitness classes, Chuze provides an environment where you can work on your overall health, including addressing knee pain through targeted stretches. Remember, your pursuit of wellness is enhanced when you have a like-minded community backing you. So, find a location near you today to get started!
 Reviewed By:
Ani is the Vice President of Fitness at Chuze Fitness and oversees the group fitness and team training departments. She’s had a 25+ year career in club management, personal training, group exercise and instructor training. Ani lives with her husband and son in San Diego, CA and loves hot yoga, snowboarding and all things wellness.
The post Knee Pain Stretches appeared first on Chuze Fitness.
Introducing Brendon Burchard: A Renowned Fitness Model and Health Enthusiast
Il est l’un des conférenciers motivateurs les plus regardés, cités et suivis de l’histoire.
Auteur de trois best-sellers du New York Times, il a partagé la scène avec le Dalaï-Lama, Sir Richard Branson, Tim Ferriss, Tony Robbins et avec beaucoup d’autres influenceurs éminents dans ce domaine.
Les magazines SUCCESS et O, The Oprah Magazine l’ont désigné comme étant l’une des personnes les plus influentes dans le développement personnel ; Forbes l’a nommé premier coach en haute performance du monde, et Larry King l’a élu meilleur entraîneur en motivation du monde.
Il a également fondé et est le PDG de GrowthDay, la plate-forme de développement personnel n° 1 au monde, et la toute nouvelle offre Mindset de BODi.

La passion de Brendon pour le développement personnel et le coaching a commencé après avoir survécu à un accident de voiture à l’âge de 19 ans. Cet événement traumatique l’a incité à se poser les questions qui se trouvent encore aujourd’hui à la base de son travail et de sa pratique. « Ai-je vécu ? Ai-je aimé ? Avais-je de l’importance ? » De ces questions, Brendon a réalisé un travail autour des thèmes de la vitalité, la connexion et de la signification.
Plus de 3 millions d’élèves ont suivi les plus de 20 cours en ligne sur le développement personnel de Brendon dans plus de 100 pays sur des sujets, tels que la motivation, la confiance, les habitudes, la productivité et l’influence. Ses séminaires en direct, définis comme « à voir à tout prix » par Entrepreneur Magazine, font salle comble dans le monde entier.
Aujourd’hui, alors que Brendon guide beaucoup des influenceurs les plus suivis, il continue chaque jour à créer du contenu sur le développement personnel. Et maintenant, les membres de BODi pourront accéder à ce contenu et débloquer des séances de coaching quotidiennes créées par Brendon.
Reçois dès aujourd’hui motivation et inspiration avec un abonnement à GrowthDay.
The post Présentation de Brendon Burchard appeared first on BODi.

7 Effective Steps to Gain Weight with a Lightning-Fast Metabolism
A fast metabolism can be a blessing and a curse. Eating more of the right foods is challenging. Volume and consistency are two of the most important variables, when it comes to gaining weight with a fast metabolism. And here, you thought volume and consistency just applied to your training program.
Someone who has a hard time gaining weight due to a fast metabolism, is often referred to as a hardgainer. A hardgainer is defined as someone who is trying to build more muscle but finds it extremely challenging to put on any weight or gains, regardless of the effort they may be attributing, due to their metabolic rate. The most common reasons why hardgainers have a difficult time achieving their goals, include not eating enough, lack of recovery time, fast metabolism, and not engaging in the right type of physical activity or bodybuilding program.
Often times, the issues that effect a true hardgainer may go deeper than just the required elements for building more muscle mass, such as nutrition protocol and training regimen. Those issues may be rooted in genetic predispositions and difficulties affecting muscles and muscle protein synthesis. Genetics of course and metabolism again, also play a huge role in metabolic rate.
How Metabolic Rate Influence Weight Gain
Your metabolic rate, or the rate at which you metabolize and convert food into energy, depends on several factors. Some people can eat a ton of calories and not gain a single pound. While others can’t even look at a milk shake without gaining weight.
Those with a slow metabolism, will need fewer calories to gain weight, whereas those with a fast metabolism, will require more calories and need to be in a caloric surplus (eat more calories than they expend through the day), to gain weight.
To know how much you need to eat, to gain weight, you’ll need to know your total daily energy expenditure as well as your basal metabolic rate. You can calculate both those with our FREE calculators.
FREE BMR CALCULATOR
FREE TDEE CALCULATOR
How To Gain Weight With A Fast Metabolism 1. Consume More Calories
All you need to do is eat more! And if it were that easy you wouldn’t be reading this article. However, consuming more calories, is not necessarily the same thing as eating more food. Although, yes you do also need to eat more food.
More calories will translate into more added energy and weight gain overtime. Making small incremental adjustments to your nutrition plan, will help make the biggest changes and gains, in order to build more muscle mass.
- Add Sauces And Spreads to Your Meals (I.e. BBQ, Mayo, Jam, Nutella, Peanut Butter, Syrup etc.)
- Drink More Juice or energy and calorically dense drinks
- Add carbohydrates and fats to your meals and shakes
- Add Proteinand Carb Shakes Between Meals
Implementing small changes to your diet, in addition to more volume, will increase your caloric intake and get you where you need to be faster.
2. Increase Meal Frequency
Yes, consuming more calories is related to increasing meal frequency. However, if you can eat more consistently throughout the day, you’ll train your body to adjust to the caloric increase and use it more efficiently. It can be very difficult to increase portion size a few times per day, to the point that helps you gain weight. Thus, if you can break up how much you eat, into more frequent meals, you’ll have an easier time adding more calories and increasing weight.
3. Track Your Food Intake
Part of the challenge is knowing exactly how much food you’re really eating. You might think you’re constantly eating a high volume of food, but until you track it, you won’t be entirely sure if you’re getting the quality calories you need to increase your weight with a fast metabolism. The best and most efficient way to gain weight and size, is to know your food intake. Use an app, like myfitnesspal, or hire a nutrition coach from The Swole Kitchen and use a customized approach to tracking your food intake.
Once you start tracking your food, a good way to measure your gains is by increasing your carb intake by 40g per week, until you start noticing a change. Once you start adding more weight, you’ve found a good threshold or carb goal to stick with to stack on more size.
Best practice also calls for using a food scale. Make sure you are using a food scale, to get a better understanding of the amount of food you’re eating. These numbers will be very useful, as you start to increase your food intake, and know exactly how much you need to eat, to increase your weight.
4. Be Consistent
If the goal is to build more muscle, then you have to be consistent especially when the work you put in can evaporate quickly with a fast-moving metabolism. Consistently eating at your recommended caloric goal, hitting your macros, supplementation, and following your training program, is the key to ultimately reaching your goals.
5. Supplementation
With the right supplements you’ll be able to incrementally increase your size and strength. Several studies haves shown that athletes who participate in resistance training programs, or high intensity functional training, combined good nutrition and proven muscle building supplements can substantially increase muscle mass, body weight, strength, and overall performance.
Research has shown that there are several supplements proven to help increase muscle mass, such as Kre-Alkalyn Creatine, Citrulline Malate, Beta-Alanine, Whey Protein Isolate, and Clean Carbs.
RELATED ARTICLE The Best Supplements To Build More Muscle Mass And Strength
That being said, supplements can be tricky. Most supplement brands will under dose the proven ingredients you need to improve your performance, by including proprietary blends. A proprietary blend, includes several ingredients, and does not list the amounts of each ingredient, but only a lump sum, therefore you don’t really know how much of each ingredient you’re consuming.
For example, if you’re using a pre-workout product and it only has 1-2g of Beta-Alanine or Citrulline Malate, you really need 3.2g and 5-6g in order to derive any real strength or performance benefit. When you’re considering a supplement to purchase in order to help with your goals, pay attention to the label and make sure that it’s proprietary blend free, made with proven ingredients, and has the correct clinical dose to ensure you get the results you want, like Swolverine.
6. Pick The Right Training Program
If you have a fast metabolism, you will need to put more effort into training, than the average person to gain weight. While heavy weight is necessary to stimulate muscle growth and increase size, volume is crucial in order to stack on more mass.
Gradually increasing work volume through a linear progression and periodization will help improve strength gains and add more size over time.
Bodybuilding is systematically designed to increase gains through periodization, ensuring progressive overload, performed with traditional split training isolating specific muscle groups, designated to certain days (i.e. back and biceps, chest and triceps, legs and shoulders). Like I said before, hardgainers need more volume. The specific training modality and program I would recommend is High-Intensity Functional Bodybuilding (HIFB).
HIFB incorporates this same type of training split, but with higher volume, increased intensity, shorter rest intervals, and added supersets with accelerated functional movements.
HIFB is performed at 80-90% intensity, 3-5 sets, 10-16 reps with .30-1-minute rest intervals. Fundamentally bodybuilding and HIFB are very similar, the only difference is the training objective. Instead of just aesthetics, we’re adding an aspect of athleticism and performance.
RECOMMENDED PROGRAM High Intensity Functional Bodybuilding VL II
7. If You Need A Gainer, Do It
Sometimes eating more food, and adding protein shakes just won’t cut it. If that’s the case, and you still are having a hard time gaining weight, invest in a mass gainer supplement, and or start adding in high caloric foods, just for the calories. When you have a fast metabolism, you need to eat highly dense caloric foods, sometimes to start seeing results. Adding a doughnut, poptarts, or other foods that pack a ton of carbohydrates and fat, will help with adding more weight.
Need Help With Optimizing Your Diet And Nutrition Plan To Finally Get The Results You’ve Been Waiting For?
The Swole Kitchen is an exclusive membership opportunity for those who are looking to pursue a performance-driven lifestyle. By combining wellness consulting, nutritional lifestyle improvement, and 1:1 customized nutrition plans to our members, our programs aim to optimize human potential. In each of our programs, you’ll receive guidance to reclaim your health, fuel your lifestyle, and pursue performance ambitions, all while learning how to make nutritional decisions from a place of self-trust and intuition. All of our coaches are committed to providing the highest level of results-driven wellness to our members.

SWOLVERINE IS AN ENDURANCE ATHLETE AND ACTIVE LIFESTYLE BRAND. MADE FOR THE ELITE ATHLETE, AND THE STRONG-WILLED OUR PRODUCTS WERE DESIGNED TO FUEL YOUR ATHLETIC PERFORMANCE. WE PERFORM WHEN YOU PERFORM.
We believe that everyone can optimize not only their athletic performance but their human potential. The way we believe we can optimize performance is through transparency, clinically effective doses, and clinically proven ingredients with evidence-based outcomes. We provide the nutrients you need to power your active lifestyle.
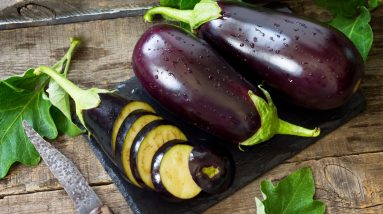
Unveiling the Incredible Health Benefits of Eggplant: The Purple Superfood
Eggplants, also known as aubergine, brinjals, or baingan, are glossy purple fruits that are often prepared and treated like vegetables. They are spongy. It is a common ingredient in many cuisines, primarily Mediterranean ones.
Historians claim that eggplants have been around since 50 BCE. In the past, it mainly served as an ornamental item rather than a food item. Travellers brought the plant’s seeds to America, where a British gardener planted them. The plant produced tiny, white, oval-shaped fruits that resembled chicken eggs, thus the name.
Eggplants come in an assortment of colours and shapes and provide numerous health benefits. This article discusses everything there is to know about eggplants.
Nutritional Profile of Eggplant
With a high water content, eggplant is low in calories and fat. It contains some fibre, protein, and carbohydrates as well. Compared to the white and green types, the purple varieties generally show a higher protein content. Significant concentrations of vital amino acids, including leucine, valine, lysine, and isoleucine, are also present in purple eggplant.
A 100-gram serving of raw eggplant contains the following nutrients.
- Calories: 25 kcal
- Water: 92.3 g
- Protein: 0.98 g
- Fibre: 3 g
- Fat: 0.18 g
- Carbohydrate: 5.88 g
- Calcium: 9 mg
- Iron: 0.23
- Magnesium: 14 mg
- Phosphorus: 24 mg
- Potassium: 229 mg
- Vitamin C: 2.2 mg
- Vitamin K: 3.5 µg
- Sodium: 2 mg
- Folate: 22 µg
Potential Health Benefits of Eggplants Helps in Weight Loss
Since eggplant is low in calories and high in fibre content, it is an excellent addition to a weight-loss-friendly diet. Fibre significantly aids weight loss. Fibre promotes fullness and satiety by moving through the digestive tract slowly. It reduces calorie intake and helps to maintain a calorie deficit for weight loss. Therefore, eggplant can be a healthy alternative to higher-calorie ingredients.
Helps Treat Anaemia
WHO estimated that 1.92 billion people globally suffer from anaemia. Patients who have anaemia suffer from headaches, fatigue, depression, migraines, weakness, and cognitive malfunction. Eggplants contain a fair amount of copper and iron. Copper with iron assists in increasing the count of red blood cells. Eating foods that have iron will help in managing anaemia.
Helps Fight Cancer
Eggplant is rich in antioxidants. Investigations show bioactive components in eggplants help prevent cancer. Chlorogenic acid is an antioxidant found in eggplants that is antiviral and antibacterial and helps fight against cancer. Moreover, solasodine rhamnosyl glycosides (SRGs) are a unique plant compound found in eggplants that have anti-cancer properties.
Supports Bone Health
Eggplants are rich in calcium and magnesium, both necessary for strong bones. Moreover, it is rich in vitamin K and copper, which prevents osteoporosis and strengthens bones. The collagen present in this vegetable also assists in the connective tissues and bone formation.
Supports Heart Health
Eggplants may help lower the risk of heart disease because of their antioxidant content. By lowering triglyceride and LDL cholesterol levels, eggplants enhance heart health. Nevertheless, the majority of research now only involves tests on animals. More research is necessary to determine how eggplants could improve human heart health.
Summary
Based on their antioxidant content, eggplants may help lower heart disease. Furthermore, eggplants are a high-fibre, low-calorie substitute for higher-calorie ingredients in recipes. This fibre in eggplant can help reduce calorie intake by promoting satiety and fullness. In addition, eggplants are rich in antioxidants. It has chlorogenic acid, solasodine rhamnosyl glycosides (SRGs), etc., that prevent and fight against cancer cells. It also supports bone health and manages anaemia.
Healthy Eggplant Recipes
It is easy to include eggplant in the diet or meal plans because of its incredible versatility. It tastes best when baked, roasted, grilled, or sautéed and is topped with a bit of olive oil and seasoning. Here are a few simple recipes to try:
Roasted Eggplant
Servings: 4
Preparation time: 5 minutes
Cooking time: 20 minutes
Ingredients
- Eggplant: 1 whole (cut into ¾-inch cubes)
- Olive oil: 2 tbsp
- Salt: to taste
- Black pepper: ½ tsp
Method of Preparation
- Preheat the oven to 425°
- Take a large bowl and toss cubed eggplant with oil, salt and pepper.
- Place cubed eggplants in a baking paper and bake for 20-25 minutes. Remember to flip the eggplants after 15 minutes.
- Serve immediately.
Air-fryer Eggplant Fries
Servings: 6
Preparation time: 15 minutes
Cooking time: 10 minutes
Ingredients
- Eggs: 2 large
- Eggplant: 1 medium
- Chilli flakes: to taste
- Cheese: 2 tbsp
- Black pepper: to taste
- Garlic salt: to taste
Method of Preparation
- Preheat the air fryer to 375°
- Whisk egg, mix cheese, and seasoning and keep it aside.
- Cut eggplants into thick slices and dip in egg cheese mixture.
- In the greased tray, place the thickly sliced eggplants and cook for 5-7 minutes or until golden brown.
Risks of Overconsumption
The recommended amount of eggplants per day is less than 100 grams daily. One can get almost 7% to 10% of the daily fibre needs from one cup of eggplant. Overconsuming eggplants may have a few adverse effects. Such as:
Kidney Stones
Due to its high oxalate content, eggplant should be consumed in moderation by those who suffer from kidney stones. The crystal formations of calcium oxalates are extremely painful and inflammatory.
Allergic Reactions
Allergic reactions are one of the most frequent adverse effects of eggplant. Although it is uncommon, eating eggplant may induce anaphylaxis in certain people. Additional potential allergic reactions to eggplant include rashes or skin irritation, gastrointestinal pains, asthma, or trouble breathing.
Solanine Poisoning
Eggplants naturally contain a poison called solanine. Vomiting, nausea, and sleepiness are all signs of solanine toxicity that can result from overconsumption. However, to reach potentially dangerous solanine levels, one would need to consume more than twelve whole eggplants (at least!) in a single sitting.
Iron Deficiency
Iron is bound to nasunin, a kind of anthocyanin found in eggplant peels, which extracts iron from the cells. It may impair the body’s absorption of iron and result in a deficiency.
Summary
Overeating eggplants might result in solanine toxicity and allergies. The compound found in eggplant peels called nasunin, a kind of anthocyanin, binds to iron and extracts it from the cells. It can lower iron absorption and result in an iron shortage in the body. Eggplants naturally contain a poison called solanine. Vomiting, nausea, and sleepiness are all signs of solanine toxicity that can result from overeating. In addition, because of the oxalates they contain, kidney stones can also develop. Though uncommon, another potential eggplant side effect is an allergic reaction. It might trigger hives, rashes, skin irritation, anaphylaxis, swelling, and abdominal cramps.
HealthifyMe Suggestion
If you aren’t a fan of eggplants, instead of cooking them separately, you can combine eggplants with other foods to improve their palatability. For example, a non-vegetarian could add cubes of eggplant along with root veggies while cooking a chicken stew or add eggplants with mince in a tomato base as seen in a Shepherd’s Pie. A vegetarian could make a brinjal spiced mash (bharta) and pair it with pooris or stuffed parathas rather than plain rotis or rice.
The Final Word
It’s no secret that eggplants are an excellent addition to almost any meal, and there are many different varieties to pick from. Eggplant’s high fibre content is an ideal way to support gastrointestinal health because fibre is essential to a balanced diet. There are other possible health advantages as well. But it’s also necessary to incorporate a range of veggies in your diet to ensure you are getting a variety of nutrients.
Disclaimer: The purpose of this article is just to disperse knowledge and raise awareness. It does not intend to replace medical advice from professionals. For further information, please contact our certified nutritionists Here.
Frequently Asked Questions
Q. What is the nutritional content of eggplant?
A. Eggplant is a rich source of antioxidants. Rich in calcium, iron, potassium, phosphorus, magnesium, folate, and vitamin C. It provides several types of amino acids, such as leucine, isoleucine, valine, tryptophan, arginine, histidine, lysine, etc.
Q. Can eggplant aid in weight management and weight loss?
A. Absolutely, eggplants can be a great addition to your weight loss diet plan if consumed in moderation. It is high in fibre and phenolic compounds like antioxidants. In various studies, fibre and antioxidants show significant results in fat reduction.
Q. How does eggplant contribute to heart health?
A. Various studies have demonstrated eggplant has cardioprotective properties. It reduces the risk of stroke, heart attack, CAD, etc. Moreover, eggplants assist in increasing the red blood cells that deliver oxygenated blood throughout the body.
Q. Are there specific antioxidants in eggplant that provide health benefits?
A. Eggplants are rich in anthocyanins and phenolic compounds. The peel of eggplant is a rich source of antioxidants, including nasunin, lutein, and zeaxanthin. Moreover, it offers vitamins A and C. These have tremendous health benefits, such as fighting free radicals, supporting eye health, reducing inflammation, mental health improvements, etc.
Q. What is the impact of eggplant on blood sugar levels and diabetes management?
A. Eggplants are rich in fibre. Fibre assists in lowering blood sugar levels by slowing the rate of digestion and absorption of glucose in the body. In addition, the glycemic index of eggplant is just 15 (below 55 is low GI). Therefore, eggplants are a fantastic option for patients with diabetes.
Q. Can eggplant be beneficial for digestive health and gut function?
A. Certainly, since eggplants are rich in fibre, they benefit digestion and bowel regularity and improve gut health. However, if you have a weak digestive system, it is recommended to avoid eggplant, as it may cause gas or bloating issues.
Q. How is eggplant used in traditional medicine and herbal remedies?
A. In Ayurveda, eggplant root has been used to treat diabetes and asthma since ancient times. Eggplant is a rich source of potassium and fibre that helps to treat several diseases.
Q. What are the potential benefits of eggplant for skin and hair health?
A. Healthy enzymes included in eggplants stimulate hair follicles, resulting in the formation of healthy hair. Additionally, high in water content, aubergine aids in restoring and softening those dry hairs. To keep your hair’s natural shine and gloss, wash it with eggplant juice.
Q. Can eggplant be part of a vegetarian or vegan diet for essential nutrients?
A. On a vegan diet, eggplant is a delightful dish to eat. It can even taste similar to meat, depending on how it is prepared and seasoned. Some of the most delicious ways to consume eggplant are tofu with roasted eggplant, vegan eggplant meatballs, etc.
Q. How should eggplant be prepared and cooked to maximise its health benefits?
A. Some of the best ways to consume eggplant to maximise its health benefits include grilling, roasting, steaming, and braising. It is best to avoid deep frying.
Q. Are there any potential side effects or risks associated with eggplant consumption?
A. Although eggplants are good for health, it has a few potential side effects. Having too much eggplant may cause allergies, solanine poisoning, etc. Eggplants contain oxalates, which may lead to kidney stone formation.
Q. What is the role of eggplant in reducing inflammation and pain?
A. Eggplants contain anthocyanins, antioxidants that reduce inflammation and pain. However, since every individual is different, for some, inflammation and pain might flare up, and for some, it might decrease.
Q. Can eggplant help with brain health and cognitive function?
A. Eggplant is a rich source of phytonutrients that improve overall brain health and is well-known to increase cognitive ability. These phytonutrients reduce free radicals that cause disease and protect the brain from getting affected.
Q. How is eggplant used in various global cuisines and recipes for health benefits?
A. Eggplants are added in various cuisines, baked, grilled and sauteed. Brining the eggplant (soaking in salted water) will also make the flesh super creamy. It also helps cut the bitterness.
Research Sources
Data by the US Department of Agriculture on eggplant
Cardioprotective properties of raw and cooked eggplant (Solanum melongena L)
Eggplant fruits protect against DNA damage and mutations.
Effects of Dietary Fibre and Its Components on Metabolic Health

Dr. Gabrielle Lyon Debunks Online Fitness Myths on The Mike O’Hearn Show
The internet is a wellspring of knowledge. The vast majority with access to it turn to Google and social media for answers to any questions they may have about anything. That is typically the case for those seeking health, fitness, and bodybuilding information as well. However, much of the information available online is rooted in personal opinion and lacks scientific evidence. This can pose a considerable risk, particularly for individuals with specific health conditions.
On the Oct. 27, 2023, episode of The Mike O’Hearn Show, the show’s namesake sat with Dr. Gabrielle Lyon, a functional medicine physician and author of “Forever Strong,” to bust myths surrounding fitness and training. Check it out the video below, courtesy of Generation Iron’s YouTube channel:
https://www.youtube.com/watch?v=sTI4AwItaV0&ab_channel=GenerationIronFitness%26BodybuildingNetworkVideo can’t be loaded because JavaScript is disabled: Dr. Gabrielle Lyon: Majority Of Health & Fitness Information Online Is WRONG | The Mike O’Hearn Show (https://www.youtube.com/watch?v=sTI4AwItaV0&ab_channel=GenerationIronFitness%26BodybuildingNetwork)
Dr. Lyon holds a fellowship in nutritional sciences and geriatrics. The social media boom started around the time she began her clinical practice. The misinformation in the fitness space took her aback. “It definitely wasn’t going to make anyone stronger, and it was a whole bunch of BS,” said Dr. Lyon. She began posting on social media to debunk the falsehoods and misconceptions within the health and fitness industry.
“We can change the trajectory of how we age,” said Dr. Lyon. The threat of misinformation about aging on social media is that it so easily spreads. Misinformation can be repeated so often that people believe it. There’s a prevalent fitness dogma that letting young children lift weights can stall their growth. Dr. Lyon clarified that there isn’t sufficient scientific support to back up that claim. Children can exercise as soon as they are curious about it. (1)
According to a Clinical Journal of Sport Medicine study, “training protocols with weights and resistance machines and with supervision…are relatively safe and do not negatively impact growth and maturation of pre- and early-pubertal youth.” (2)
View this post on InstagramA post shared by Dr. Gabrielle Lyon (@drgabriellelyon)
Dr. Lyon highlighted another common misconception about women lifting weights and how it can lead to a more masculine appearance. Masculinity is subjective, so how to measure it isn’t clear. Furthermore, most female gym goers don’t necessarily build the same amount of muscle tissue as their male counterparts due to variations in natural testosterone production. (3)
“Go into any gym, and it’s mostly the guys in the free weights area. Women are doing cardio because they have all these myths,” said Dr. Lyon. “These myths stem out of discomfort and not a real belief.”
Dr. Lyon opined that most women don’t actually believe they’ll get bulky lifting weights but rather want to avoid the time and effort strength training entails and use the fear of a more masculine appearance as an excuse to avoid lifting weights.
O’Hearn quipped that most male gym goers struggle to build muscle — a combination of sufficient intensity and frequency while following a diet that provides enough calories and protein are the common building blocks to add muscle tissue. In Laymen’s terms, it’s not easy to add muscle mass, so O’Hearn feels female gym goers shouldn’t worry about this made-up threat of looking masculine as a result of resistance training.
View this post on InstagramA post shared by Dr. Gabrielle Lyon (@drgabriellelyon)
Many female gym goers might perform various triceps exercises hoping to get rid of underarm fat, popularly known as “bat wings.” However, spot reduction through weight training is a myth. A Medicine & Science in Sports & Exercise study concluded that “Subcutaneous fat changes resulting from resistance training varied by gender…MRI found a generalized subcutaneous fat loss independent of gender, supporting the notion that spot reduction does not occur as a result of resistance training.” (4)
When scrolling through Instagram or reading about health and fitness online without peer-reviewed research supporting the claims made, or believing fitness influencers at their word, take everything with a grain of salt.
References
- National Institute on Aging. (2022, June 30). How can strength training build healthier bodies as we age? [Press release]. National Institutes of Health. https://www.nia.nih.gov/news/how-can-strength-training-build-healthier-bodies-we-age
- Malina RM. Weight training in youth-growth, maturation, and safety: an evidence-based review. Clin J Sport Med. 2006 Nov;16(6):478-87. doi: 10.1097/01.jsm.0000248843.31874.be. PMID: 17119361.
- Weiss LW, Cureton KJ, Thompson FN. Comparison of serum testosterone and androstenedione responses to weight lifting in men and women. Eur J Appl Physiol Occup Physiol. 1983;50(3):413-9. doi: 10.1007/BF00423247. PMID: 6683165.
- Kostek MA, Pescatello LS, Seip RL, Angelopoulos TJ, Clarkson PM, Gordon PM, Moyna NM, Visich PS, Zoeller RF, Thompson PD, Hoffman EP, Price TB. Subcutaneous fat alterations resulting from an upper-body resistance training program. Med Sci Sports Exerc. 2007 Jul;39(7):1177-85. doi: 10.1249/mss.0b0138058a5cb. PMID: 17596787.
Featured image: @drgabriellelyon on Instagram
The post The Mike O’Hearn Show — Dr. Gabrielle Lyon Explains Online Fitness Misinformation appeared first on BarBend.
Struggling to Shed Pounds Despite Eating Well? Discover 10 Common Mistakes That Could Be Holding You Back
First thing’s first: If you are eating healthy, hopefully you’re feeling better! Getting rid of processed foods and feeding your body real nutrients is so important for your overall health. (So you’re already ahead of the game!)
But even though the quality of your food choices has improved, there are still several other reasons why you might not be losing weight despite eating healthy.
So, if you’re eating healthy but not losing weight, the following are 10 factors you may not be taking into consideration.
Calorie Intake 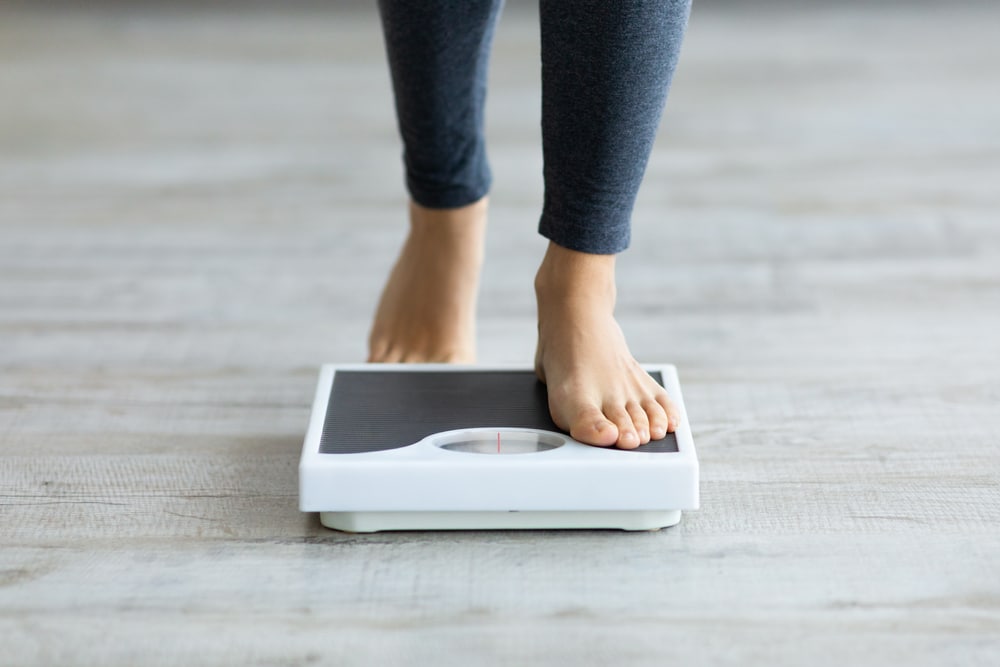 Photo Credit: Shutterstock
Even healthy foods have calories, and quantity does matter!
You won’t lose weight if you consume more calories than your body needs. Make sure you’re in a calorie deficit — meaning, you’re burning more calories than you’re consuming.
Portion Sizes 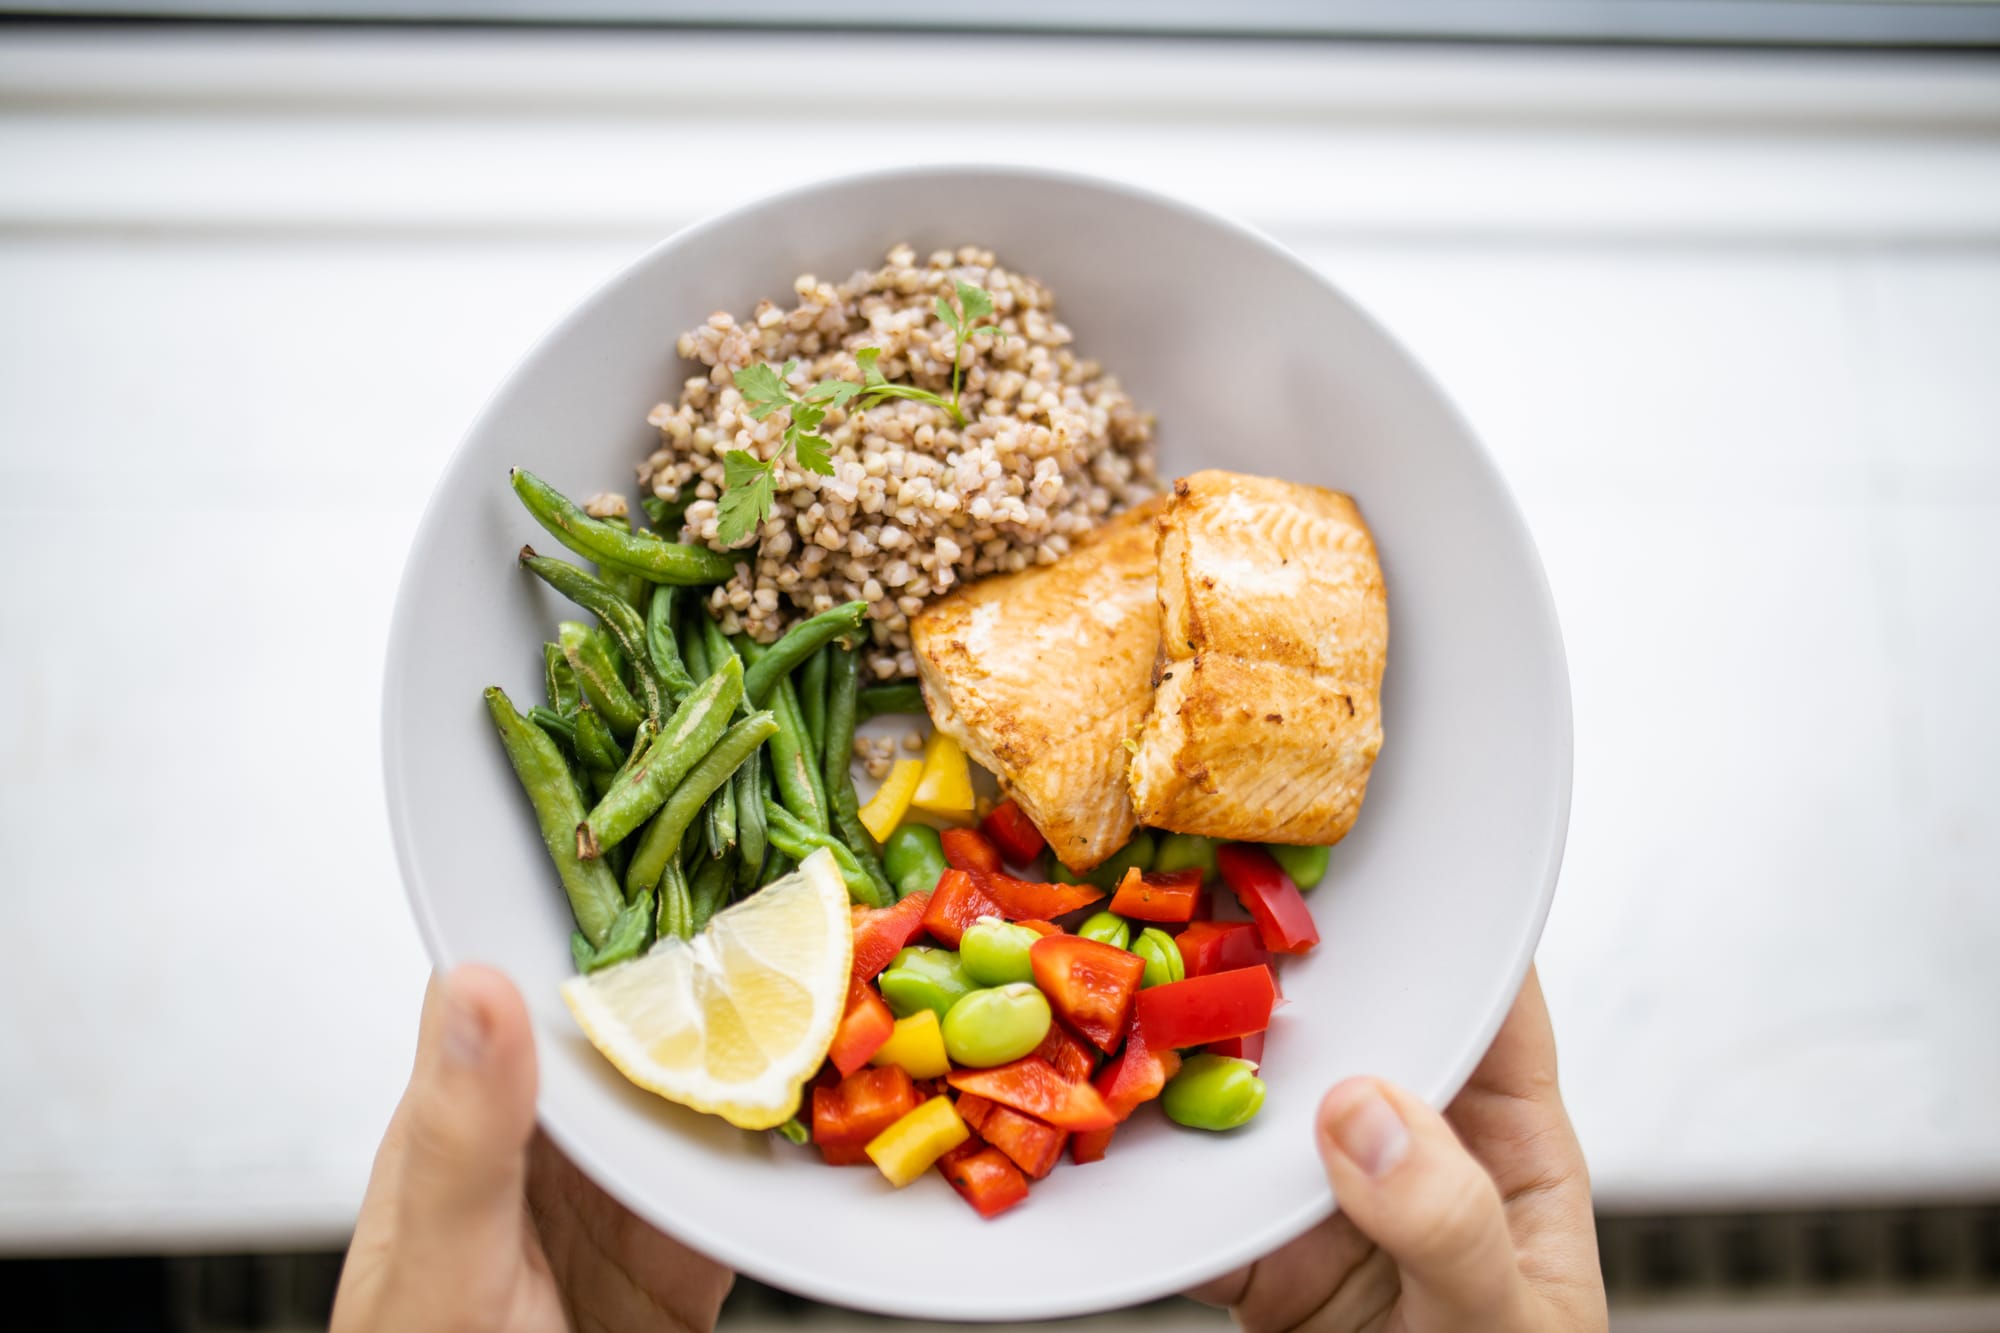 Photo Credit: Depositphotos
Even healthy foods can lead to weight gain if you’re eating large portions! Be mindful of portion sizes and try not to overeat, even if the food is healthy.
Hidden Calories 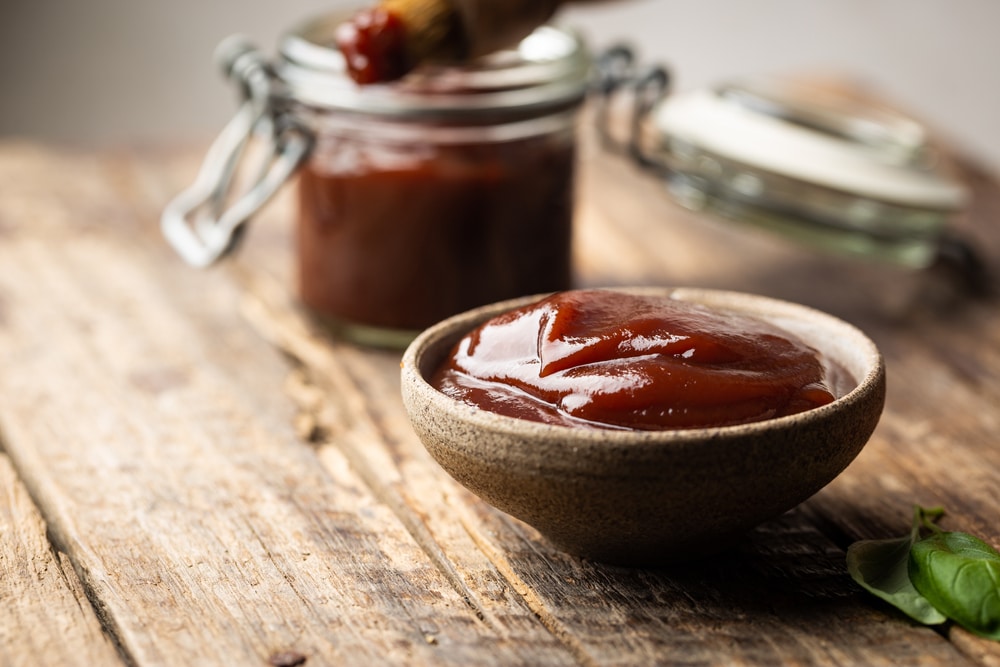 Photo Credit: Shutterstock
Be aware of hidden calories in sauces, dressings, and other condiments. They can add up quickly and sabotage your weight loss efforts.
Exercise 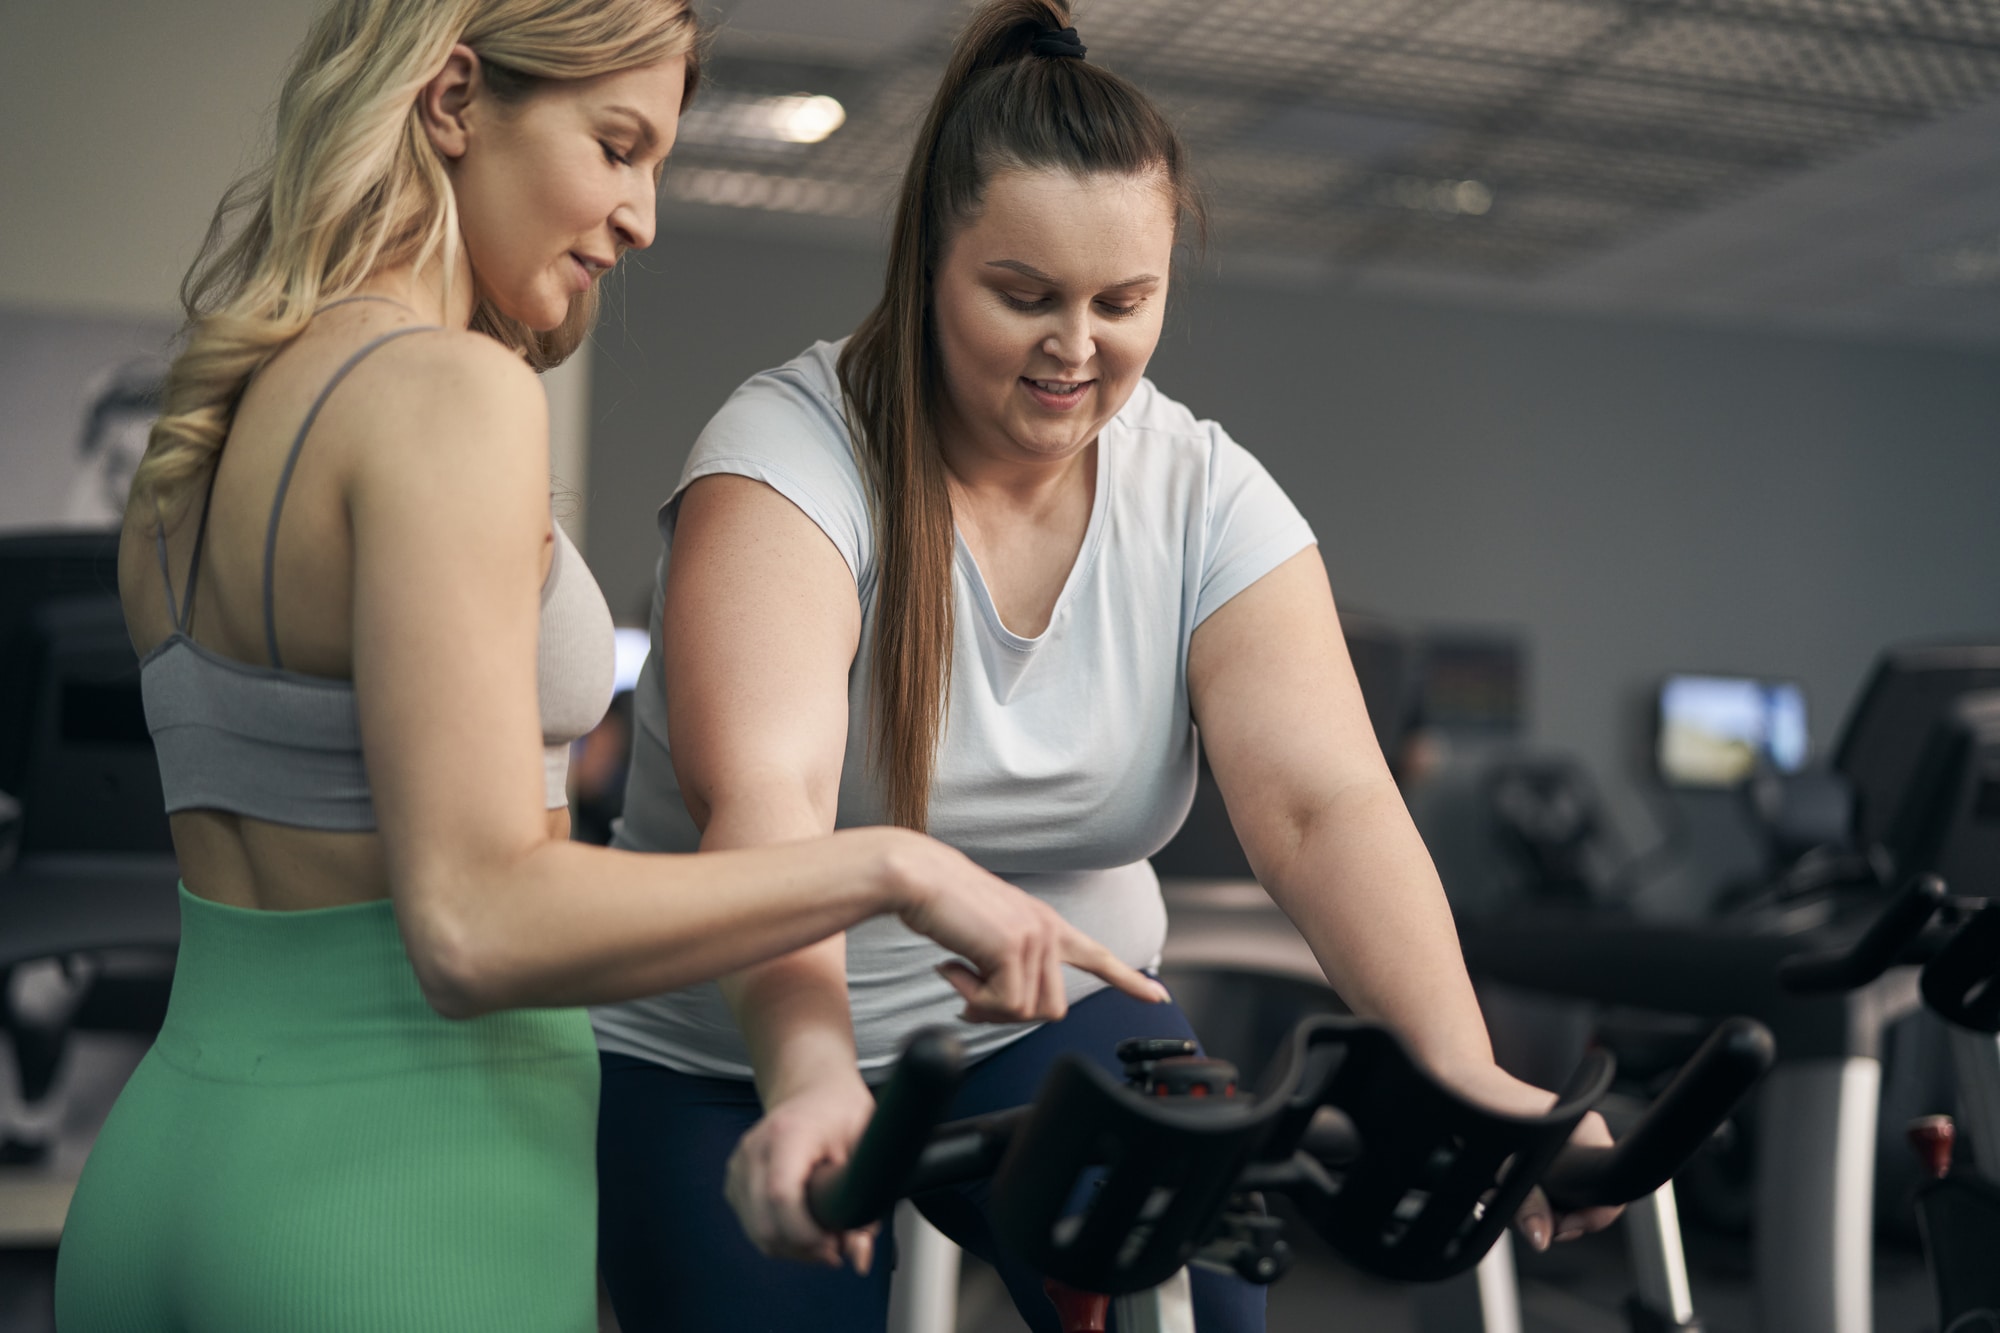 Photo Credit: Depositphotos
While diet is crucial for weight loss, exercise also plays a significant role. Make sure you’re engaging in regular physical activity to burn extra calories and improve your overall fitness.
Medical Conditions 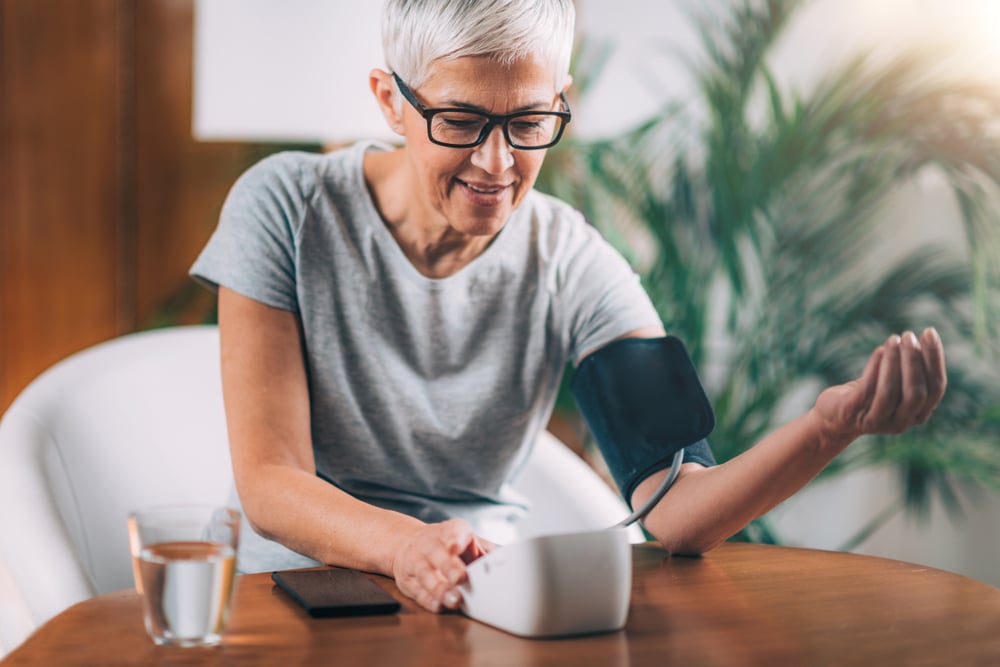 Photo Credit: Shutterstock
Certain medical conditions, such as thyroid disorders or polycystic ovary syndrome (PCOS), can make it harder to lose weight. If you suspect a medical condition might be hindering your progress, consult a healthcare professional.
Stress and Sleep  Photo Credit: Shutterstock
Chronic stress and lack of sleep can interfere with your body’s ability to lose weight. Both can disrupt your hormones, making it harder to shed pounds.
Muscle Gain 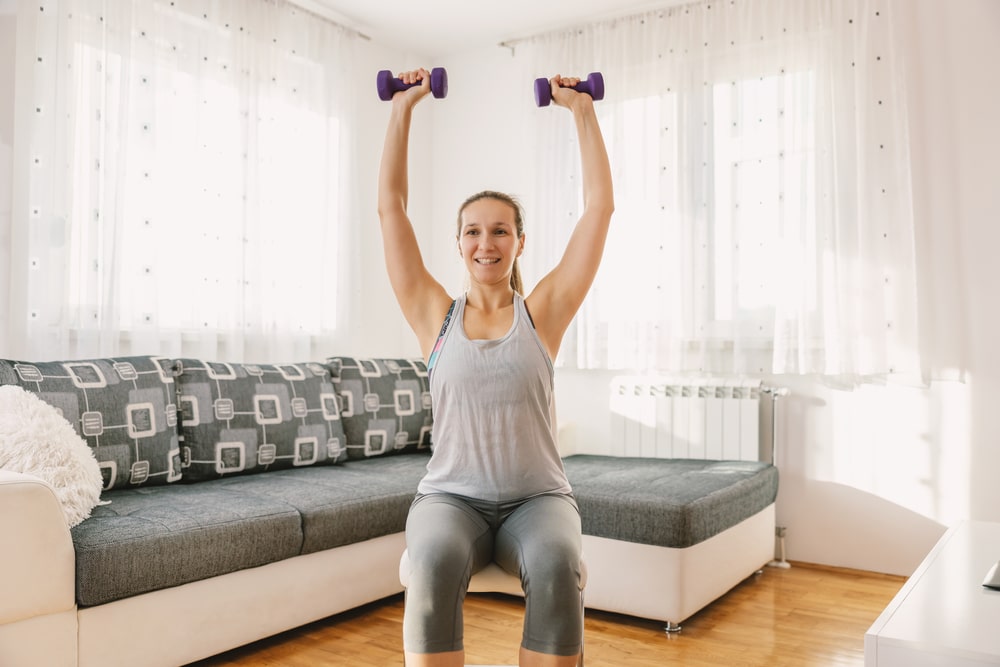 Photo Credit: Shutterstock
If you’re also exercising, you might be gaining muscle mass, which is denser than fat. This could make you leaner and healthier without a significant change in weight.
Water Retention  Photo Credit: Shutterstock
Sometimes, your body retains water, especially if you’ve recently changed your diet or exercise routine. This can mask weight loss on the scale. It’s essential to look at trends over time rather than focusing on daily fluctuations.
Metabolic Rate 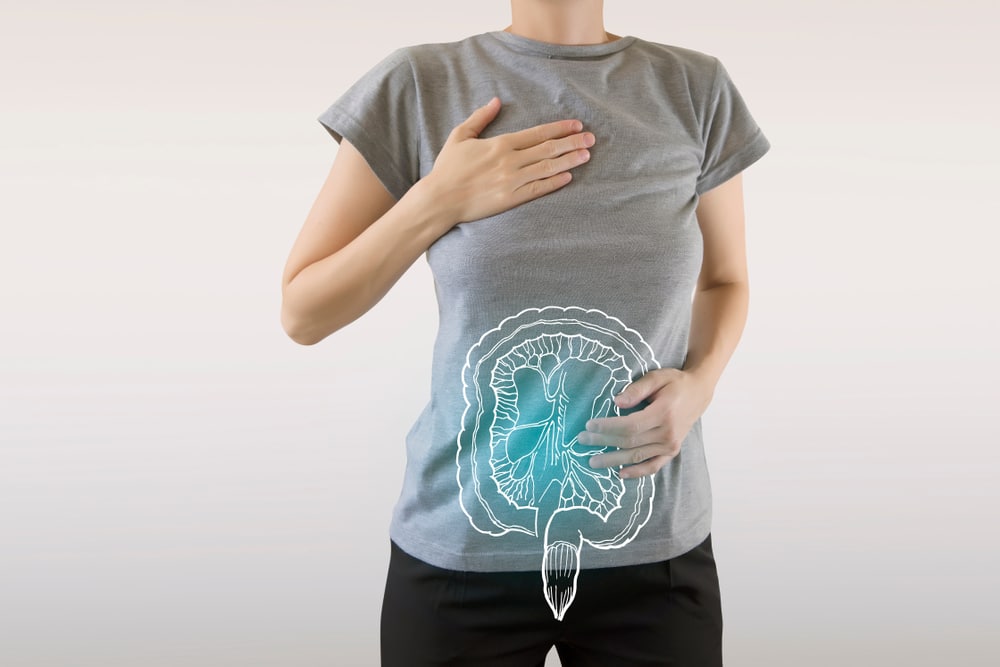 Photo Credit: Shutterstock
Your metabolic rate, influenced by genetics and muscle mass, affects how many calories your body burns at rest. Some people naturally burn more calories than others.
Lack of Patience  Photo Credit: Shutterstock
Weight loss takes time. It’s not always a linear process, and there will be periods where you might not see the scale move despite your efforts. Be patient and focus on overall health improvements.
In my 35 years of experience as a personal trainer and health coach, if you want to lose weight, tracking your calories and tracking your exercise minutes can be very eye-opening. Stay the course — you didn’t gain the weight overnight, and you can’t lose it overnight either!
With persistence, patience, and hard work, you’ll reach your weight loss goals.
9 Blue Zone Foods to Increase Longevity  Photo Credit: Shutterstock
Blue Zone foods promote longevity while giving you serious health benefits in daily life.
How do we know? The truth is in the numbers! The longest living social circles of people use healthy habits mixed with the Blue Zones diet.
The following nine foods are found in the diets of people who are outliving the rest of us.
9 Blue Zone Foods to Increase Longevity
Strength Training for Women Over 50: 11 Best Moves 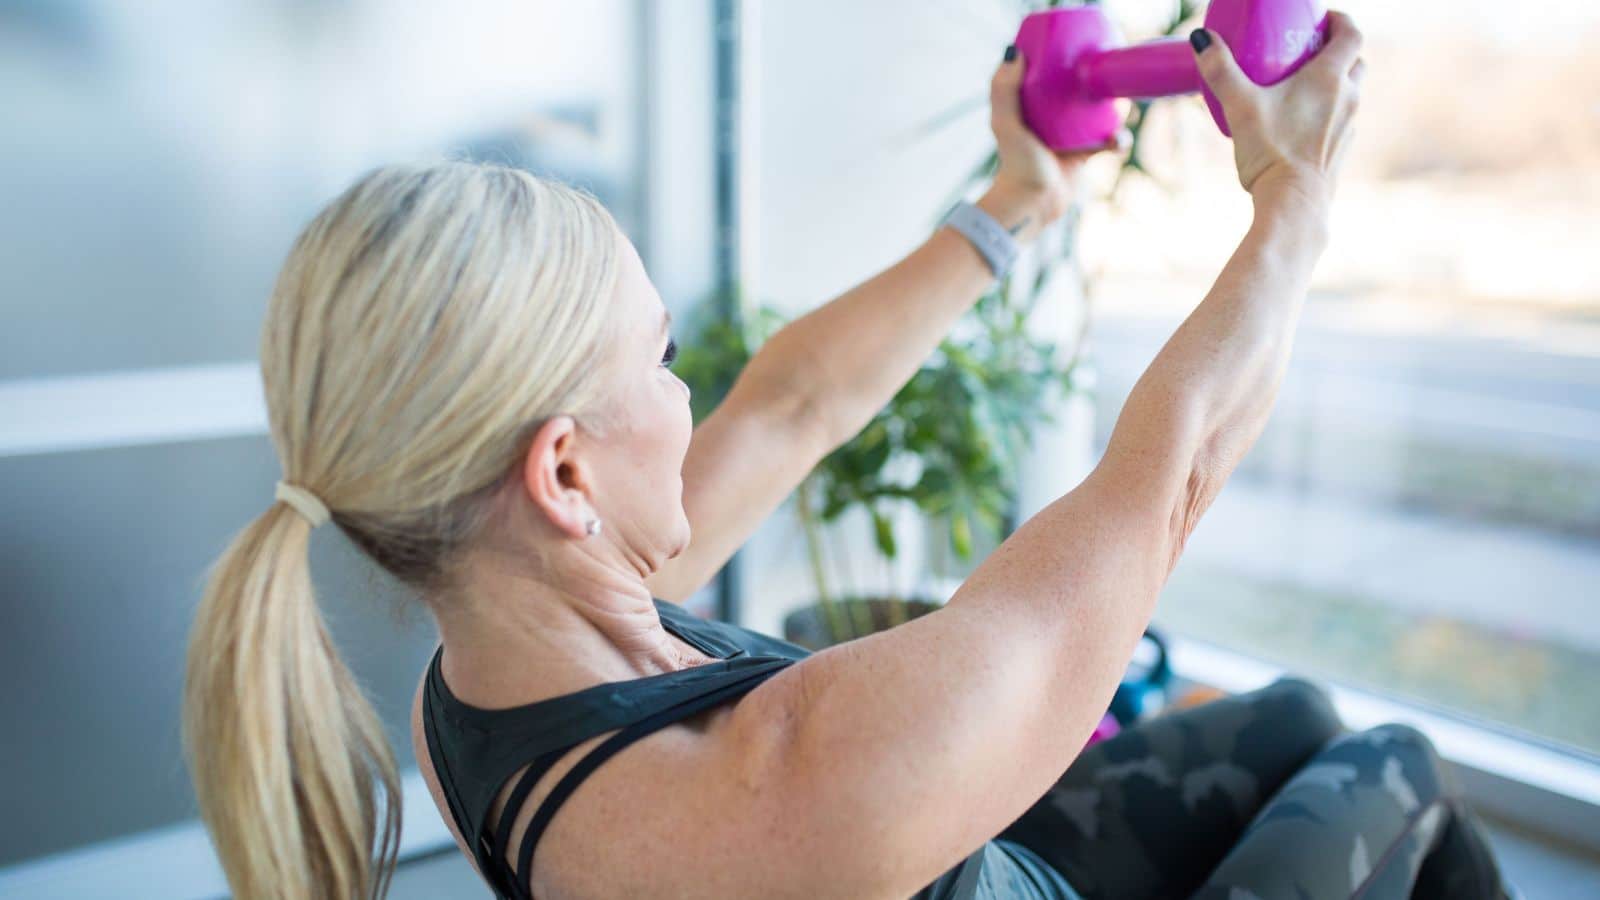 Photo Credit: Get Healthy U
There are many factors involved in maintaining good physical and mental health as you age, but one of the most important things to consider as you grow older is weight training.
These strength training exercises are proven to get results for women over 50!
Strength Training for Women Over 50: 11 Best Moves
Sugar Detox: How To Quit Sugar In 6 Steps  Photo Credit: Shutterstock
It’s hard to find the best way to quit sugar when it’s in so many of our foods! That’s why it’s important to cut back in a smart, sustainable way since doing it cold turkey can be pretty jarring for your body.
Here, we’ll take a look at some of the sugar basics, why you crave it, and how to quit sugar without making yourself totally miserable.
Sugar Detox: How To Quit Sugar In 6 Steps

How Michelin Star Chef Daniel Humm Harnesses the Power of Plants and the Art of Goal Setting for Optimal Health and Fitness
Daniel Humm is currently celebrating 25 successful years in his restaurant; Eleven Madison Park in New York, and is living by the mantra of his new book, Eat More Plants, but the process of shifting from steaks to veggies was a serious undertaking, not least because of world renowned dishes like his famous lavender duck.
Pivoting to a plant-based menu mid-pandemic sent shockwaves through the restaurant industry and its critics, but the Swiss-born chef not only held on to his coveted three Michelin stars, he became the first plant-based restaurant in the history of the Michelin guide to earn such an honor.
M&F sat down with Humm between courses to find out how his love of competitive exercise led him to follow both heart and stomach, in order to make a contribution to a sustainable future.
 Make it nice
“I have always enjoyed playing sports and exercising, it helps me to go beyond myself, both physically and mentally,” Humm tells M&F. “One of my main interests is running. In the past year, I had the incredible opportunity to participate in the Boston Marathon, where I completed it in under 3 hours, which was a significant achievement for me.”
There’s no doubt that Humm is a highly competitive individual. He worked in his first kitchen at the age of 14, to support his cycling career, but after turning pro, a serious accident at the age of 24 resulted in internal bleeding and forced him reevaluate. “I thought at the time, ‘hey maybe this cycling thing isn’t the best thing to continue’ and that’s when I decided to start cooking instead,” he shares. “That experience opened my eyes. It made me realize that the high risk of injury and hard training schedules may not have been worth it for a long-term career. Not that being a chef is the easiest career path, but cycling for me was and always will be a love of mine and a sport that influences who I am personally and professionally.”
These days, Humm is still highly active and in addition to running marathons, he’s also added boxing to his various methods of training. He still loves to cycle, but has well and truly caught the running bug. “Currently, I’m immersed in training for the next Boston Marathon,” says Humm. “My goal is to finish it in less than 2 hours. I’m constantly striving to improve my personal records and achieve new milestones in both my sporting and culinary journey. It’s not about competing with others; it’s about pushing myself to be the best I can be.”
 Ye_fanDaniel Humm learned lessons from cycling that helped him dominate the restaurant space
As an athlete, Humm learned in those early days of cycling that discipline, endurance, and the joy of pushing past limits was the recipe for success. And, it’s just the same for him when working in the kitchen. “After my accident, I was forced to put an end to my cycling dream and had to rethink my entire future,” explains Humm. “As I began working more, in these renowned kitchens, I found a love of cooking and made the move to make it a full-time endeavor. I have taken the learnings, resilience, and an athlete’s mentality into everything I do at Eleven Madison Park. I’ve learned a lot about discipline, teamwork, and the importance of setting goals. If I was going to commit myself to the fine dining space, I was going to take that discipline and training from my cycling days and take risks to be the best in order to reach the top.”
Since 2012, Daniel Humm has amassed three Michelin stars. As a celebrated chef with a busy waiting list to eat in his restaurant, everything seemed to be ticking over nicely, but his desire to push himself and set new goals took him in a completely new direction. “In 2017, we were named the number one restaurant in the world,” says Humm. “And, with that, we were left a little disoriented as we searched for what was next to strive for. I thought ‘there must be more’ to the culinary space and fine dining than winning accolades, as wonderful as they are. Then, when the pandemic hit, it highlighted that our food system needs to find ways to change how it operates in order to be more sustainable, especially when it comes to luxury experiences. ‘Luxury’ foods like caviar, lobster, or Kobe beef get imported from the other side of the world frozen, and natural resources continue to decline.”
View this post on InstagramA post shared by Daniel Humm (@danielhumm)
Instead of resting on his laurels, this chef laced-up his apron and got to work. “I felt that by elevating plant-based food to the highest level, we can challenge or redefine what luxury means for fine dining, as well as what we eat at home,” says Humm. “Instead of celebrating how far your food has travelled, we can instead value the beauty and flavor of fresh, plant-based produce that was grown in your local farm.” Switching to plant-based, at a time when one of Humm’s signature dishes was made with duck was undoubtedly a bold move, but he concentrated on the goals that he had set for himself, and for his team of talented cooks.
Daniel Humm Contributes to a Sustainable Future By Goal Setting
“I anticipated there would be criticism,” shares Humm. “But, within that criticism emerged an even greater sense of purpose. This is what drives me and my team. Eleven Madison Park is not ‘anti-meat’, but rather ‘pro-planet’. Global environmental research has showcased the substantial impact of greenhouse gas emissions resulting from animal agriculture. My goal has been to craft the finest plant-based options, showcasing them in novel and unconventional ways in order to challenge the long-established norms that will drive meaningful conversations and awareness. One of Humm’s most personal goals it to make sure that everyone has access to sustainable food, especially those that can’t afford fine dining.
“We reached out to our friends at Rethink Food, an organization founded in 2017 by Eleven Madison Park alum Matt Jozwiak, with the mission of bridging the gap between the 108 billion tons of food that go unused in the United States each year and the 38 million Americans who continue to face food insecurity,” says the Chef. “We’ve collaborated with Rethink many times in the past, and then we became partners at the dawn of the pandemic. Through this work, we were introduced to Robert ‘Bob’ Madison and his team at the Jacob A. Riis Settlement at Queensbridge Houses in Long Island City, where we’ve served hundreds of meals to the community each weekday. Every meal at Eleven Madison Park and every purchase from elevenmadisonhome.com contributes directly to this mission. We are committed to using our resources to combat food insecurity, aiming to create a more sustainable and equitable food system in New York City and beyond.”
Daniel Humm asserts that small steps can lead to great change. “My diet is predominantly plant-based, but not entirely” he notes. “I’ve found that the more I eat plant-based, the less I crave meat. Even if everyone were to eat plant-based for just one day out of the week, it would make a significant difference for the future. I often say it’s about progress, not perfection. I am also a huge fan of traveling and experiencing other cultures, and in those senses I believe it’s important to experience and taste dishes from all around the world.”
So, what does a Michelin star chef eat after intense exercise? Try Daniel Humm’s “Morel Mushroom and Seaweed Baked Rice” for a tantalizing recovery meal.
“Eat More Plants. A Chef’s Journal” is available to pre-order now.
Get Ready for the Ultimate Showdown: A Sneak Peek into the 2023 Women’s Physique Olympia
Of 11 contests to be held at the 2023 Olympia in Orlando, FL, on Nov. 2-5, 2023, none may be as intense as the Women’s Physique Olympia. Nineteen athletes qualified to compete. The reigning champion, Natalia Abraham Coelho, and the former champion, Sarah Villegas, are amidst a heated rivalry that is a boon for interest. The full roster is below in the order that they qualified for the contest”
2023 Women’s Physique Olympia Preview
- Natalia Abraham Coelho (USA)
- Sarah Villegas (USA)
- Brooke Walker (USA)
- Anne-Lorraine Mohn (France)
- Pamela Canfield (USA)
- Elena Aviles Romero (Spain)
- Emily Schubert (USA)
- Emilija Martic (Canada)
- Romana Skotzen (United Kingdom)
- Zana Benta (Brazil)
- Caroline Alves Dos Santos (Brazil)
- Amy McKown (USA)
- Danielle LaMartina (USA)
- Jeannie Feldman (USA)
- Ivie Rhein (USA)
- Karina Goncalves (Spain)
- Alex Hall (USA)
- Marie-Soulange Essoh (USA)
- Julia Monroe (USA)
[Related: 2023 Classic Physique Olympia Preview]
View this post on InstagramA post shared by Natalia Abraham Coelho (@ifbbpronataliacoelho)
[Related: 2023 Mr. Olympia Preview]
How to Qualify
Like the other pro divisions at the Olympia, champions are qualified for life. The second and third-place finishers for the 2022 Women’s Physique Olympia were automatically invited to compete in the 2023 contest. The rest of the roster is filled with competitors who won a Women’s Physique pro show before the qualifying cutoff date of Oct. 9, 2023.
Any athlete who hasn’t qualified before the cutoff date would have to receive a special invitation to compete from the IFBB Pro League or the Olympia promoters. As of Oct. 23, 2023, no invites have been issued.
Past Champions
This contest’s two most recent champions are the only two champions in the 2023 edition. Reigning champion Natalia Abraham Coelho had tried to win this show since 2017 and finally broke through in 2022. 2020 and 2021 champion Sarah Villegas acknowledged mistakes in her 2022 prep but feels if her 2023 condition is presented as aspected, Coelho won’t be able to retain.
Fans who follow both athletes on social media could confirm Coelho and Villegas don’t see eye to eye and want to beat each other in. Villegas has been in this position before when she beat two-time titleholder Shanique Grant to win the championship in 2020. No champion in the history of the contest has regained the title after losing it. Villegas hopes to make that history; Coelho aims to start a dynasty of her own.
Top Contenders
2022 Women’s Physique Olympia third-place finisher Brooke Walker is growing her own fanbase. She is seen by many as a star of the future. She didn’t have to win a pro show to qualify for this contest, so the Olympia will be her 2023 debut. A year of muscle maturity could serve her well if she showcases definition that rivals Villegas, who is usually the most ripped athlete onstage. Walker’s shape compares well to Coelho, so don’t be surprised if Walker is alongside the past two champs in the first callout.
The next highest finisher from 2022 in this show is Ivie Rhein. She won the inaugural Masters Olympia Women’s Physique title in Romania on Aug. 26-27, 2023. Rhein has been in the mix for this title in the past but has never finished higher than fifth.
The last spot in the first callout is anyone’s to claim, but Jeannie Feldman and Anne-Lorraine Mohn are strong candidates. They finished sixth and seventh in the 2022 Olympia, respectively.
Dark Horses
Few people saw Walker emerge as she had to the division’s top tier. Dark horse competitors can be dangerous at the Olympia. Marie Solange-Essoh ranked 10th at the 2022 Olympia in Las Vegas, NV, but the Masters competitor won the 2023 Daytona Pro, proving she can hold her own.
Emily Schubert will make her second Olympia appearance, but her first in two years. She tied for 16th in the 2021 Olympia in Orlando, FL, and has shown significant improvement since then.
Olympia Debuts
Over half of the Women’s Physique field are first-time Olympia competitors — 11 of 19 athletes will grace an Olympia stage for the first time: Pamela Canfield, Karina Goncalves, Elena Aviles Romero, Julia Monroe, Emilija Martic, Alex Hall, Danielle LaMartina, Amy McKown, Caroline Alves Dos Santos, Zana Benta, and Romana Skotzen. At least two of those athletes will leave that stage as one of the top 10 Women’s Physique athletes in the world.
Those who are unable to attend the Olympia in Orlando to spectate live can still watch all 11 pro divisions live from home by purchasing the 2023 Olympia pay-per-view on the Olympia Productions website.
Featured Image: @ifbbpronataliacoelho on Instagram
The post 2023 Women’s Physique Olympia Preview appeared first on BarBend.

Top 5 Health and Fitness Picks of the Week: October 20
Hi friends! Happy Friday! How was the week? I hope you had a great one. What’s going on this weekend? We have an event for the girls’ school, Trunk or Treat, and we’re celebrating the Pilot’s bday a little early (and yes, his favorite cake is on the menu). I’d love to hear what you have going on!
Workwise, I’ve been doing a ton of functional testing for clients lately. As much as I love workout programming, this is close competition for being my favorite work-related task. I LOVE going through all of the data and creating custom action plans. I put on some binaural beats, sprawl out on the PEMF Go Mat (my code is FITNESSISTA15), and go through EVERYTHING. If you’ve been curious about functional testing as a 1:1 client, please let me know; I have three spots left as we wrap up 2023.
It’s time for the weekly Friday Faves party! This is where I share some of my favorite finds from the week and around the web. I always love to hear about your faves, too, so please shout out something you’re loving in the comments section below!

(pics to an art show we attended by the Boys and Girls Club. I got the sweetest greeting cards and a javelina painting for P’s room! Dress is here and P is still loving her Vivobarefoots.)

Friday Faves 10.20 Read, watch, listen:
Five pick-me-ups.
Why building muscle is more important than losing fat.
What little things in your home are just for you?
Fashion + beauty:
Shopbop sale is here! It’s a tiered sale, so the more you spend, the more you save. You can get up to 25% off.
Here are some of my favorite picks:
This floral dress would be gorgeous with heels or booties
This jumpsuit (I have another Pistola jumpsuit in red and love it)
These recycled leather pants – so cute for fall and holiday parties
These wide leg pants
These straight jeans
This nude slip dress
These bow earrings
LOVE the cut of these ALC dresses (size up)
This black maxi
These drop earrings
Fitness, health, and good eats:
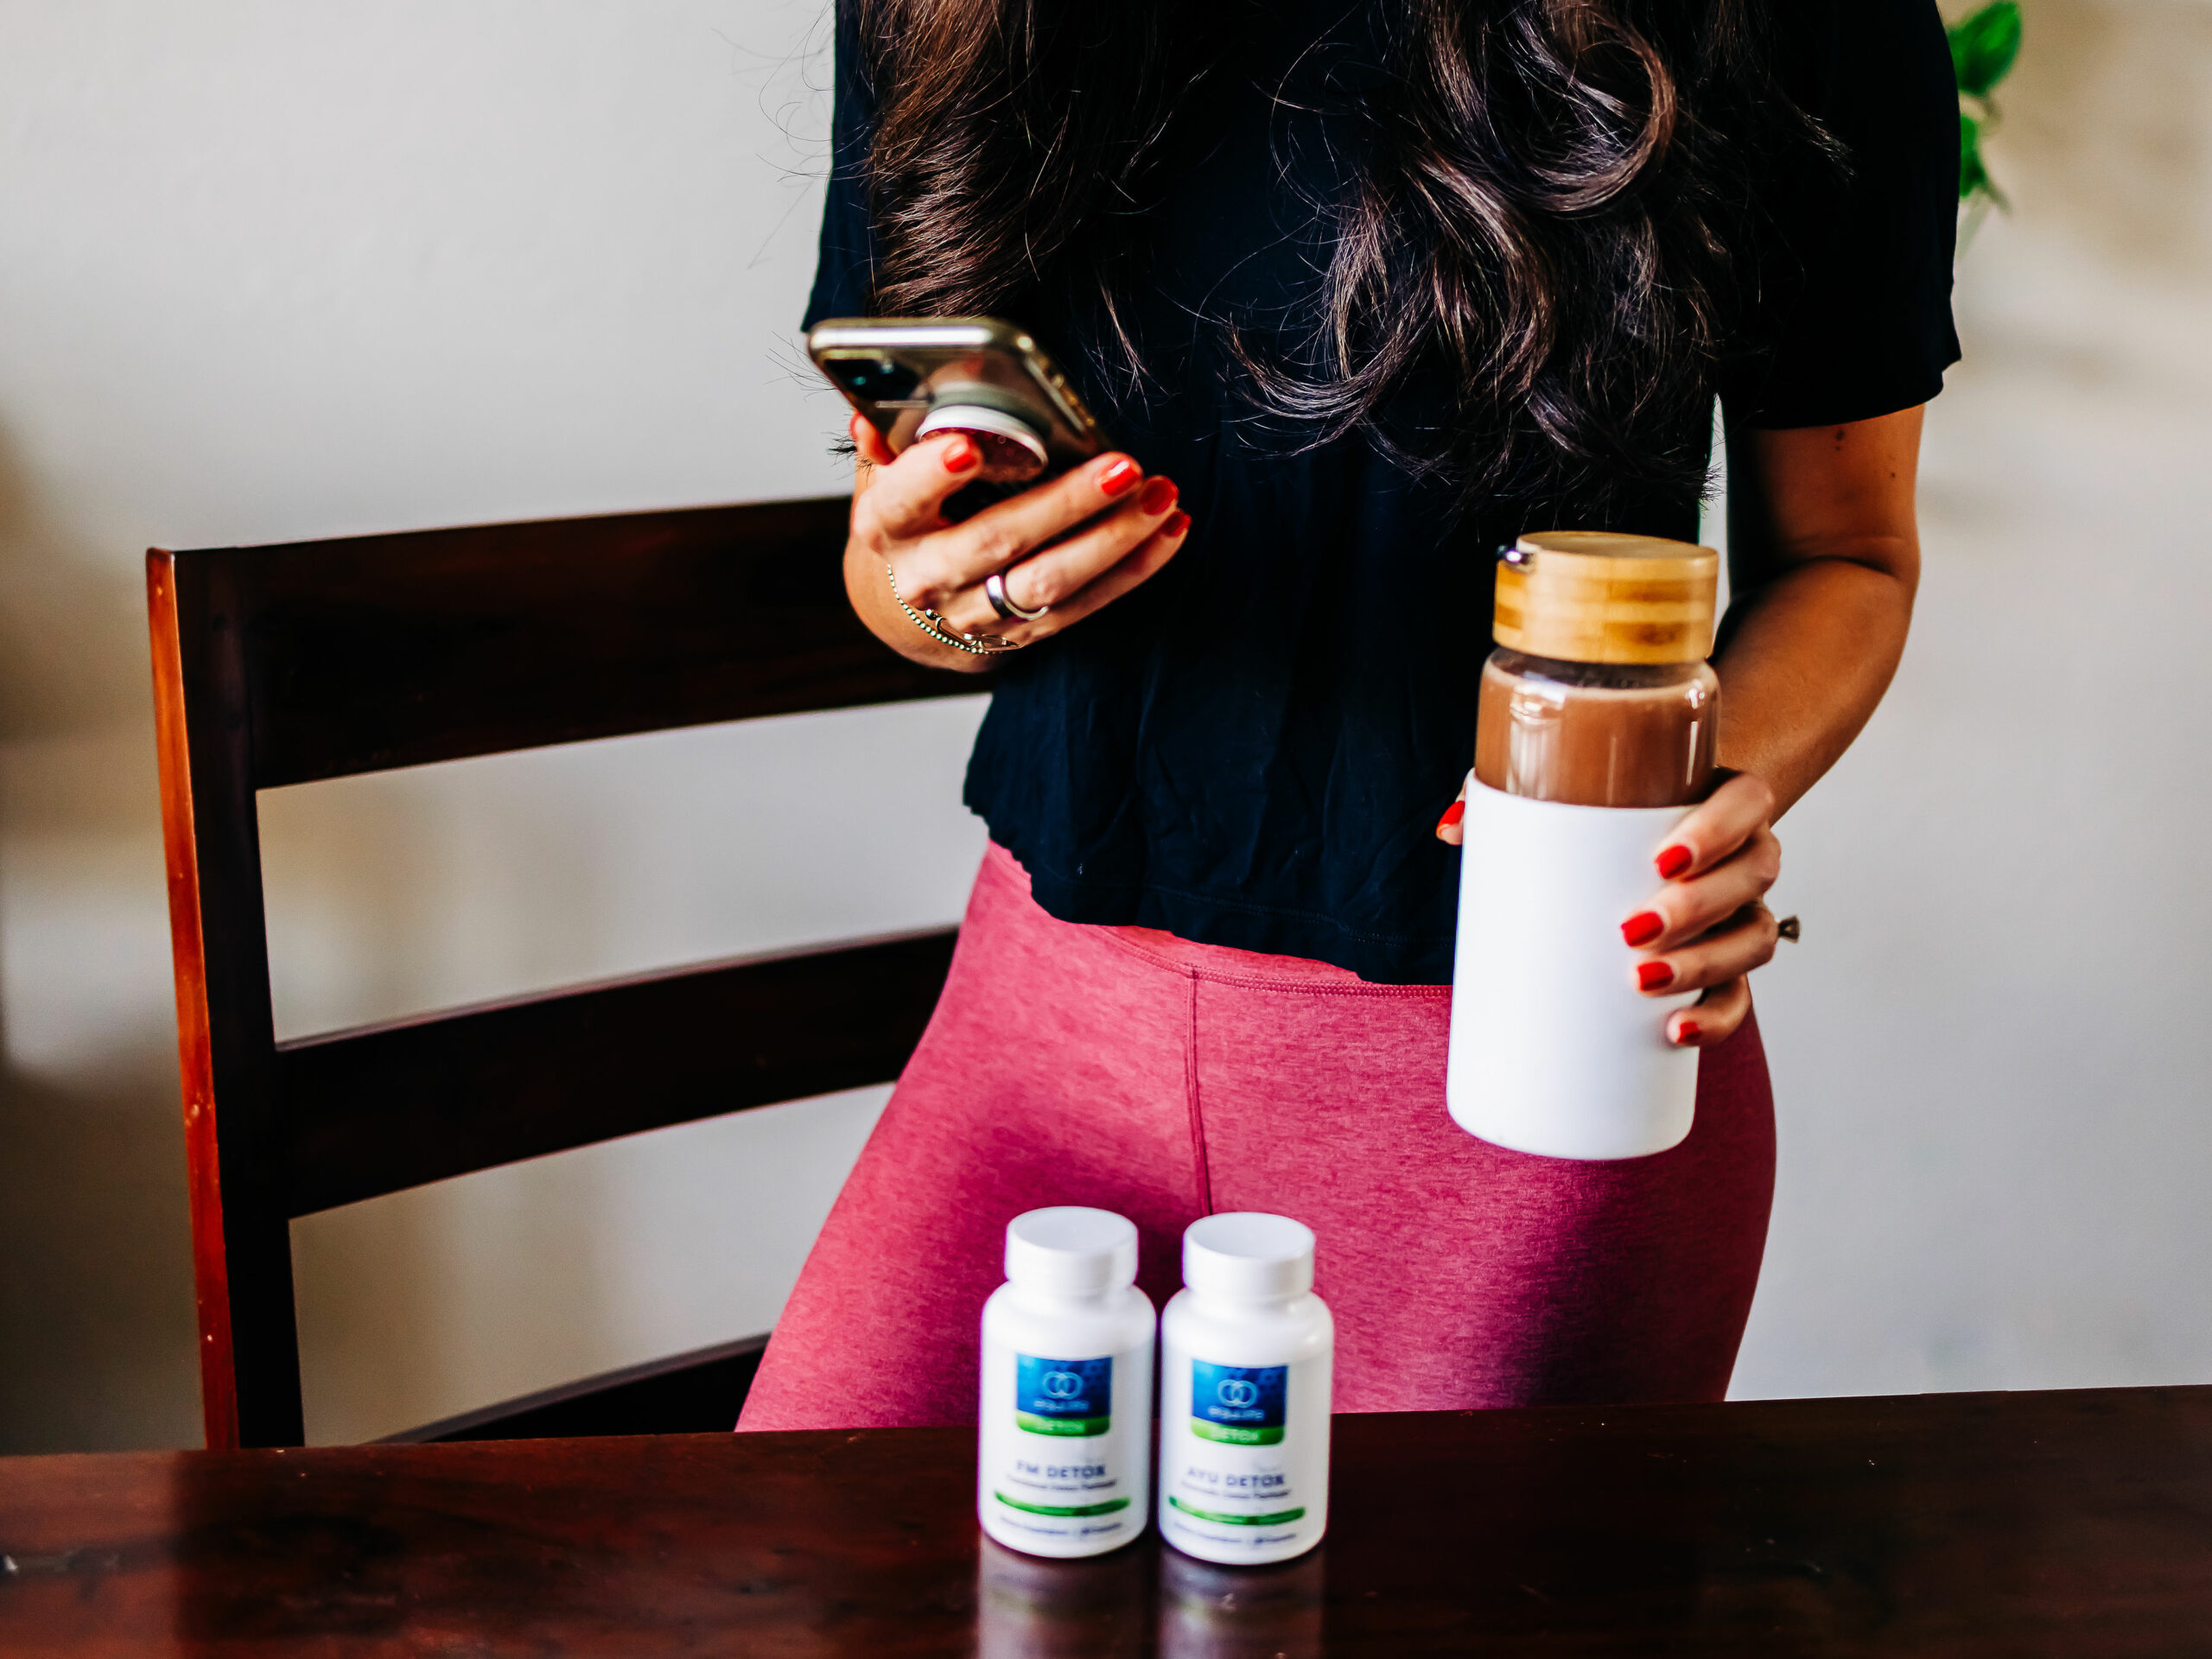
EquiLife has COFFEE! When they launched this past week, I was so pumped about it. Ever since I learned about how coffee is process, particularly how it’s decaffeinated, I’ve been pretty strategic about my coffee choices. I switched to decaf in the morning a few years ago, and when we got our Nespresso, I started drinking the organic pods since the taste of the decaf is horrible.
I’m so excited to try something new that’s free from the pesticides and mold that can negate the positive health benefits of coffee.
Here’s what’s exciting about this one:
Providing more than double the antioxidants found in blueberries
Contains Chlorogenic Acids (CGAs), a superior form of antioxidants
Effective at scavenging free radicals & preventing cell damage
Increases brain function & supports healthy levels of inflammation
Organic, single source coffee
Free from pesticides & mold
Whole bean, available in both regular (Revive) & decaf (Relax)
You can get a free bag of it here with a purchase of $99! (I would do a detox kit and a box of their chocolate brownie snack bars. You’ll have some tasty snacks and be ready for our community detox on January 8th! Use the code FITNESSISTA10 for 10% off, too.)
LOVE the Simple Mills protein pancake mix. It’s so good and the edges are a little crispy.
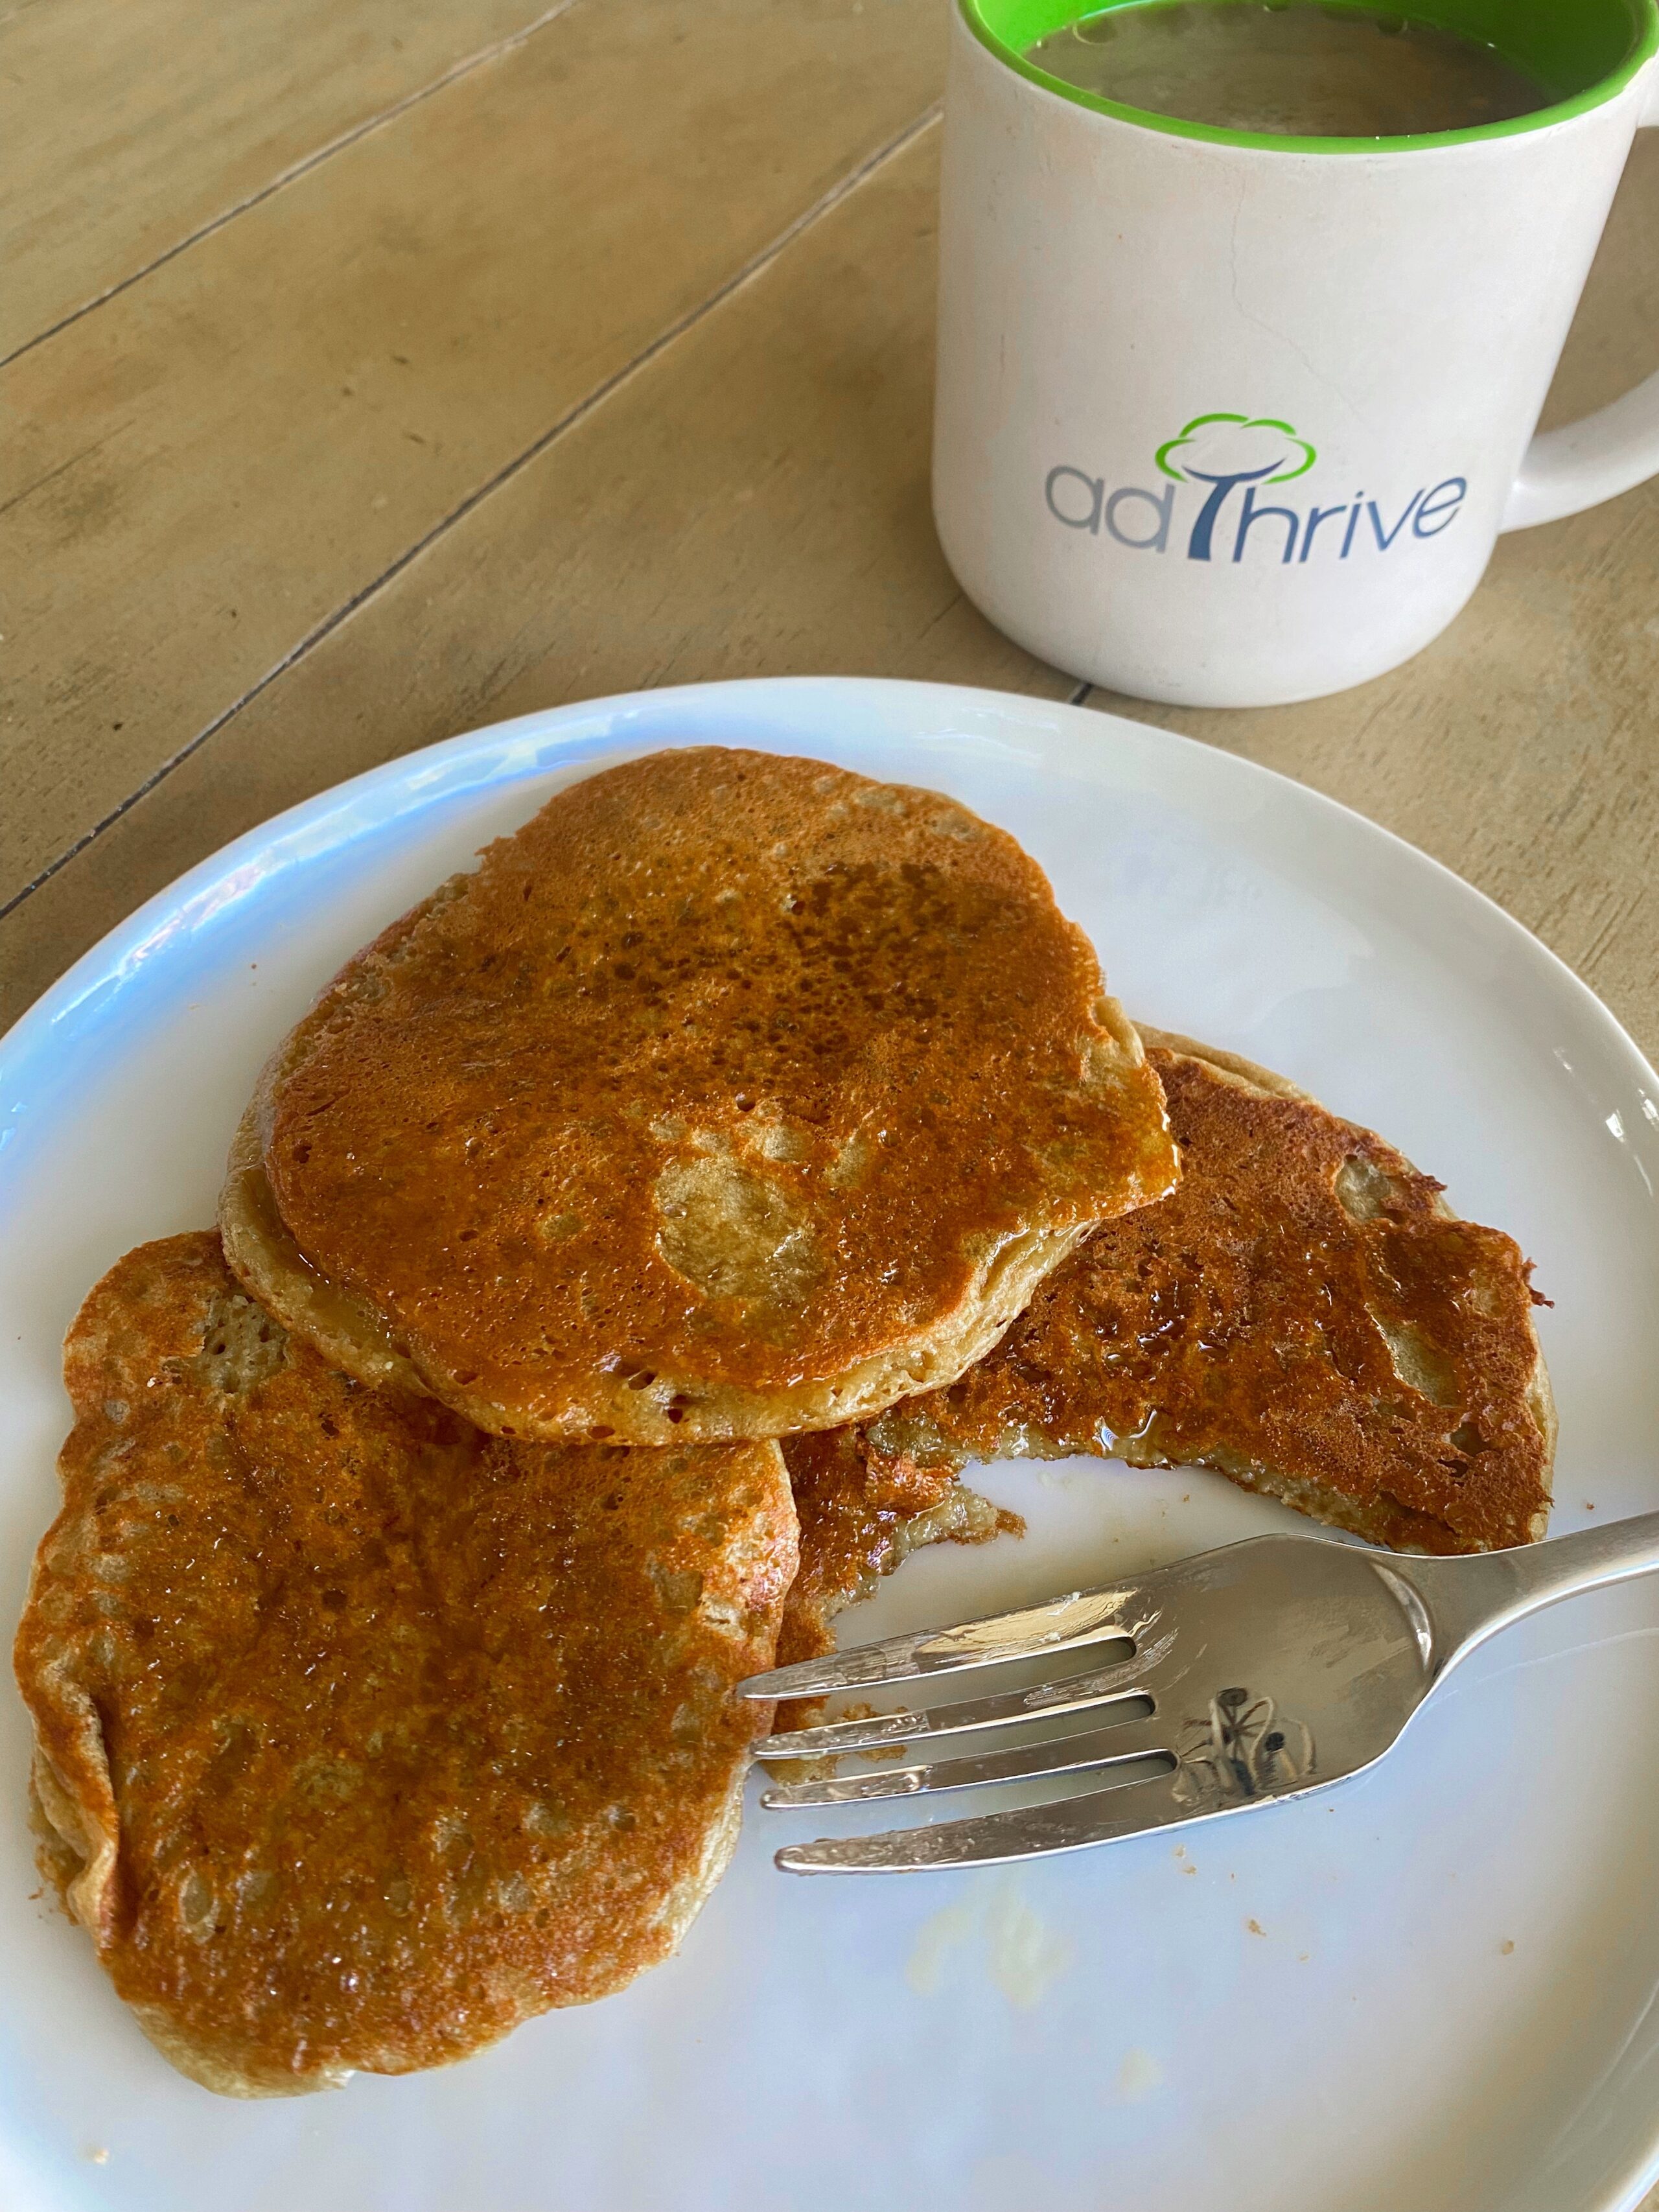
They’re especially amazing with berries on top and a side of chicken sausage.
Cinnamon apple pie ice cream.
Interesting links between seasons and metabolism.
You have to try this pumpkin baked oatmeal.
Happy Friday, friends! Thank you so much for stopping by the blog today and I’ll see ya soon!
xo
Gina
The post Friday Faves 10.20 appeared first on The Fitnessista.
Are Barre Arm Exercises Legit Strength Training or Just Another Trend?
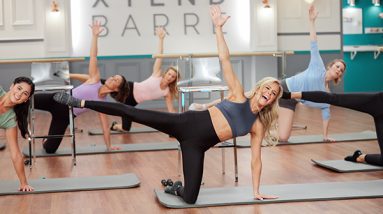
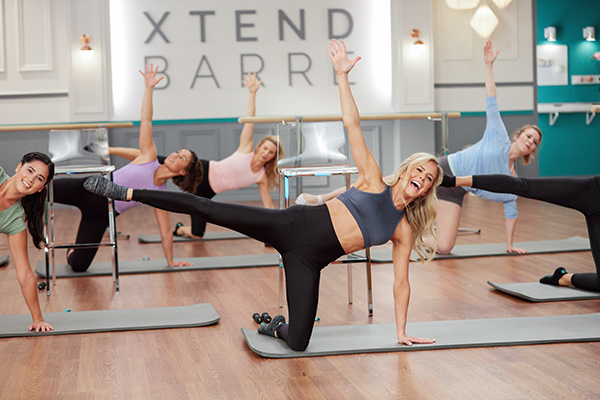
If strong, sculpted arms are one of your fitness goals, you might assume the only way to get them is to perform endless biceps curls and triceps kickbacks. But if you’ve done an at-home barre workout, like Xtend Barre or Barre Blend, you’ve likely felt the burn in your arms.
So can you get a solid strength training workout from those barre arm exercises? Here’s what you need to know.
Does Barre Build Strength in the Arms?
“Absolutely!” says Jen Cordiner, education director for Xtend Barre, an at-home barre program that incorporates cardio, Pilates, and ballet fundamentals to help you burn fat and build muscle.
Barre workouts typically combine bodyweight exercises with high reps to strengthen and build your muscles.
“A focus on proper form and creating your own resistance help lead to a long, lean, sculpted upper body,” Cordiner says. Your target muscles may burn and shake — surefire signs that the routine is working.
Many Xtend Barre workouts also incorporate equipment such as resistance bands or light hand weights to boost the intensity of barre arm exercises. This can really ramp up your upper-body toning results, Cordiner says.
Is Barre Considered a Strength or Cardio Workout?
Traditional barre workouts use small, isometric exercises to help you build total-body strength and definition — minimal cardio included.
However, BODi’s barre programs are unique in that it blends traditional isometric exercises with dynamic movements that get you moving through a full range of motion.
The result: You get strength and cardio benefits in a single session. “Our combination of sculpt and cardio offers a full-body workout, which leads to better results,” Cordiner says.
How Often Should I Do Barre Arm Exercises to Increase Strength?
If you really want to see and feel strength results, Cordiner recommends doing barre three to five days a week. As your strength and endurance grow, you can bump up your weekly sessions to five or more.
Ready to get started? Try an Xtend Barre or Barre Blend workout on BODi. Choose from total-body routines, or give specific muscle groups (ahem, your arms) extra attention with focused workouts.
Don’t have a ballet barre? No worries — a sturdy chair, countertop, or the back of the couch will do the trick, so you can start enjoying the benefits of barre arm exercises.
The post Do Barre Arm Exercises Count as Strength Training? appeared first on BODi.
Unleash Your Inner Strength and Achieve a Sculpted Physique with Shaun T’s DIG DEEPER Workout
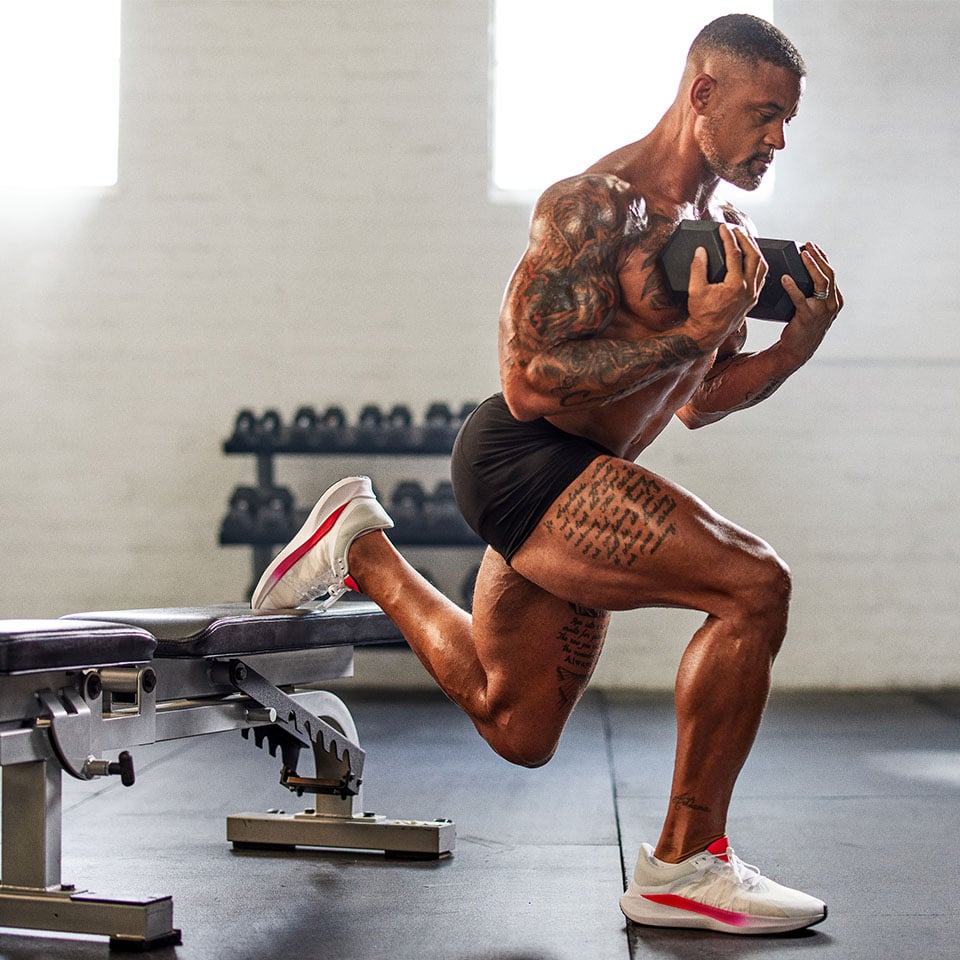
Build the body you’ve always wanted, become mentally unstoppable, and discover what it’s like to be in control of your results with the first-ever weightlifting program from Super Trainer Shaun T.
Introducing DIG DEEPER, the ultimate body recomposition program coming to BODi in December 2023.
What is DIG DEEPER?
DIG DEEPER is an intense, all-out weightlifting program for all levels, designed to give you a total-body recomposition.
A body recomposition program reshapes your body by torching fat while building muscle to reveal a leaner, more muscular body.
Over 12 weeks, Shaun takes you through three 4-week collections of workouts using a variety of proven lifting techniques that will leave you toned and sculpted.
You will lift heavy, gradually bumping up your intensity, and target every muscle group to help you reach your peak physical and mental strength.
Workouts are 6 days a week, 30-50 minutes a day, with just 1 day of low-impact cardio (no jumping or high impact required!).
There’s also a No Excuses collection of under-25-minute workouts, for when you’re short on time.
What kind of results can I expect from DIG DEEPER?
Get jaw-dropping physical results with DIG DEEPER, as you shred fat and increase muscle mass to completely rebuild your body.
It’s about getting the results you want and feeling more powerful in your body than ever before.
You will see continuous progress as you build and sculpt muscles, even in areas you never thought you could, and achieve next-level strength and fitness — physically and mentally.
What is a body recomposition program?
Your body composition is your ratio of lean mass (such as muscle) to fat mass.
DIG DEEPER is a body recomposition program that changes the makeup of your body by reducing your fat stores while increasing your muscle mass to make you leaner, stronger, healthier, and more powerful.
Body recomposition also speeds up your metabolism, to help you lose weight and keep it off.
Keep in mind that body recomposition looks different for everyone. This is why you might not see the scale move, but you will 100% see and feel a difference in your body.
Why is strength training important?
Whether you want a lean and toned body or a muscular, chiseled physique, weight training is one of the most effective ways to reshape your body and achieve a healthier body composition.
Regular strength training also helps protect and stabilize your joints, improve bone density, and increase strength and muscle mass, to help you look and feel amazing — now and into the future.
How is DIG DEEPER different from other workouts?
DIG DEEPER isn’t just the name of his new fitness program — it’s a mentality Shaun has followed since the beginning of his fitness journey. It’s tattooed on his body, quoted in his gym, and always top of mind.
The term reminds Shaun that when life gets tough, you can back down, or you can dig deeper, push through, and discover the greatness inside of you.
And that’s what he did in his own weightlifting journey.
Shaun immersed himself in weightlifting to take his training to the next level and challenge his body in new ways.
He reshaped his body, a total recomposition of his physique, and shocked the world with his stunning physical and mental transformation.
Stronger and more shredded than ever, he won several gold and silver medals in his first-ever Men’s Classic Physique competition.
Now, he’s sharing his exact body-sculpting method with you, so you can get your own mind-blowing results.
Who is Shaun T?
As a BODi Super Trainer, fitness legend, and motivational superstar, Shaun T has helped millions of people get in the best shape of their lives.
Known for his transformational programs and powerfully inspirational style, he’s the creator of megahits FOCUS T25, T25 + B25 Super Blocks, Transform :20, CIZE, INSANITY, and LET’S GET UP!
Now he’s back with his first-ever weightlifting program that will get you serious results, to help you look and feel incredible.
When will DIG DEEPER be available?
DIG DEEPER will be available for VIP Early Access in December 2023. You’ll need a Fitness membership to purchase the program.
Want more details about DIG DEEPER?
Get all the info about Shaun’s new DIG DEEPER program by visiting FAQ 10406.
The post Lift and Get Shredded With DIG DEEPER From Shaun T appeared first on BODi.
Achieve Sculpted Lower Abs with These 10 Effective Exercises
Try this: Place your hand on your lower abs and cough a few times. That contracting muscle you feel? That’s your transverse abdominis—and targeting this particular muscle is the best way to tone your lower abs!
The transverse abdominis extends between your ribs and pelvis and is the deepest of the six ab muscles. Its fibers run horizontally, wrapping around your trunk from front to back like a corset.
The next 10 exercises can help target your transverse abdominis, tone and strengthen your lower abs, reduce lower back pain, and keep you feeling fit, strong, and energized!
Be sure to take your time and maintain good form (these are not about speed!), and remember to breathe. Try to incorporate these exercises into your workout routine on a weekly basis for the best results!
1. Full Plank  Photo Credit: Get Healthy U
The plank is a staple of most ab workouts because it recruits the entire core!
How to perform a plank:
- Begin kneeling on all fours with your hands directly under your shoulders and toes on the mat.
- Tighten your abdominals and raise your body up off the floor, lengthening your legs behind you. Hold your entire body tight, and remember to breathe.
2. Bird Dog  Photo Credit: Get Healthy U
Bird dogs strengthen the lower back and abdominals while promoting stability and balance.
How to perform a bird dog:
- Kneel on the mat on all fours. Reach one arm long, draw in the abdominals, and extend the opposite leg long behind you.
- Repeat on the other side.
3. Forearm Side Plank  Photo Credit: Get Healthy U
Forearm side planks don’t just target your core—they also strengthen your shoulders and upper back.
How to perform a forearm side plank:
- Being lying on the floor with your forearm on the mat and your shoulder stacked over your elbow. Legs are long, with your feet stacked on top of each other.
- Lift your body into a side plank position, keeping your lower knee on the floor and your abdominals engaged. Try not to let your hips rise or drop.
- Repeat on the other side.
4. Bend-Extend Ab Tuck  Photo Credit: Get Healthy U
Bend-extend ab tucks are great for working your lower abdominal area and protecting your lower back.
How to perform a bend-extend ab tuck:
- Start seated on the mat with arms behind you, hands on the mat, and fingers facing your backside. Sit back on your hands and lift up your feet off the mat, keeping the knees bent.
- Keep abs tight, press your legs out long, and your lower back down slightly (you should feel your lower abdominals working). Push yourself back up and pull your knees in to return to the start position.
5. Bicycle Crunch  Photo Credit: Get Healthy U
Bicycle crunches help build coordination and a strong core.
How to perform a bicycle crunch:
- Start lying on your back with your feet off the floor and legs in a tabletop position. Hands are behind your head, and your head, neck, and shoulders are flexed off the mat.
- Bring one knee in and to the opposite elbow, reaching towards it. Repeat on the other side in a crisscross motion working the obliques.
6. Toe Reach  Photo Credit: Get Healthy U
Toe reaches focus on core engagement and really target the transverse abdominis.
How to perform toe reaches:
- Start on your back with your legs long-reaching towards the ceiling.
- Bring your head, neck, and shoulders off the mat and reach your arms up towards your feet. Return to the tips of the shoulders and repeat.
7. Bridge  Photo Credit: Get Healthy U
Bridges stretch the chest, neck, spine, and hips while strengthening the glutes, core, and lower back. They also promote good posture!
How to perform a bridge:
- Begin lying on your back with your knees bent and feet flat on the floor close to the glutes.
- Place your arms flat on the floor next to you, tucking your shoulders under your back. Align your knees with your hip bones.
- Press your palms down as you lift your hips high and squeeze the glutes and abdominals. Keep your neck relaxed on the mat.
- Continue to breathe and hold for 30 seconds.
8. Leg Drop  Photo Credit: Get Healthy U
Leg drops focus on strengthening the lower abs and back. Keep your movements slow to really work the core!
How to perform leg drops:
- Start lying on your back with both legs long towards the ceiling.
- Keep your abs tight as you lower one leg until it’s a few inches off the floor, then switch legs.
- Tip: never go so low with your legs that your back pops off the mat.
9. Flutter Kick  Photo Credit: Get Healthy U
You’ll definitely feel these flutter kicks in your lower abs!
How to perform flutter kicks:
- Start lying on your back, legs extended at a 45-degree angle, with your arms down at your sides and your legs off the ground.
- Slightly lift your head, shoulders, and neck off the ground.
- Start kicking (or fluttering) your legs up and down, alternating as you go. Your flutters should be at a pace you can maintain while still keeping your core still.
- Try to flutter for at least 30 seconds, or as long as you can!
10. Bear Crawl Hold  Photo Credit: Get Healthy U
The bear crawl hold is another challenging move, but it’s perfect for activating your core, shoulders, quads, back, and hips.
How to perform a bear crawl hold:
- Start on all fours and lift your knees so that they’re at a 90-degree angle and hovering an inch off the ground. Only your palms and toes should be touching the floor.
- Keep your back flat, core engaged, legs hip-width apart, and arms shoulder-width apart.
- Hold this position for 20 to 30 seconds, or as long as you can!
Strength Training for Women Over 50: 11 Best Moves  Photo Credit: Get Healthy U
There are many factors involved in maintaining good physical and mental health as you age, but one of the most important things to consider as you grow older is weight training.
These strength training exercises are proven to get results for women over 50!
Strength Training for Women Over 50: 11 Best Moves
The Best Love Handle Workout  Photo Credit: Shutterstock
These five exercises specifically target the love handles and will have you feeling the burn!
Combine this workout with a healthy diet and cardio, and you’ll watch that belly fat “waist” away.
The Best Love Handle Workout
9 Tips For Joint Health | Keep Your Joints Healthy As You Age  Photo Credit: Shutterstock
Keeping your joints healthy is key to staying mobile and experiencing less pain as you age. Although you may not be able to prevent all joint injuries or arthritis, there are many things you can start doing today to improve your joint health!
9 Tips For Joint Health | Keep Your Joints Healthy As You Age
Fitness Icon Brett Wilkin Pulls Out of the Highly Anticipated 2023 Mr. Olympia Competition
IFBB Pro League Men’s Open bodybuilder Brett Wilkin was the first athlete to qualify for the 2023 Mr. Olympia contest when he won the 2022 Bigman Weekend Pro. On Oct. 9, 2023, Wilkin officially withdrew his name from the 2023 Mr. Olympia, slated for Nov. 2-5, 2023 in Orlando, FL. Wilkin announced that he had to bow out due to digestive issues in an video published to his Instagram page that can be seen below:
View this post on InstagramA post shared by Brett “The Butcher” Wilkin (@brett_wilkin)
[Related: Theo Leguerrier Wins 2023 Italian Olympus Pro Bodybuilding Show]
“To make a long story short, the body was not responding like it should be from the get-go,” said Wilkin. “I had some early red flags, and that just progressed into me not being able to keep food down, keep meals down.”
Wilkin revealed in the video that he hadn’t trained in two weeks as of the time the video was filmed. He estimated losing 15 to 17 pounds in that time due to digestive problems that he’d suffered for several weeks.
After initially keeping the issues to himself while trying to continue his prep, he consulted his wife, Ivana, and coach, Matt Jansen, to pull out of the Olympia. The IFBB Pro League and Olympia promoters were made aware of his decision before Wilkin’s public announcement.
View this post on InstagramA post shared by Brett “The Butcher” Wilkin (@brett_wilkin)
Several of Wilkin’s fellow competitors and renowned bodybuilding champions offered support following Wilkin’s decision, including seven-time Mr. Olympia Phil Heath, seven-time Olympia 212 champion Flex Lewis, and fellow Mr. Olympia competitor Nick Walker, whom Wilkin would’ve shared the stage with in November.
Wilkin’s victory in the 2022 Bigman Weekend Pro was his first victory in the IFBB Pro League, and he would’ve made his Mr. Olympia debut in Orlando had he competed. He also became a father to a daughter in 2023.
Wilkin is the third athlete to withdraw from bodybuilding’s world championship event. Two-time Sandow Trophy winner Mamdouh “Big Ramy” Elssbiay bowed out due to injuries in September 2023. Earlier that same month, 2023 Toronto Pro Supershow winner Iain Valliere withdrew from the contest and announced his retirement from competitive bodybuilding.
With Wilkin’s absence, the 2023 Mr. Olympia roster has 21 athletes scheduled to take the stage as of the time of this article’s publication. The qualifying season concluded on Oct. 9, 2023, which means the only way another competitor can join the lineup is if they are offered a special invite by either the IFBB Pro League or Olympia promoters.
Wilkin concluded his video by sharing his optimism about competing again to potentially qualify for the 2024 Olympia.
Featured image: @brett_wilkin on Instagram
The post Brett Wilkin Withdraws From the 2023 Mr. Olympia Contest appeared first on BarBend.

Discover Your Ideal Healthy Weight
If you’re wondering if there’s a definitive “healthy weight,” here’s the truth: There’s no perfect, absolute number you should aspire to achieve.
Your healthy weight depends on a number of different factors, and there’s no way we can all fit into the same mold.
With that said, everyone has a healthy weight — or better yet, a healthy weight range — they can strive for to limit their risk of weight-related health issues. Here’s how to estimate yours.
How to Find Your Healthy Weight
Age, height, gender, bone density, muscle-to-fat ratio, and overall health can all influence how much you weigh.
While there’s no cut-and-dried formula for calculating your healthy weight, there are four common metrics that medical professionals use:
- Body mass index (BMI)
- Waist-to-hip ratio
- Absolute waist circumference
- Body fat percentage
While these measurements won’t provide you with a magical number to aim for, they can be used as a guideline to determine a healthy weight range.
(Though, again, this isn’t an exact science — it’s also important to pay attention to other factors, like your energy levels, how your clothes fit, and how good you feel overall.)
What Is Body Mass Index (BMI)?

Body Mass Index (BMI) is an estimation of body fat based on a person’s weight and height.
Doctors may use your BMI as a screening tool to determine if you’re at risk for developing obesity-related health problems such as heart disease, high blood pressure, type 2 diabetes, and sleep apnea.
To calculate your BMI, divide your weight in pounds by your height in inches squared, and multiply the result by 703. (Or just use an online BMI calculator.)
The resulting number predicts where you sit on the weight spectrum:
- Underweight = BMI <18.5
- Normal weight = BMI 18.5–24.9
- Overweight = BMI 25–29.9
- Obesity = BMI of 30 or greater
You can get an idea of your recommended weight range for your height by consulting this BMI chart from the National Institutes of Health.
However, the Center for Disease Control and Prevention (CDC) notes that BMI is not a reliable method of measuring body composition, which is all-important, because it only measures “excess weight” and not excess fat.
Excess weight isn’t always a bad thing. Someone who carries a lot of muscle, for example, may have a high BMI even though their body fat percentage is quite low.
That’s why it’s important to take other metrics, like waist circumference and boy fat percentage, into consideration, too.
What Is Absolute Waist Circumference?

Absolute waist circumference is a fancy term for your waist measurement in inches. This measurement should be taken an inch or so above your belly button, says nutrition scientist Eric Feigl-Ding, PhD.
“People with apple-shaped bodies — or a large amount of fat around the midsection — have high risk levels for health problems, especially when their waist circumference is more than 35 inches (for women) or 40 inches (for men),” he explains.
How can this info help you determine your healthy weight? In general, if your waist circumference falls below that threshold, it’s likely that your weight is within a healthy range.
What Is Hip-to-Waist Ratio?
Like BMI and absolute waist circumference, measuring your hip-to-waist ratio is another quick way to estimate whether you’re at a healthy weight.
To calculate hip-to-waist ratio, simply divide your waist measurement (in inches) by your hip measurement (taken at the widest part of your buttocks—also in inches).
The resulting number can be used to predict your risk of developing health conditions such as heart disease, especially in women.
For men, waist-to-hip ratios of:
- Less than 0.9 = low risk
- 0.9 to 0.99 = moderate risk
- 1 or above = high risk
For women, ratios of:
- Less than 0.8 = low risk
- 0.8 to 0.89 = moderate risk
- 0.9 or above = high risk
Similar to BMI, lowering your waist-to-hip ratio into the “low risk” range means that your weight is likely in — or close to — a healthy range.
What Is Body Fat Percentage?

We get it: When you’re trying to lose weight, you want to see the number on the scale go down.
But water retention, muscle mass, and hormones can cause the scale to fluctuate — so focusing on weight isn’t the best way to gauge whether your healthy lifestyle is paying off.
By keeping track of your body fat percentage, however, you can get an idea of how much fat you’ve lost — even if the number on the scale isn’t budging.
And research suggests that body fat percentage — the percentage of your weight that comes from fat — may be a better predictor of cardiovascular risk factors than BMI.
So how do you measure body fat percentage? The most reliable methods include a DEXA (x-ray) scan, underwater weighing, or bioelectrical impedance.
Some of these methods can be done at home — you can shop online for a body fat scale that uses bioelectrical impedance — but for the most accurate estimate of your body fat percentage, you’ll want to let a professional do the measuring (ask your doctor for a recommendation).
Finding Your Healthy Weight Without Crunching Numbers
When it comes to determining and achieving your goal weight, some of the most important variables can’t be calculated or measured.
Take stock of how you feel overall: Do you have enough energy to be as active as you’d like throughout the day? Does your annual physical show you’re in good health? Are you eating and sleeping well?
Pay attention to that instead of solely focusing on what you see on the scale.
“It’s always about a better weight, not a perfect weight,” says Marty Davey, M.S., R.D. “Aiming for better weight is much more useful, because it’s achievable. A 280-pound person who loses even 10 percent of their weight is still obese, but has reduced health risks. That’s a win.”
The post What Is a Healthy Weight for Me? appeared first on BODi.